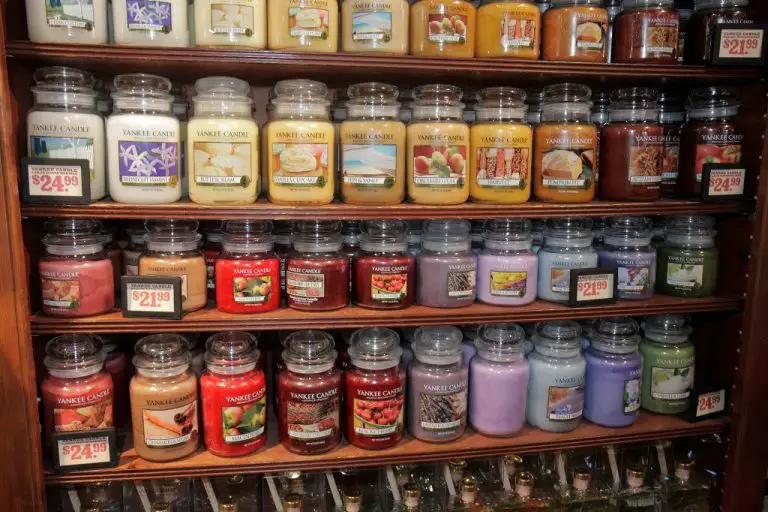
How Do You Trim The Wick Of A Candle?
Candle wick trimming is an important part of properly maintaining candles and ensuring optimal performance. Trimming the wick to the proper height helps regulate the flame and prevents issues like tunneling, smoking, and sooting. There are a few different types of wicks that require trimming, including braided, cored, and beeswax wicks. Proper wick maintenance helps candles burn evenly, last longer, and perform as intended.
When to Trim
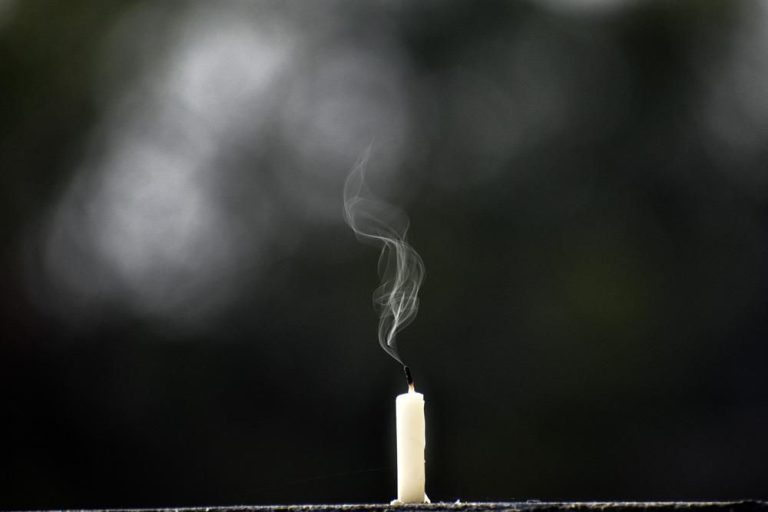
It is important to trim your candle’s wick periodically as you burn it. The wick on a candle brings melted wax up into the flame by capillary action; if the wick gets too long it can create smoke and allow the flame to get too large. Signs that trimming is needed include:
- A mushroom-like bulb forming at the tip of the wick as soot builds up. This prevents the wick from burning properly.
- Excess smoke coming from the wick.
- An overly large flame that can lead to dripping, tunneling, or burning too quickly.
- Soot building up on the candle jar or surroundings.
- An uneven flame that flickers and dances instead of burning brightly.
Trimming helps maintain a smaller, steady flame for proper wax pooling and burning. As a general rule, trim the wick to 1⁄4 inch every 2-3 hours of burn time. However, always watch for the visual signs above and trim more frequently if needed.
Trimming Tools
There are a few common household tools that work well for trimming candle wicks:
- Scissors – Small scissors like craft scissors or nail scissors are ideal for trimming wicks. The sharp tip allows you to snip the wick cleanly at the desired height.
- Candle wick trimmer – Specialty tools designed just for candle wick trimming make the process easy. They look like small nail clippers with a curved blade to surround the wick.
- Nail clippers – Standard nail clippers can also trim a candle wick if no other tools are available. The curved shape allows you to trim the wick evenly.
The most important thing is using a sharp blade for a clean cut. Dull scissors may fray the wick instead of trimming it.
Trimming New Candles
Trimming the wicks of new candles before lighting them for the first time is an important step to ensure proper burning. Long wicks on new candles can create overly large flames, tunneling, and sooting.
The best practice is to trim new wicks to 1⁄4 inch before the initial lighting. This allows the wick to burn slowly and evenly for the first burn. The flame will be a proper size – around 1⁄2 inch high – instead of dangerously large and erratic.
Trimming to 1⁄4 inch prevents tunneling, which happens when a new wick is too long. The large flame will burn down the wax around the wick, leaving a hole or tunnel in the top. It also prevents excessive smoking from an oversized flame.
So for safety and optimal performance, always trim a new candle’s wick to 1⁄4 inch length before lighting for the first time. This prep work allows the candle to burn slowly and cleanly.
Trimming Burned Candles
Candles that have already been burned will often require wick trimming as well. As a candle burns down, the wick can become too long and begin producing black smoke, irregular flames, or a “cauldron effect” where the melted wax pools around the wick.
These issues indicate it’s time to trim the wick of a burned candle. Trimming helps regulate proper melting and prevent excess smoking and sooting.
For candles that have been burned before, trim the wick down to 1⁄4 inch or less. This optimal length helps ensure clean, even burning without generating excess smoke or dripping down the sides.
It’s best to trim wicks of burned candles just before lighting to prevent any potential issues. Quickly trimming also allows you to enjoy the candle’s scent and flame right away.
Trimming Length
The ideal length to trim the wick to is about 1⁄4 inch. Trimming to this length helps the candle burn properly and prevents issues like tunneling.
Long wicks that are untrimmed tend to bend over into the melted wax while the candle is burning. This causes the flame to become smothered and smoke. It can also create soot on the glass around the candle.
Trimming too short can lead to a weak flame and tunneling. The flame needs a little length of wick to wrap around to stay lit. Too short of a trim prevents the fuel from being drawn up the wick efficiently.
Get in the habit of always trimming to 1⁄4 inch before lighting to maintain the best burn and fragrance throw from your candle.
Trimming Method
When trimming the wick, it’s important to cut straight across to leave a flat, even top. Using scissors or nail clippers, make one clean snip perpendicular to the length of the wick. Avoid leaving any loose strands or tattered edges. Jagged ends may curl as the candle burns, causing the flame to flicker unevenly. A straight, flat cut helps the wick burn slowly and evenly down the center.
To trim, identify how much wick needs to be removed and aim to cut slightly above that point. Leaving some extra length will ensure you make a clean cut across the tip. Trimming too close risks leaving strands. Test the wick after each snip to ensure it has an even flat top. Adjust with additional small trims if needed.
Be careful not to trim the wick too short, as this can cause issues like tunnelling and reduced melt pool size. Follow the candle maker’s guidelines for proper wick height based on the diameter of the candle and wax type. A good rule of thumb is to leave about 1/4 inch of wick until the candle becomes substantially burned down.
Wick Maintenance
In addition to trimming, occasional wick maintenance is needed for optimal candle performance. As the candle burns, the wick can become off-center or curled. Gently straighten and center the wick as needed with tweezers or needle-nose pliers. This helps ensure even burning and prevents tunneling.
Wicks may also bend over time while the candle is not being burned. Check on stored candles periodically and re-straighten the wick if needed. Centering the wick every time you trim will help train it to remain straight while burning. Proper wick maintenance extends the life of your candle and provides the best burn experience.
Troubleshooting
If you run into issues while trimming your candle wicks, there are some troubleshooting tips that can help:
Tunneling
Tunneling is when the edges of the candle melt faster than the middle, creating a tunnel shape. This is often caused by the wick being too short. To fix tunneling, trim the wick to be slightly longer to encourage a fuller melt pool. You can also try moving the candle to a draft-free spot or waiting a bit longer between burns.
Soot
Excess black smoke and soot is a sign your wick is too long. Trim the wick shorter and make sure to trim before each burn. Using a pair of candle snuffers to fully extinguish the flame can also help prevent soot.
Mushrooming
When wick tips get a mushroom-like shape, use nail clippers or scissors to trim off the charred portions. This will help the wick burn cleanly. You can avoid mushrooming by always trimming to 1⁄4” before lighting.
Uneven Burning
If the candle burns unevenly, creating ridges, it’s likely due to drafts. Move the candle away from vents, windows, doors, and fans. Trim the wick to 1⁄4” to encourage an even melt pool.
Conclusion
Properly trimming your candle wicks is an important part of candle care that affects performance and safety. As we’ve covered, wicks should be trimmed before lighting a new candle to remove any curling and create an even burn. Wicks on burning candles should be trimmed to 1⁄4 inch each time wax pools to edges, or every few hours of burn time, to prevent excess carbon buildup and uneven melting.
Trimming wicks regularly with proper wick trimmers helps candles burn slower and more evenly down to the bottom. It also prevents smoking, tunneling, and mushrooming of wicks. Always trim wicks when wax is liquid for clean cuts. Allow trimmed wicks to harden briefly before relighting.
By following these simple wick trimming guidelines, you can maximize burn time, fragrance throw, and flame consistency. Your candles will perform optimally with flames that are strong, vibrant, and smoke-free. Proper wick maintenance is easy and ensures safe, clean burning and the best results from your candles.