How Do You Stop A Candle From Tunneling?
What is Candle Tunneling?
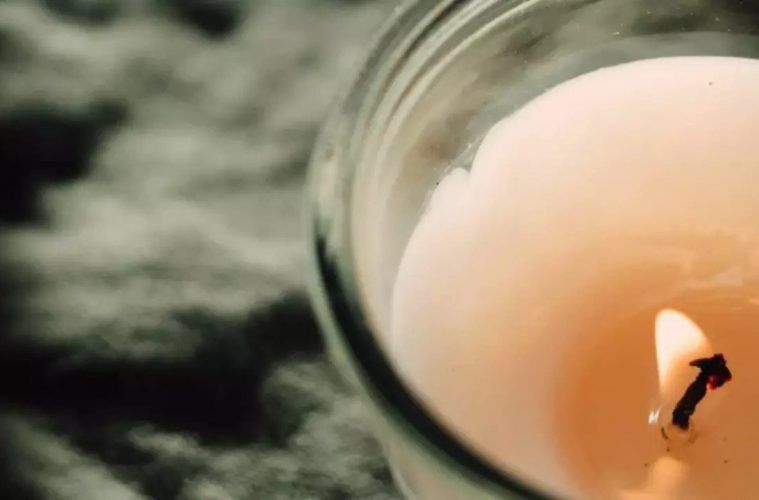
Candle tunneling is when a candle forms a hole or channel down the center as it burns, leaving the remaining wax around the edges unmelted. This happens because the flame only melts the wax directly in its path instead of liquefying all the wax evenly across the top of the candle as it burns (https://tlccandleco.com/blogs/tlc-talks/what-is-candle-tunneling-and-how-do-you-prevent-it).
Tunneling typically occurs due to one or more of the following reasons:
- The wick is too small for the diameter of the candle, so the flame doesn’t generate enough heat to melt the outer wax.
- There is insufficient airflow around the candle, preventing the melted wax from spreading outwards.
- The candle is being burned for too long on the initial lighting, which creates a deep melt pool in the center.
You’ll know tunneling is happening if you see a deep, narrow hole forming in the candle as it burns, leaving much of the outer wax untouched. The flame will be sunken into this hole rather than sitting atop a pool of melted wax across the surface. Tunneling can cause the candle to burn unevenly, produce excess smoke, and leave wasted wax around the sides when finished.
Why Tunneling Occurs
Candle tunneling happens for a few key reasons related to the wick, diameter, and burning conditions:
The wick is a major factor. If the wick is too small or becomes shortened as the candle burns, it won’t be able to properly draw up the wax to burn. This leads to the tunnel forming around the wick as it fails to melt the whole top surface of wax (source).
The diameter of the candle also plays a role. Tunneling tends to happen more frequently in containers with wide diameters, as the heat from the wick often can’t reach the outer edges. Conversely, containers that are too narrow can lead to excess melting and an overly hot center (source).
Finally, burning conditions like drafts, humidity, temperature, and burn time affect tunneling. A cold environment or short burn times don’t allow enough melt pool time for the wax to liquefy evenly. Hot, stagnant air also hinders even melting.
Preventing Tunneling
There are a few key things you can do to help prevent tunneling in the first place:
Use the proper wick length. Having a wick that is too short for the candle diameter is one of the main causes of tunneling. Make sure to use a wick size recommended for the size of your candle container. Larger candle diameters need longer wicks to reach the melted wax at the edges (Source: https://www.harlemcandlecompany.com/blogs/journal/candle-care-101-how-to-fix-prevent-candle-tunneling).
Maintain the wick as the candle burns. Trim the wick to 1⁄4 inch before each lighting to keep it at the optimal height. This allows for full melt pool coverage as the candle burns lower. Wicks that are too long create excess smoke and encouragetunneling.
Use the properly sized container. Just as wick length matters, it’s also important to use a candle container that matches the candle diameter. Too wide of a container compared to the candle results in wax cooling and hardening at the edges before the heat reaches it. This makes tunneling more likely to occur (Source: https://www.harlemcandlecompany.com/blogs/journal/candle-care-101-how-to-fix-prevent-candle-tunneling).
Fixing Existing Tunnels
If your candle already has tunnels, there are a few methods you can try to fix them and help the candle burn more evenly going forward:
Trim the wick – Use scissors or nail clippers to trim the wick to 1⁄4 inch before lighting. This will help prevent future tunneling issues.
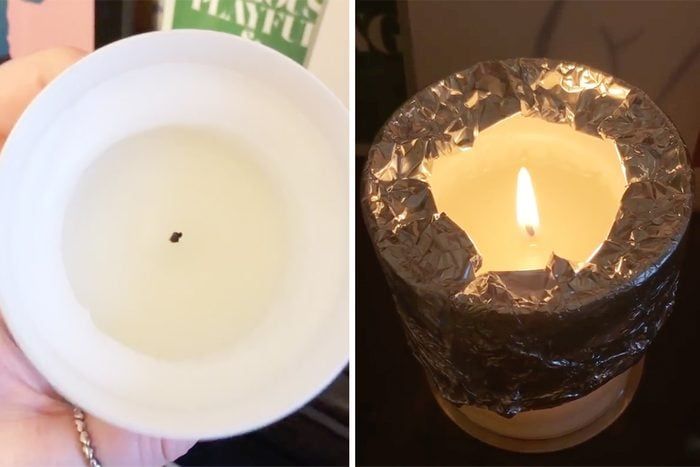
Melt and re-level the wax – One effective tunneling fix is to use a hairdryer to gently melt the top layer of wax and smooth it out to fill in holes or gaps (Harlem Candle Company). Heat the surface until just melted enough to move wax around and make it level again. Let cool completely before relighting.
Use a candle warmer – These gentle, flameless warmers can melt down built up walls around tunnels so wax can pool evenly again. Place on a candle warmer for a few hours at a time, allowing wax to redistribute and fill in divots.
Wick Tips
Selecting the proper wick material and size for your candle wax is crucial to prevent tunneling. The three main wick components are the core, yarn wrap, and priming. Common core materials include cotton, paper, zinc, and wood. Cotton provides excellent capillary action to draw the wax up while paper and zinc offer rigidity. The yarn wrap impacts fueling the flame and curling, with options like cotton or rayon. Priming helps the wick light quickly. Refer to a sizing chart to match your wax and container to the right wick diameter. Eco wicks work well in soy wax.
Trimming the wick to 1⁄4” before each burn helps center flames for even wax pooling and burning. Use scissors or an electric trimmer and cut just above the melted wax line, removing any dark tips. Maintain 1⁄4” – 1⁄2” between burns. Wicks that are too long create overly large flames and more dripping.
Centering the wick makes for proper melting across the top. Use wick stickers, hot glue on the bottom, or wooden wick bars to hold wicks upright in the center as the wax hardens.
Choosing Containers
The container you choose for your candle can greatly impact how well it burns and whether tunneling occurs. According to candlemaking supplier CandleMakingSupplies.net, the width of the container is one of the most important factors. Wider containers like jars give the wax more surface area to melt and limit issues with tunneling. They recommend a minimum width of 3 inches for containers to allow proper wax pool formation.
The material properties of the container also matter. Glass and metal conduct heat better than materials like wood or plastic. This helps disperse heat more evenly to melt the wax. Glass jars are a very popular choice as they provide excellent heat conductivity. Metal tins work well too and offer a more rustic look. Just avoid materials like plastic that insulate heat and can aggravate tunneling.
Ideal Burning Conditions
To help prevent tunneling and ensure even burning, you’ll want to pay attention to the environment and conditions around your candle. Here are some tips for creating ideal burning conditions:
Avoid drafts. Air currents from fans, open windows, or air vents can cause the candle flame to flicker inconsistently. This uneven burning can lead to tunneling. Place your candle away from any drafts in a still area of the room for best results (Malibuapothecary.com).
Moderate humidity is best. Very dry air can cause candles to burn too quickly, while very high humidity can cause wet wax issues. The ideal humidity range is between 40-60%. Consider using a humidifier or dehumidifier if needed to keep the room in this comfort zone (Jenkinsrestorations.com).
Aim for room temperature. Candles burn best at normal room temperature between 65-80°F. If it’s too cold, the wax won’t melt properly. If it’s very warm, the wax melts too fast. So keep the thermostat set within this range (Candles.org).
When to Discard
There comes a point when a tunneled candle should be thrown out instead of attempting to fix it. This depends on two key factors:
The extent of the tunnel – Smaller tunnels may be salvageable, but if the tunnel extends deep into the candle, it likely cannot be fixed. As a general rule, if the tunnel depth exceeds 1 inch, it’s time to discard the candle, according to The Candle Lab [1].
Wax remaining – Consider how much wax is left outside the tunnel. If only a thin outer ring remains, the candle won’t burn properly even if the tunnel is fixed. Aim to have at least 1 inch of wax surrounding the full diameter of the container. If not, it’s best to start fresh with a new candle.
Additionally, if soot buildup occurs inside the tunnel or the wick can’t be centered properly, the candle is too far gone and should be discarded. Trust your judgment – if fixing seems futile, don’t waste time trying to salvage an overly-tunneled candle.
Safety Tips
When burning candles, it’s crucial to keep safety in mind. Here are some key tips for safely enjoying candles in your home:
Supervision
Never leave a burning candle unattended. It’s important to keep a close eye on candles to prevent potential fires or accidents. According to the National Fire Protection Association (NFPA), you should extinguish candles before leaving a room or going to sleep.
Placement
Be strategic about where you place candles. Keep them at least 12 inches away from anything flammable like curtains, furniture, bedding or decorations. Avoid placing candles near drafts that can cause rapid, uneven burning and dripping wax. An open window or AC vent can make a candle flame flicker and smoke.
Fire Safety
Take proper fire safety precautions when burning candles. Never light candles near trees, wreaths or other festive holiday decor. Keep a fire extinguisher on hand in case of emergency. According to the National Candle Association, you should also never leave a child or pet alone with a burning candle.
Summary
Key takeaways:
- Candle tunneling occurs when the wax melts unevenly, creating a hole or tunnel in the wax.
- Tunneling can be caused by issues with the wax, wick, or burning conditions.
- Choosing the right wax hardness, trimming wicks, using appropriate containers, and monitoring burn times can prevent tunnels.
- Existing tunnels can sometimes be fixed by re-wicking, repouring wax, or cotton ball tricks.
- But severe tunnels may mean the candle should be discarded for safety reasons.
To recap, tunneling happens when part of the candle’s wax melts faster than the rest. By identifying and addressing the cause – whether it’s the wax, wick, or environment – you can stop tunneling and enjoy flawless candle burns.