How Do You Start Off Making Candles?
Candle making has become an increasingly popular hobby and even a potential small business opportunity for many people. It offers a fun, creative way to produce beautiful, homemade candles using basic supplies. The process involves melting wax, preparing wicks, adding scents and colors, and pouring the wax into containers or molds. With some practice, candle makers can produce stunning candles to use themselves or give as gifts. Some even turn their hobby into a side business selling at craft fairs or online. The candle making process allows for plenty of customization in terms of colors, scents, and designs.
According to this market research report, the rising popularity of candlemaking as a hobby has become a key driver propelling the growth of the soy wax market. The relaxing, therapeutic nature of making candles by hand attracts many hobbyists.
Supplies Needed
To get started making candles, you’ll need to gather some basic supplies. The main items you’ll need include:
Wax
Candle wax is the main ingredient in candle making. There are several types to choose from including paraffin, soy, beeswax, and palm wax. Paraffin wax is commonly used for candle making as it’s affordable, easy to work with, and makes candles with excellent burn properties. According to Candlewic, paraffin is a great choice for beginners.1
Wicks
Wicks are the component that brings the candle to life. When lit, the wick draws wax up through capillary action and provides a small flame. Wicks come in different materials like cotton, wood, and paper. Cotton wicks are versatile and work well with most waxes. Make sure to get wicks appropriate for the diameter of your candles.1
Fragrance Oils
Fragrance oils are mixed into candles to provide pleasing scents. There are many fragrance options like fruits, flowers, baked goods, and seasonal scents. Use 0.5-1 oz of fragrance oil per pound of wax. Be sure to choose oil-soluble fragrances made for candle making.2
Dye
Candle dye is used to add color to candle wax. Liquid candle dye provides vibrant colors. Start with just a few drops, mix, and add more as desired. Too much dye can clog wicks. Use less dye for lighter colors.3
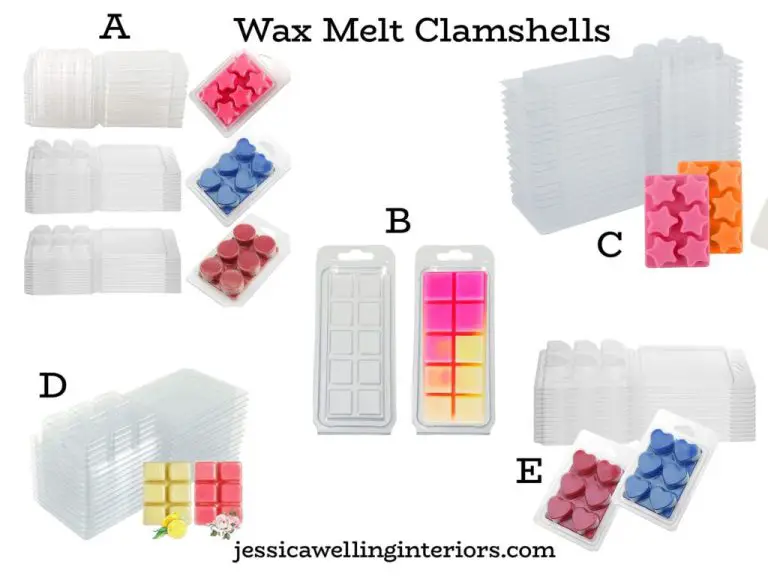
Containers/Molds
You’ll need a vessel to pour melted wax into to make a candle. Glass and metal containers are common choices. Make sure containers are heat-safe. For molded candles, plastic molds are affordable and reusable.3
Choosing Wax
There are several types of wax commonly used in candle making. Popular options include:
Paraffin wax – This is a petroleum-based wax made from refining crude oil. It is inexpensive and makes candles that burn cleanly with a high melting point. However some find the smoke it produces unpleasant. (Source: https://www.marthastewart.com/8061950/candle-wax-type-guide)
Soy wax – Made from hydrogenated soybean oil, this natural wax has grown in popularity for homemade candles. It’s easy to work with and makes smooth candles, though the scent throw may not be as strong. (Source: https://shoparchipelago.com/blogs/blog/types-of-candle-wax)
Beeswax – This natural wax is produced by honey bees and has a lovely honey scent. It makes durable, long-burning candles though can be more expensive. Beeswax is preferable for some as it’s renewable and biodegradable. (Source: https://shoparchipelago.com/blogs/blog/types-of-candle-wax)
Consider factors like performance, scent throw, environmental impact, price and availability when selecting a candle wax for beginners. Test different waxes to see which you prefer working with.
Preparing Wicks
Properly preparing wicks is an important step in candle making. The wick is the heart of the candle, so you want to make sure you select the right thickness and treat it properly before adding wax.
Choose the right wick thickness for the type of wax and diameter of your container or pillar candle. Larger candles need thicker wicks that won’t drown in all that wax. Follow manufacturer guidelines on wick sizing. Test different wick sizes to find the best burn for your wax type.
Once you’ve chosen the right thickness, prepare the wick by centering it and trimming it to size. Pillar candles need wicks about 1/4 inch longer than the candle height. Container candles should have wicks trimmed to 1/2 inch above the bottom. This prevents wicks from getting lost in the wax pool.
Wick tabs are important for centering the wick while the wax sets up. You can buy pre-tabbed wicks or make your own tabs by cutting small pieces of wood or using wick stickum. Attach the tab 1-2 inches from the base of the wick to keep it anchored.
Proper wick sizing and tabbing improves candle burn, helps prevent tunneling, and provides an all-around better candle experience. Take the time to test and prepare wicks, and you’ll have high-quality, long-lasting candles. For more tips, check out this helpful candle making video on wick preparation.

Adding Fragrance
Adding the right amount of fragrance oil is important for creating quality candles. Generally, fragrance oil makes up between 5-10% of the total wax content (cite: https://thewaxchandler.com/candle-wax/). The percentage depends on the wax type – for soy wax, use 6-8% and for paraffin wax, use 8-10% (cite: https://oliicraft.co/blogs/news/how-much-wax-and-fragrance-oil-do-i-need). Exceeding the recommended amount can make the candle scent too strong or lead to issues like sooting or poor burn quality. It’s best to weigh your wax so you can calculate the precise fragrance oil percentage. Start on the lower end around 5%, test how it smells, and gradually increase in 1% increments until you reach the ideal fragrance strength.
Coloring Candles
One of the fun parts about making candles is choosing the colors. There are two main types of candle dyes – liquid dyes and solid block dyes.
Liquid dyes are convenient to use. You simply add drops of the concentrated dye into the melted wax until you achieve the desired color intensity. Liquid dyes allow you to easily mix custom colors by blending different dye colors together. However, liquid dyes can bleed or morph when exposed to heat over time.
Block dyes last longer than liquid dyes without bleeding or discoloration. But they can be more difficult to use. Block dyes come in squares that you grate into the wax. It takes some trial and error to figure out the right amount to get the color you want. Block dyes also make it harder to mix custom colors. But for candles where color stability is important, block dyes are the better choice.
Consider how you intend to use the candle and whether color consistency matters when deciding between liquid and block dyes. Both types can produce beautiful candles in any shade imaginable.
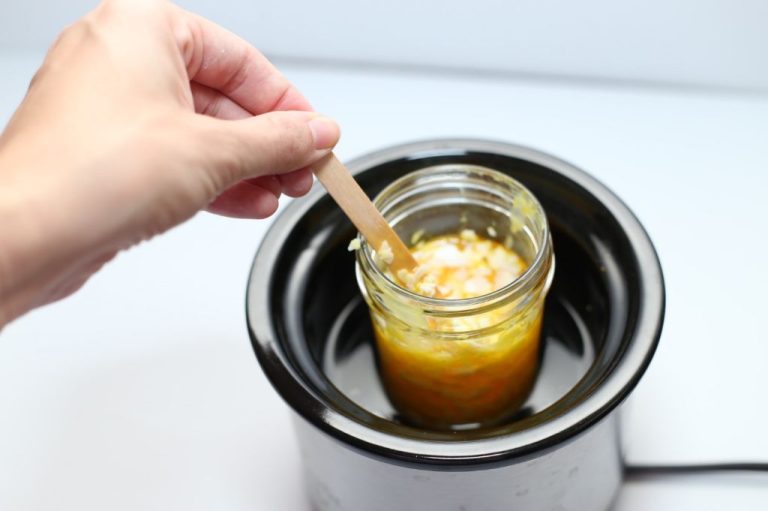
Melting Wax
To make candles, you first need to melt your candle wax. There are a few common methods for melting wax:
Double Boiler
A double boiler gently heats the wax to keep it from getting too hot. Fill a pot half way with water and place it over medium heat. Rest a second smaller pot or bowl inside the larger pot, making sure it does not touch the water. Add wax chunks to the smaller pot/bowl. Stir the wax occasionally as it melts. Remove from heat when fully melted. Be careful not to let any water mix with the melted wax.1
Microwave
You can melt wax in the microwave in short bursts, stirring between sessions. Place wax chunks in a microwave-safe container. Microwave on high for 30 seconds, then stir. Continue microwaving in 30 second bursts, stirring in between, until wax is fully melted. Be very careful as the wax can overheat quickly in the microwave.2
Pouring Candles
Proper pouring temperature is crucial for successfully making candles. The wax should be heated to between 180-185°F to ensure proper pouring viscosity. If the wax is too cool, it will setup too quickly and prevent a clean pour. If it’s too hot, the wax can lose its fragrance and discoloration may occur.1
After heating the wax to the target temperature range, carefully pour it into the container or mold, moving the pouring vessel around to evenly coat the sides. Pour to about 1/4 inch below the top of the container to leave room for the melt pool. Allow the candle to cool completely before trimming the wick and using. Cooling may take up to 24 hours. As the wax cools, it will shrink slightly and pull away from the sides of the container. This is normal.2
Take care when pouring to avoid spills and splashes. Wear protective gear like gloves and eye protection. Work over a surface that can withstand spills. If wax does spill, let it completely harden before attempting to peel or scrape it away. With proper preparation and care, pouring candles can be a satisfying process.
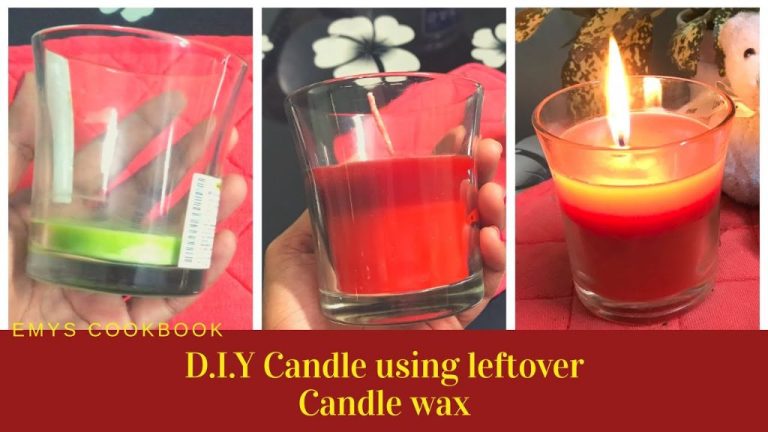
Making Container Candles
Making candles in containers like jars, cups, or tins is one of the easiest candle making methods for beginners. According to the National Candle Association, container candles make up over 80% of candles sold in the US[1]. The process involves preparing the containers, choosing appropriate wicks, melting wax, adding fragrance and dye, and pouring the wax into the containers.
Before pouring, make sure containers are clean and free of residue. Glass containers work best as they withstand heat well, but you can use tin, aluminum, or heat-resistant plastic. Adding a thin coating of vegetable oil or mold release to the inside first can help remove finished candles easily[2].
When pouring melted wax into containers, pour to 1/4″ below the top to allow room for the wick and prevent spillover. Let candles cool completely before moving them. Cooling takes at least 12 hours. Trim wicks to 1/4″ before lighting finished candles.
Making Pillar Candles
Pillar candles are made by pouring wax into a pillar mold. Proper mold preparation is important for clean candle removal. Start by ensuring the mold is clean and free of residue by washing with soap and water. Allow the mold to completely dry. Then, apply a mold release spray or silicone spray inside the mold so the hardened candle can detach easily. Let the release agent dry completely before pouring wax.
After pouring the wax and allowing it to partially set up, insert the wick by sticking it straight down into the center, leaving 1-2 inches sticking out of the top. This ensures the wick stays centered when pouring the remaining wax. Allow the candle to cool completely in the mold before attempting to remove it. Cooling takes at least 12 hours. Gently tug the wick while twisting the mold to loosen the sides of the candle and aid removal. Flip the mold over and the candle should slide right out. Trim the wick to 1⁄4 inch before burning.
Proper mold preparation and cooling produces clean, smooth pillar candles. Always use pillar molds designed specifically for candle making. Avoid drafts and rapid cooling when making pillars to prevent cracks and shrinkage. With the right materials and technique, beautiful handmade pillar candles can be created at home.