How Do You Melt A Candle Over The Stove?
Melting candles over a stove can allow you to reuse leftover candle wax and make candles last longer. Once melted, the wax can be poured into containers to make new candles or wax melts. This allows you to stretch your candle budget, repurpose old candles, and customize scents by combining wax from different candles. Melting over the stove also avoids having to buy additional equipment like a dedicated wax warmer. However, proper precautions need to be taken when melting wax on the stove to avoid injuries or damage.
Safety Precautions
When melting candle wax, it is important to take some basic safety precautions:
Work in a well-ventilated area, as candle wax vapors can be irritating. Open a window or turn on a fan to allow fresh air circulation. Consider working outside if possible.
Keep children and pets away from the melting wax, as it can drip, splash, or spill and cause burns. Supervise closely or have them leave the room.
Never leave melting wax unattended, even for a minute. The wax can overheat, ignite, or spill over the sides of the pot. Stay nearby and watch the wax carefully.
Wear gloves and long sleeves in case hot wax splatters. Candle wax can reach temperatures over 185°F (85°C) which can cause severe burns (Abaodam).

Place warning stickers on any container with hot wax, especially if left unattended, to alert others of the hazard (SEWACC).
Choose a Pot
When melting candle wax on the stove, it’s best to use a small metal pot or saucepan. Look for one that is heavy-duty and made from stainless steel or aluminum. According to experts, a pot with a nonstick coating is ideal because melted wax can be tricky to clean off bare metal later.
Opt for a pot that holds 1-2 quarts of liquid. This provides enough room to melt several candles at once, while still being easy to pour and handle. Avoid giant stockpots, as they will be unwieldy and spread the wax too thin. A smaller pot allows you to fully submerge candle chunks in the melted wax pool.
Make sure the pot has a handle so you can grip it safely. Handles that stay cool are best. Select a pot with a pouring spout if available, to neatly guide the hot wax into molds or containers. Before melting any candle wax, inspect the pot to ensure it is completely clean and free of any residue.
Prepare the Stove
When melting candle wax on the stove, it’s important to use proper temperature control to avoid overheating the wax. Experts recommend using a back burner on your stove set to a low-medium heat [1]. This will allow you to gradually warm up the wax without scorching it.
If possible, use an electric stove rather than a gas stove. Electric stoves tend to provide more even, consistent heating across the surface which helps prevent hot spots [2]. Gas stoves can sometimes concentrate the heat directly under the flame, risking localized overheating.
Monitor the wax closely and adjust the temperature as needed. Ideal wax melting temperature is between 120-150°F. Going above 180°F risks discoloration and burning of the wax.
Chop the Candle Wax
Before melting candle wax, it’s important to chop or break it up into smaller pieces. This makes the wax melt faster and more evenly. According to the Harlem Candle Company, breaking wax into 1-inch chunks can help it melt up to 50% faster than leaving big blocks of wax intact (source).
Use a knife or another tool to break up large candle wax blocks. Try to get pieces around 1 inch or smaller if possible. The more you can break it up, the faster the wax will melt. This prep step prevents the outside of a big wax block from melting while leaving the inside still solid. Getting uniform small pieces helps the entire mass of wax melt at the same pace.
Be very careful when chopping candle wax to avoid cuts and injuries. Work slowly and deliberately. Consider wearing gloves for protection. Breaking wax into smaller chunks before melting makes the entire process smoother and safer.
Melt the Wax
Once the pot is warmed up on the stove, you can start adding pieces of the chopped candle wax. Add the wax slowly, a few pieces at a time, allowing it to start melting before adding more. Stir the melting wax frequently using a long handled spoon or spatula. Stirring prevents the wax from scorching on the bottom of the pot.
Keep adding more chopped wax pieces, letting them melt and stirring often. The wax may lump up at first but continued stirring will help it melt evenly. Melt until all of the solid wax pieces have fully liquefied into liquid wax. Avoid letting the wax reach a rolling boil, just melt it slowly on low-medium heat while stirring.
Remove and Cool
Once the candle wax has fully melted, remove the pot from the heat source and place it on a heat-resistant surface. Be extremely careful, as the melted wax will be very hot. Wear gloves or potholders when handling the pot.
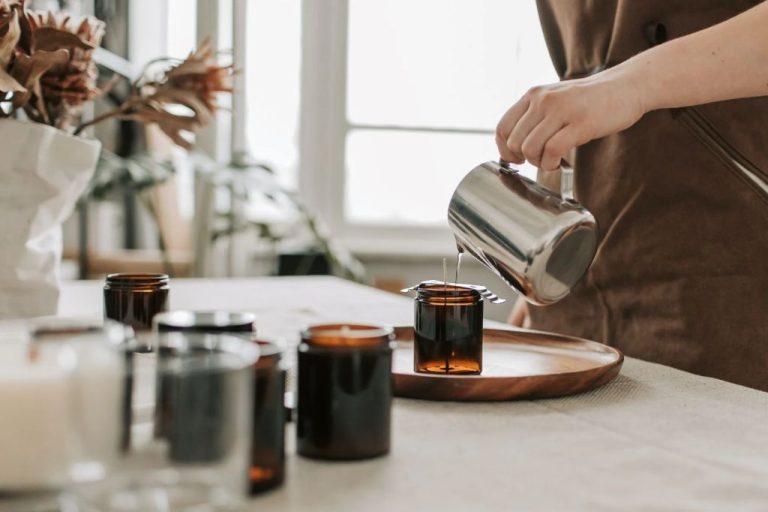
Allow the wax to cool slightly before attempting to pour or handle it further. The ideal temperature for pouring melted candle wax is between 135-145°F (57-63°C). If pouring into containers, preheat them to 100–120°F (38–49°C) to improve wax adhesion. According to Lone Star Candle Supply, cooling to about 125–135°F provides the best results.
As the wax cools, a thin outer layer will begin to harden and form what’s called a “skin.” To help the wax cool evenly and avoid skin formation, stir the wax occasionally with a utensil once you’ve removed it from the heat. Do not allow the wax to cool too long or it may become too difficult to pour.
Strain and Reuse
Once the wax has fully melted and liquefied, you’ll want to carefully strain it through a fine mesh strainer or cheesecloth to remove any debris or old wicks. Make sure the wax has cooled slightly before straining so it’s not too hot. Hold the strainer over a heat proof bowl or container and slowly pour the melted wax through. Discard any debris left behind in the strainer.
The clean, strained wax can now be reused for candle making or other craft projects. If remaking candles, you’ll need to purchase new wicks. Store the reused wax in an airtight container until needed. It can keep for many months. For more tips on reusing old candle wax, see this Quora discussion: How to reuse the old wick if you are reusing melted candle wax for another project
Clean Up
Once the candle wax has been strained and reused, it’s time to clean up. Be sure to allow the pot to cool completely before washing. Pouring hot wax down the drain can lead to clogs and plumbing issues. Run the pot under cool water to solidify any remaining wax before scrubbing clean with soap and water. Use caution when handling the pot, as the metal may still be hot for some time after heating.
If any wax dripped or spilled during melting, let it harden completely before attempting to remove it. Then gently scrape away hardened wax with a plastic scraper or old credit card. Be patient and take your time to avoid damaging the counter or stovetop surface. Any wax residue can be removed with a paper towel and a small amount of rubbing alcohol, but avoid using this method on natural stone surfaces. With some care and elbow grease, you can remove melted candle wax without harming your kitchen.
Safety Reminders
When melting candles, it’s crucial to keep safety top of mind. Here are some key tips to remember: [1]
- Ensure proper ventilation by opening windows or turning on fans. Melting wax can produce fumes.
- Always supervise melting wax to prevent spills, fires, or other accidents.
- Use oven mitts when handling hot wax or dishes to avoid burns.
- Allow melted wax to fully cool and harden before handling. Hot wax can cause severe burns.
- Keep children and pets away from melting wax to prevent accidents.
- Never leave melting wax unattended.
- Store melted wax safely out of reach of kids and pets once hardened.
Taking proper precautions allows you to melt candles safely and avoid potential injuries or property damage. Stay alert and be careful when working with hot wax.


