How Do You Make Wax Color?
Wax colors, also known as crayons, are a popular art medium used by both children and adults for coloring, drawing, and wax resist techniques. Wax colors are produced by mixing pigments with melted wax to create a solid coloring stick.
The process of making wax colors involves selecting and preparing the wax base, choosing and adding colorants, filling molds, and testing the final products. Wax colors come in many forms, from standard crayons to specialty coloring tools like colored pencils and pastels.
The most common types of wax colors are made from paraffin wax, beeswax, or a blend of waxes. The wax helps bind the colorants and allows the sticks to remain solid at room temperature for easy handling and coloring.

Ingredients
The main ingredients used in making colored wax are different types of waxes and colorants. The most common waxes used are:
- Beeswax – Made by honey bees, natural beeswax has a sweet honey scent and creates a brighter flame. However, it is more expensive and has a low melting point which can lead to candles bending or sagging in warmer environments (The Benefits of Beeswax Candles | Why You Should Switch).
- Paraffin wax – A petroleum byproduct, paraffin wax is highly refined and odorless. It is inexpensive and makes hard candles with high melt points. But paraffin produces more soot when burned (Why You Should Make the Switch to 100% Soy Wax Candles).
- Soy wax – Made from soybeans, soy wax is natural, renewable, and biodegradable. It has no petroleum and burns cleaner than paraffin. However, soy wax is softer and needs blending with other waxes (Why You Should Make the Switch to 100% Soy Wax Candles).
- Other waxes – Coconut, palm, and apricot wax are also sometimes used, but less common than beeswax, paraffin, and soy wax.
The choice of which wax or wax blend to use depends on the desired qualities like scent, hardness, color vibrancy, and melting point.
Colorants
There are several methods for adding color to candle wax. Three of the most common types of colorants are liquid dyes, color blocks, and pigments.
Liquid dyes are a popular choice for coloring candle wax. They come in a wide variety of colors and only require a small amount to achieve vibrant colors in the wax. According to cxndle.com, liquid dyes are soluble in wax so they mix in seamlessly to color the wax throughout. When working with liquid dyes it’s recommended to add just a little at a time until the desired shade is reached, as only a couple of drops can create a bold color [1].
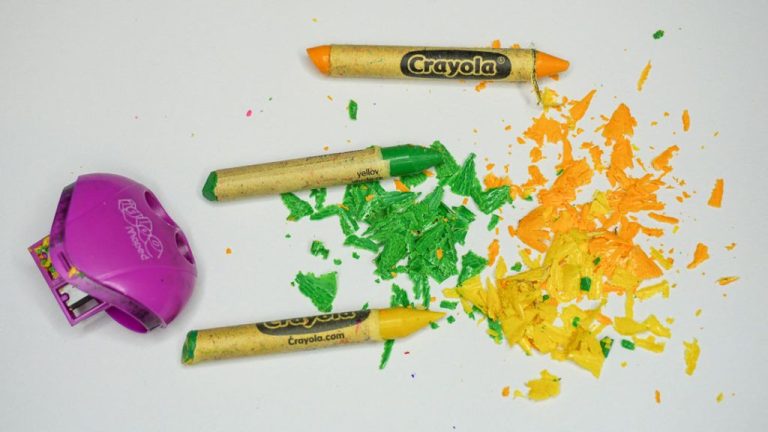
Another option is color blocks, which are concentrated blocks of dye. To use them, you shave pieces of the block into the melted wax until the preferred color develops. Color blocks allow for subtle shading and gradient effects. However, they can be messier to work with than liquid dyes [2].
Pigments are also available for coloring candles. They are powdered colorants that are melted directly into the wax. Pigments come in a wide selection of bold shades. But extra care must be taken when mixing to prevent clumping. Straining the colored wax after mixing helps ensure even color distribution [2].
Adding Color
There are a few key methods for incorporating colorants into wax when making colored candles. Proper heating of the wax is crucial, as the wax needs to be fully melted to blend with colorants. Here are some tips:
- Use a double boiler or makeshift double boiler to gently melt wax. Heat it slowly to avoid scorching.
- Melt wax to 185-190°F before adding colorants. This ensures the wax is fully liquid.
- Add powder or liquid candle dye a little at a time, stirring continuously with a utensil. Mix thoroughly before adding more.
- Alternatively, shave crayon bits or oil pastels into melted wax while stirring. Go slowly to achieve the desired hue.
- Stir constantly for 2-3 minutes after adding colorants to fully incorporate the color.
- Do test pours on white paper to check the color before pouring full candles.
Proper mixing techniques are key for dispersing color evenly throughout the wax when making colored candles. Stir well and test colors before committing to pouring the full candle.
Testing Colors
Before pouring large batches of colored wax, it’s important to test colors on a small scale first. The best way to preview your custom candle colors is by doing a simple paper test. As recommended by Bramble Berry, take a small strip of parchment paper and dip it into the colored wax. You’ll be able to see the exact shade of the color once it cools and hardens on the paper. This will allow you to adjust and experiment with color combinations until you achieve your desired hue (https://www.brambleberry.com/how-to/candles/art0152-color-candles.html).
Another easy testing method is using white paper strips, as outlined by Life N Reflection. Simply cut long, slim strips of plain white paper. Dip one end into your colored wax and watch it dry. The color on the paper will match the final color of your candle. This low commitment test allows you to efficiently try out multiple color variations before pouring full candles (https://www.lifenreflection.com/how-to-color-candle-wax/).
The key is testing colors on a small scale first, whether with parchment, plain paper, or even crayons. This prevents wasting large amounts of wax. Experiment with combining colors and take notes on your tests to achieve the perfect custom candle hue.
Achieving Depth
One of the keys to creating dimensional color with wax is layering. By applying multiple thin coats of colored wax, you can build up rich, nuanced hues. Combining translucent and opaque waxes is another great technique.
Start by applying a coat of translucent tinted wax, which allows the base color underneath to show through. Then follow up with layers of opaque wax in coordinating shades to add more saturation. As you work, blend the edges of each layer together so they transition seamlessly. Using a color wash or glaze between layers also helps merge them together.
Build up the layers slowly and purposefully. Applying too much opaque wax at once can make the color look flat. It’s better to gradually deepen the shade with successive thin coats. Often 3-5 layers are needed to achieve really dimensional color.
Don’t be afraid to experiment and make adjustments as you go. Removing excess wax or sanding back a section allows you to rework an area until you get the desired custom color. With patience and practice, you’ll be able to create beautiful faux finishes with wax in any hue.
For more tips, see “Add Depth To Furniture With Tinted Wax” at https://www.artsychicksrule.com/add-depth-to-furniture-with-tinted-wax/.
Troubleshooting
Sometimes you may run into issues with your colored wax not turning out as expected. Here are some common problems and solutions for troubleshooting wax color:
Fading Color Intensity
If your candle color starts fading or becoming lighter after burning, it’s likely due to too much exposure to UV light. Try keeping candles out of direct sunlight and consider adding UV inhibitors which can help prolong color (https://www.theflamingcandle.com/troubleshooting/).
Color Sinking
If you notice your color pigments sinking to the bottom of the jar, it means the wax cooled too slowly. Try pouring wax at a slightly lower temperature or in thinner layers to allow it to harden faster (https://www.candlescience.com/wax/soy-wax-trouble-shooting-guide/).
Bleeding Colors
If colors start to bleed together, the wax may have been overheated or colors were added at too high of a temperature. Try adding colors below 150°F to prevent bleeding.
Storing Colors
Proper storage is crucial for maintaining the integrity of your colored wax. Contamination from other wax colors, fragrance oils, or dust can ruin your carefully crafted hues. Here are some tips for storage:
Store colored wax in clearly labeled, airtight containers like glass jars or plastic bags. Glass allows you to easily see the color while plastic prevents any fragrance absorption. According to Craft Server, you can even store the wax in the fridge or freezer to help it harden faster.
Make sure to keep different colors separated. Having cross-contamination between colors can muddy your bright tones. Consider keeping similar colors together and darker versus lighter colors separate.
Prevent dust and debris from getting into the wax by sealing the containers well. Any foreign particles in the wax can detract from the vibrancy of the color.
Store finished wax melts properly to maintain scent and color. Like candle wax, keep them in airtight containers away from heat, light, and humidity according to Storables. The fridge can help set melted wax melts faster.
With proper storage techniques, you can maintain the integrity of your colored wax for future candle making projects.
Uses
Colored wax has many creative uses, especially for candle and wax melt making. Adding color allows you to customize candles and wax melts. Popular uses of colored wax include:
Candles – Adding colorant to wax gives you full control over the look of candles. You can create solid colored candles or do advanced techniques like layers and embeds. Color allows you to make decorative candles for holidays, special occasions, gifts, etc.
Wax melts – These aromatic wax cubes release fragrance when melted. Color makes them more visually appealing. Coordinate melt colors to fragrance or make them match your home’s decor.
Embedded objects – You can suspend objects like dried flowers, seashells, and glitter in colored wax to create one-of-a-kind designs. The colored wax provides a background that makes the objects stand out.
The possibilities are endless when you make your own colored wax. You’re only limited by your creativity and imagination!
Creativity
Candle making offers endless opportunities for creativity. You can blend wax colors to create custom shades and effects. Try layering multiple colors in the candle container before pouring or create an ombre effect by gradually transitioning between hues. Some creative techniques include:
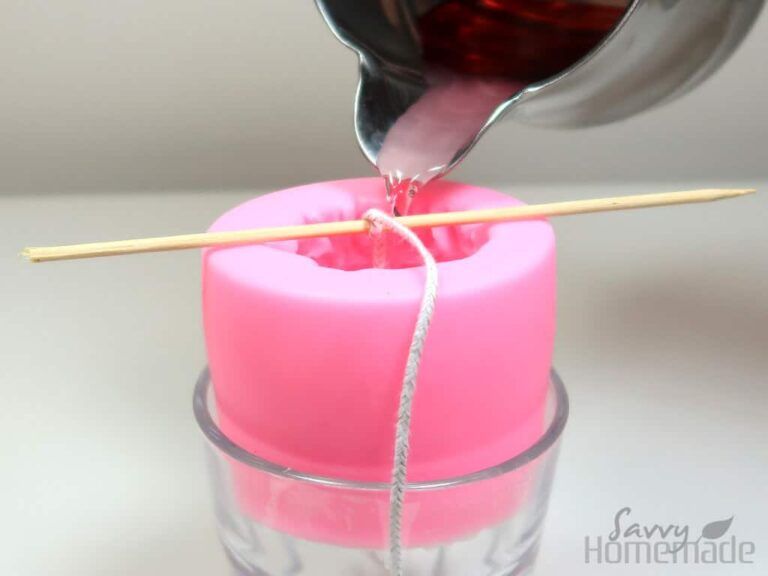
Swirling – Pour alternating colors into the container and run a skewer through the wax to “swirl” them together. Try a simple two color swirl or get creative with multiple colors.1
Marbling – Pour one color along the inside walls of the container, then fill with a different color. The wick gets encased by the second color while the sides retain swirls of the first. Flip the candle over halfway through cooling to distribute the marbling effect.2
Layering – Pour different colored layers into the container, one on top of the other, to create stripes or a colorful gradient.
Embeds – Press flowers, glitter, herbs, beads, seashells, or other decorative objects into the wax before it hardens.
With some creativity, you can make completely unique candle designs. Experiment with colors and techniques to make artistic candles that reflect your personal flair.

