How Do You Make Old Fashioned Scented Candles?
Making your own old fashioned scented candles can be a fun and rewarding DIY project. Old fashioned candles differ from modern candles in a few key ways:
They are made from natural waxes like beeswax or soy wax, rather than paraffin wax which is a petroleum byproduct. They use cotton or wood wicks instead of metal-cored wicks. And they are scented with essential oils rather than synthetic fragrances.
The benefit to making your own old fashioned scented candles is that you can fully customize the process. You get to choose your preferred wax, wick, vessel, and essential oil scents. This allows you to create candles with an authentic, vintage aesthetic and natural scent. Since you control the ingredients, you can avoid toxic chemicals found in some store-bought candles. Making your own candles also allows for self-expression through unique scent blends and decorative vessels. Overall, the DIY approach is both creative and practical.
Materials Needed
Making old fashioned scented candles requires just a few basic supplies. Here are the key materials you’ll need:
Wax – The most common types used for candle making are paraffin, soy, and beeswax. Paraffin wax is derived from petroleum, while soy wax comes from soybeans. Beeswax is a natural wax made by honey bees.
Wicks – Wicks draw the melted wax up while burning to keep the flame going. Look for wicks specifically made for candle making based on the type of wax you choose.
Fragrance Oils – These concentrated scents are mixed with wax to add aroma to candles. Choose from floral, food, spice, essential oil or synthetic fragrance oils.
Candle Molds/Containers – Use candle jars, tins or silicone molds to hold the wax while forming candle shapes and sizes. Make sure containers are heat safe.
Thermometer – A thermometer with a clamp is useful for monitoring wax temperatures during the candle making process.
Double Boiler – This setup with two pots allows gentle heating of wax to proper temperatures for pouring.
Selecting Wax
When making old fashioned scented candles, you have a choice between natural beeswax or paraffin wax. Beeswax is made by honey bees and has a pleasant natural honey aroma. It’s also biodegradable and non-toxic. However, beeswax is more expensive and has a lower melting point than paraffin. Paraffin wax is a petroleum byproduct that’s odorless, colorless, and relatively inexpensive. While paraffin burns cleanly, some find the source controversial from an environmental standpoint.
To source beeswax, look for local beekeepers, apiaries, or health food stores. Bulk paraffin wax can be found at some craft stores, online, or at candle making suppliers. The amount of wax needed depends on the size and number of containers. For standard apothecary jars, you’ll need 6-8 ounces of wax per jar. Calculate the wax needed based on the volume of your containers.
Choosing Wicks
Choosing the right wick is crucial for proper candle burning. Wicks are made from different materials like cotton, paper, zinc, and wood. Cotton wicks are the most common because they burn cleanly without releasing odors or smoke. The thickness and width of the wick also matters.
For old fashioned poured candles, you’ll want to select a wick size based on the diameter of your candle. The general rule is to use a larger wick for wider candles. A candle with a 1-2 inch diameter would use a #1 or #2 wick. A 2-3 inch diameter candle would use a #2 or #3 wick. For candles 3-4 inches wide, choose a #3 or #4 wick. Make sure to test burn your candle and trim or change the wick if needed to achieve the right melt pool and flame height.
Scenting Candles
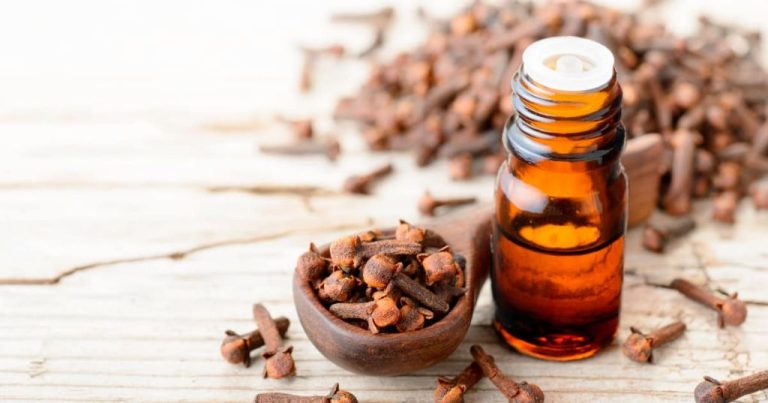
One of the best parts of making scented candles is choosing the fragrance. When scenting candles, you’ll need to decide whether to use essential oils or fragrance oils. Essential oils are derived from plants and can provide pleasing natural scents. However, they are more expensive and fade faster than fragrance oils, which are synthetic scents designed to be strong and long-lasting in candles.
A general guideline is to use 1 ounce of fragrance oil per 1 pound of wax. Start by adding half of the fragrance oil and stir thoroughly before adding the remaining half. Adding the fragrance gradually helps avoid losing scent. Go lighter on essential oils, using 1/2 to 3/4 ounces per pound of wax since they are more concentrated.
You can blend scents by mixing multiple fragrance or essential oils together. Figure out your desired strength for each and combine them in the proper ratios. For example, use 1 part powerful fragrance like peppermint with 2 parts lighter fragrance like vanilla. Avoid using more than 4-5 total oils in one candle to prevent muddying the scent.
Prepping Candle Containers
Before pouring your candle wax, you’ll need to properly prepare the containers. This involves cleaning the containers, prepping the wicks, and securing them in place.
Start by thoroughly cleaning your containers with soap and water. Remove any residue, dust or oils. Glass containers like jars or votives can go in the dishwasher for easy cleaning. Other container materials like tin or aluminum should be hand washed. Make sure containers are completely dry before proceeding.
Next, prepare your wicks by trimming them to the proper height. Use wick stickum or hot glue to adhere the base of the wick to the bottom center of the container. The wick should stand straight up in the middle. For wide container openings, you can put a pencil or chopstick across the opening and lay the wick over top to hold it in place. Allow any glue to fully dry before pouring wax.
Now your containers are prepped and ready for the candle wax to be poured. Be sure to center your wicks and keep them secured upright as the wax will be very hot when poured. This prep work ensures you’ll have clean containers and properly placed wicks to make professional looking finished candles.
Melting and Pouring Wax
Once you have chosen your wax, wicks, scents, and candle containers, you are ready to melt the wax and pour it into the containers to make your candles. This is a crucial step that requires care and precision.
The safest and most effective way to melt wax for candle making is using a double boiler. This involves placing the wax in the top pot of the double boiler and letting the bottom pot simmer with water to gently heat the wax. Directly heating wax runs the risk of overheating and damaging it. The double boiler allows for even, gentle heating.
The ideal wax pouring temperature is between 185-200°F. Cooler than 185°F, the wax will start to thicken and solidify too quickly when poured into containers. Hotter than 200°F runs the risk of the wax scorching. Use a thermometer to carefully monitor the melted wax temperature before pouring.
Once the wax is melted to the proper temperature, carefully pour it into each candle container, leaving about 1/4 inch of headspace at the top. The wax will shrink slightly as it cools and cures. Pour slowly and steadily in a liquid stream down the sides of the container to prevent bubbles.
Allow the poured candles to cool completely before moving them. The wax will need to fully set up and stabilize, which can take up to 24 hours. Once cooled, you will have successfully homemade scented candles!
Cooling and Curing
After pouring your melted wax into the candle containers, it’s important to let them cool and cure properly before moving or burning them. Here are some tips for cooling and curing your homemade scented candles:
Let the candles cool completely before moving them. It takes around 6-12 hours for most container candles to cool enough to move safely without spilling or cracking. Test by gently touching the wax – if it still feels warm, let it cool longer. Avoid jostling or blowing directly on the candles to speed up cooling, as this can cause issues.
Allow 1-2 weeks of curing time before burning. Curing allows any trapped air bubbles to rise to the top and the wax to become denser. This helps the candle burn more slowly and evenly. During curing, store the candles somewhere with stable, room-temperature conditions. After curing, give the candle one final check and trim the wick if needed before lighting.
With proper cooling and curing, your homemade scented candles will burn beautifully! Taking the time for this important step is worth the wait.
Troubleshooting
Making old fashioned scented candles isn’t always perfect, and you may run into some common issues like sinkholes, frosting, tunneling, etc. Here’s how to troubleshoot and fix the most common candle making problems:
Sinkholes
Sinkholes occur when there is a divot or hole in the top of the candle. This happens because the wax contracted as it cooled. To prevent sinkholes:
- Make sure your candle containers are room temperature before pouring wax
- Pour candles an inch or less in diameter to allow even cooling
- Add a second pour of wax after the first layer sets to top off the candle
Frosting
Frosting is those whitish crystals that form on the top of a candle. It’s caused by additives and fragrance oils. To reduce frosting:
- Use wax with a higher melting point like soy
- Avoid fragrance oils with high vanillin content
- Add a small amount of oil like coconut or jojoba to the wax
Tunneling
Tunneling is when the wax melts unevenly, creating a tunnel down the side of the candle. This happens if the wick is too small for the candle diameter. To fix it:
- Use a larger wick appropriate for the candle size
- Trim wicks to 1⁄4 inch before lighting
- Make sure candle containers don’t touch while cooling
Safety Tips
When making candles at home, it’s important to take proper safety precautions. Here are some tips for staying safe while making scented candles:
Use proper equipment – Have a thermometer on hand to check wax temperatures. Pouring wax that is too hot can be dangerous. Protective equipment like goggles, gloves, and long sleeves are a good idea when handling hot wax.
Ensure proper ventilation – Work in a well-ventilated area so fumes don’t build up. Open windows, use exhaust fans, or work outdoors. Never leave melting wax or candles burning unattended.
Avoid wax burns – Use potholders when handling candle containers filled with hot wax. Allow candles time to cool completely before moving them. Trim wicks to 1⁄4 inch before lighting to avoid high flames.
Making candles requires caution, but taking appropriate safety steps will allow you to enjoy the creative process. Allow time for cooling wax, have proper equipment on hand, and work in a well-ventilated area.