How Do You Make Frosted Pillar Candles?
Frosted pillar candles are a beautiful decorative item often displayed in the home. Pillar candles get their name from their straight-sided cylindrical shape, resembling a pillar. The frosting is a thin decorative coating added to the outside of the candle for aesthetic appeal.
Frosted pillar candles are popular for their soft, charming look. The frosted coating gives them an elegant finish. These candles make lovely decorations for mantels, shelves, tables, and more. They are frequently used to add cozy, atmospheric lighting to rooms. Their glowing ambiance helps create a relaxing mood. During holidays and special occasions, frosted pillars make festive centerpieces and displays.
Materials Needed
To make frosted pillar candles, you will need the following materials:
- Wax – The most common types used are paraffin, soy, or beeswax. Make sure to use wax intended for making candles. The amount will depend on the size of your pillar candles.
- Wicks – Pre-tabbed or pre-waxed wicks designed specifically for the type of wax you are using. You’ll need a wick for each candle.
- Fragrance oil – Optional but adds nice scent to the candles. Use candle safe oils.
- Candle dye – Optional to color the wax. Use liquid or block dyes made for candle making.
- Double boiler – This allows you to melt the wax indirectly to avoid overheating.
- Candle molds – Metal or silicone molds designed for pillar candles in your desired shape and size.
- Frosting – Use a thin layer of white wax or other candle frosting products.
In addition you’ll need basic kitchen tools such as thermometers, mixing spoons, and protective equipment like oven mitts.
Preparing the Wax
Preparing the wax is one of the most important steps in making frosted pillar candles. To start, gather the wax flakes, wax dye, and fragrance oil. Place the wax flakes into a double boiler or a metal pitcher suspended over a pot of simmering water. Allow the wax to fully melt, stirring occasionally. Avoid allowing the wax to get too hot or boiling, which can scorch it. Melted wax should be around 180 to 200 degrees Fahrenheit.
Once the wax is completely liquid, you can add the dye and fragrance. Use wax dye in your desired color, starting with just a drop or two and increasing as needed. Stir thoroughly to incorporate the color evenly. For fragrance, a typical ratio is 1 ounce of oil per 1 pound of wax. Stir the fragrance oil in slowly. Be careful not to spill any fragrance, as that concentration would be flammable.
When the wax is scented and colored how you like, carefully pour it into the candle molds, leaving a little extra room at the top for the final frosting layer. Let the candles fully set up before moving to the next steps of preparing the wick and frosting.
Preparing the Wicks
Choosing the proper wick size for your candles is crucial for getting the best burn. The wick should be wide enough to allow the wax to melt into a pool as it burns, but not so wide that it creates high flames or sooting. Consider the diameter of the candle and test wicks to find the ideal width. For pillar candles, common wick sizes are #1, #2, or #3.
Once you’ve chosen your wick size, cut the wick to be 1-2 inches longer than the height of the candle mold. This ensures you’ll have enough wick exposed at the top once the candle is poured and finished. Use scissors to make a straight cut.
Before pouring the wax, it’s important to center the wick in the mold. Tie the wick to a pen or skewer and lay it across the top of the mold, centering it from side to side. Gently press the wick into the bottom of the mold so it stands upright when released. This keeps the wick positioned in the center as you pour the wax.
Allowing to Cool
After pouring the melted wax into the pillar candle molds, it’s crucial to allow adequate cooling time before removing the candles. The cooling process enables the wax to completely harden and take on the molded cylindrical shape. Cooling the candles properly will help them retain their pillar shape once removed from the molds.
Candles should be left to cool completely in the molds before attempting to remove them. Cooling time can take several hours and depends on factors like the size of the candle, wax type, and ambient temperature. Larger pillar candles may require cooling in the molds overnight. It’s best to wait at least 4-6 hours before removing smaller to medium-sized pillar candles from their molds.
Don’t rush the cooling process. If candles are removed too soon, the wax will not be completely set and the candles risk bending, losing their shape, or cracking after being taken out of the molds. patience here pays off with nicely formed pillar candles.
Test if the wax is fully hardened before attempting to remove candles from the molds. Gently pressing on the sides and bottom of the mold can help determine if the wax is ready. There should be no give or soft spots. If the candle feels solid, it should be ready to be removed from the mold.
Creating the Frosting
The frosting is what gives frosted pillar candles their distinctive wintery, snow-covered look. To make the frosting, you’ll need:
- 1 pound confectioners’ sugar
- 1/4 cup light corn syrup
- 1/3 cup warm water
- 1 teaspoon vanilla extract
- Food coloring (optional)
In a large bowl, stir together the confectioners’ sugar, corn syrup, warm water, and vanilla extract until smooth. For colored frosting, add a few drops of food coloring and mix until the color is even throughout the frosting. The frosting should be thick but still able to be spread smoothly onto the candles. If needed, adjust the consistency by adding more confectioners’ sugar to thicken or more water to thin.
Applying the Frosting
Once the frosting has been prepared, it’s time to evenly coat the candles. Use a pastry brush or spoon to apply a smooth layer all over the candle surface. Make sure to get into any crevices and cover every inch of the candle for full coverage.
Let each coat dry completely before adding another layer. Drying times vary based on frosting thickness and humidity levels. Generally, frosting will be dry to the touch within 30-60 minutes. Allow at least 2 hours between coats for thorough drying.
Applying multiple thin layers results in a smoother finish than one thick coat. 2-3 layers is usually ideal for achieving full opaque coverage on pillar candles. Be patient and allow proper drying between layers.
Work in a dust-free area since wet frosting can collect lint and debris easily. Prevent drips by keeping the candle surface horizontal while drying. Once fully dry, you can position the frosted candle upright.
Optional Decorations
You can add some extra decorative touches to your frosted pillar candles to really make them stand out. Here are some ideas for optional decorations you may want to try:
Glitter
Adding glitter to the frosting is an easy way to create a sparkly, festive look. Before applying the frosting, mix some glitter into the frosting mixture. You can use fine glitter or chunkier craft glitter. Silver and gold glitter work well for a classic look, but you can also use colored glitter to match your decor.
Dried Flowers
Small dried flower buds and petals can make beautiful embellishments. Glue them onto the frosted candle using a strong craft glue or clear drying candle glue. Try flowers like baby’s breath, lavender, rose buds or small daisies. Arrange them creatively on the candles in small bunches.
Sequins, Beads and Buttons
For a more eclectic, artsy look you can use various embellishments like sequins, beads, buttons or charms. Affix them onto the frosted coating with strong glue in small groupings. Metallic beads and sequins will complement the frosted finish.
Allowing Frosting to Set
Once you have finished applying the frosting to your candles, you will need to allow adequate time for the frosting to dry and cure properly. The amount of drying time can vary greatly depending on factors like temperature, humidity, ventilation, and thickness of frosting application.
In general, it is best to allow frosted candles to cure in a dry, well-ventilated area away from direct sunlight and heat. At standard room temperature, expect the frosting to take around 24-48 hours to fully cure and harden. During this time, avoid touching or moving the candles until completely set.
You can test if the frosting has hardened by gently touching the surface with your finger – the frosting should feel dry and firm, not sticky. Insufficient drying time can lead to fingerprints or smudging. Be patient and allow the full curing time for best results.
Lower temperatures or higher humidity will extend drying time. Likewise, thicker frosting application will take longer to cure. If struggling with slow set times, consider placing candles in a warm, dry area to speed up the process – just avoid direct heat sources.
Once fully cured, the frosted finish will be hard and durable. Now the candles are ready for finishing touches, decorations, or display.
Displaying Your Frosted Pillar Candles
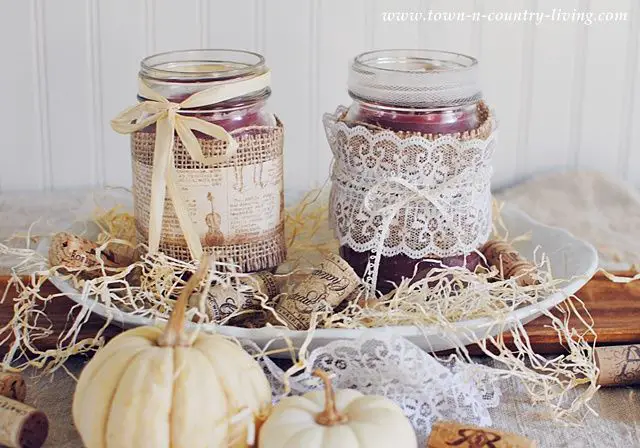
Once your frosted pillar candles have completely cooled and set, it’s time to display these beautiful handmade creations. Get creative with how you present your frosted candles to make lovely home decor or thoughtful gifts.
For home décor, place several varying heights of frosted pillar candles on a mantel or shelf. Arrange them artfully, alternating heights and colors for a stunning display. Cluster them in the center of a dining room table for ambiance during meals. For parties, line them along a buffet table or stair banister.
If giving as a gift, consider displaying your frosted pillar candles in a pretty glass vase or tying them with raffia and adorning with ribbon bows. Place them in a decorative box or basket, surrounded by shredded paper, flowers or other small gifts. Attach a gift tag sharing that they are homemade. Your friends and family will appreciate the time and care you put into crafting these frosted pillar candles.