How Do You Make A Homemade Oil Diffuser?
An oil diffuser is a device that disperses essential oils into the air to fill a room with pleasant scents and aromas. They provide several benefits such as purifying the air, relieving stress, and creating a calm environment. Diffusers come in different styles like heat, nebulizing, and ultrasonic. Heat diffusers use gentle heat to evaporate the oils, while nebulizers use pressurized air and ultrasonic diffusers use vibrations in water to disperse the oils as a fine mist.
Oil diffusers are an excellent way to experience the therapeutic benefits of essential oils. The fragrant compounds in the oils are dispersed into the air for you to breathe in. This can help relieve anxiety and depression, improve sleep, boost immunity, and more depending on the oils used. Diffusing essential oils also humidifies and purifies the air by eliminating airborne bacteria, mold, and bad odors.
Necessary Supplies
To make your own homemade oil diffuser, you just need a few basic supplies:
- Glass or ceramic container – Look for a container made from heat-resistant glass or ceramic. Glass jars, vases, bowls, and bottles all work well. According to Glassnow, their reed diffuser containers are perfect for holding essential oils.
- Essential oils – Choose your favorite scented essential oils like lavender, eucalyptus, lemon, etc. CandleScience has a wide selection of essential oils perfect for diffusers.
- Distilled or filtered water – Use distilled or filtered water to fill your diffuser. Tap water can leave mineral deposits.
- Diffuser reeds – These porous reeds absorb the scented oil and allow the fragrance to waft into the air. The Flaming Candle offers many styles of diffuser reeds.
With just a few basic supplies, you’ll be ready to make your own easy yet elegant oil diffuser for your home.
Choosing a Container
The most important part of a homemade reed diffuser is choosing the right container. The container holds the fragrant oil and allows the reeds to draw up the oil to scent the air. Look for containers made from glass, ceramic, or stainless steel for the best diffusion (according to this source). Avoid plastic containers, which can absorb the fragrance oil.
Glass containers work extremely well, as glass won’t react with the oils. Look for thick, durable glass jars or bottles in various shapes and sizes. Vintage glassware, apothecary jars, and recycled glass food jars or bottles make ideal diffuser containers on a budget. For an elegant look, try cut glass or faceted glass.
Ceramic containers like vases, jugs, and bowls also make attractive diffusers. Opt for high-fired, non-porous ceramic that won’t absorb the scent. Glazed ceramics provide a glossy finish and protect the clay from staining.
Stainless steel has a sleek, modern look. Containers like buckets, tins, and pitchers work well. Stainless steel won’t corrode or react with essential oils. Just make sure to clean it thoroughly between scent changes.
No matter what container you choose, pick ones that will complement your décor. Look for interesting shapes, colors, and textures. And make sure it has an opening wide enough to easily insert the reeds.
Adding Water
When making your own homemade oil diffuser, it’s important to use the right type and amount of water. Most experts recommend using regular tap water or filtered water in your diffuser. Well water or mineral water can leave mineral deposits behind that can clog the diffuser over time. The ideal is to use distilled or demineralized water, but tap water works well for most purposes. According to Young Living, you’ll typically want to add about 1 cup of water to your diffuser, but be sure to check the capacity and fill line of your specific container.
“Add water to the fill line, usually approximately 1 cup; but be sure to follow your diffuser’s directions.” (Young Living)
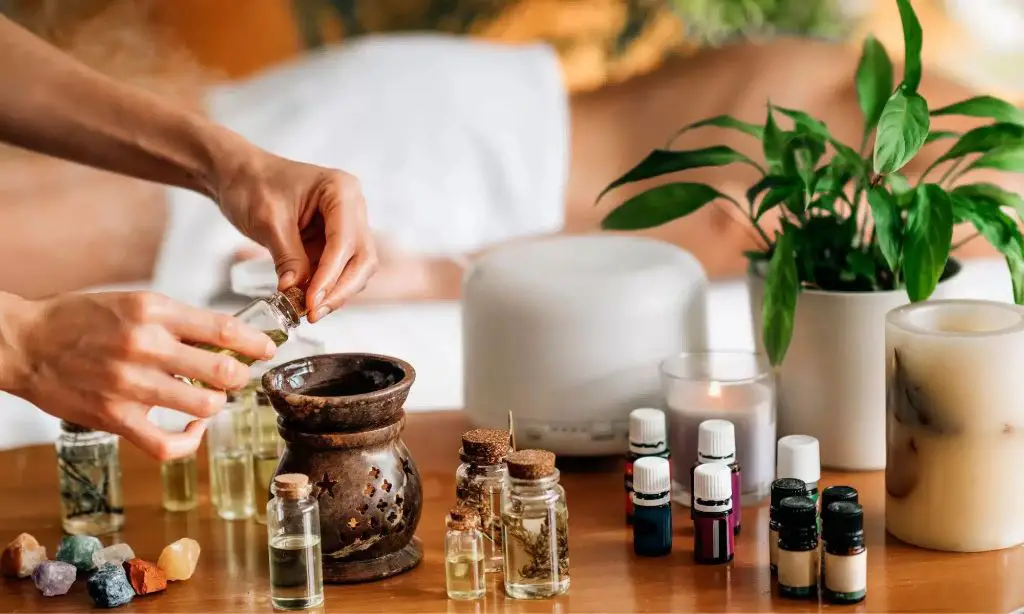
Selecting Oils
When choosing oils for your diffuser, there are many delightful scents to pick from. Some of the most popular oils for diffusing are lavender, eucalyptus, peppermint, and clary sage (Source). Lavender is known for its calming and relaxing aroma that can promote sleep and reduce anxiety. Eucalyptus has an invigorating minty scent that can help clear sinuses and improve respiratory issues. Peppermint is similarly refreshing and energizing, with a sharp menthol odor that can boost focus and concentration. Clary sage has an earthy, herbaceous fragrance that provides soothing effects on stress and anxiety.
When selecting oils, it’s important to dilute them properly with water and be cautious if you have sensitivities. Using oils directly or in high concentrations can cause skin irritation, headaches, and other adverse effects for some people. It’s best to start with small amounts of oils and adjust the dilution until you find the right strength for your diffuser and personal tolerance.
Adding Oils to Water
Once you have selected your oils, it’s time to add them to the water in your diffuser. When adding essential oils to water in a diffuser, it’s important not to overdo it. Generally, you’ll want to add 5-10 total drops of oil to your diffuser, depending on its size.
For a 100ml diffuser, add 3-5 total drops of oil. For a 200ml diffuser, use 5-7 drops. And for a 300ml or larger diffuser, add 8-10 total drops (Source 2). It’s best to start with fewer drops and work your way up to find the ideal aroma strength for your space.
If you are blending multiple oils, use 2-3 drops of each oil. You don’t need to use every oil at once either. You can alternate oils each time you refill the diffuser (Source 1). The key is not to oversaturate the water, as that can decrease the diffusion rate.
Shake or swirl the water after adding oils to incorporate them. Over time, you’ll get a feel for the right oil-to-water ratio to suit your nose!
Diffuser Ideas
There are several creative ways to make homemade diffusers to suit your style. Here are some popular DIY diffuser ideas:
Reed diffusers are a simple method. Place rattan or bamboo reeds into a glass jar filled with water and essential oils. As the reeds absorb the oil, it will diffuse the fragrance into the air. Make sure the jar has a tight lid to prevent evaporation when not in use (Source).
Terra cotta diffusers involve soaking terra cotta clay objects in essential oils overnight. The clay will slowly diffuse the scent. You can use terra cotta pots, discs, or figurines. Just place them around your home. Replace the oils every few weeks as the scent fades (Source).
Floral diffusers are made by adding a few drops of essential oils to the water in a vase of flowers. As the flowers release moisture into the air, they will carry the lovely scent through the room.
Safety Tips
When using essential oils, it’s important to exercise caution, especially when there are children or pets around. Essential oils can be toxic if ingested, so it’s critical to keep diffusers and bottles out of reach of little hands. As recommended by Healthline, “Essential oils loaded in diffusers fill the air with aroma, so it’s best to keep them away from babies and young children.”
It’s also important to follow usage guidelines and not exceed recommended diffuser runtimes. Most ultrasonic diffusers should not be run for more than 1-2 hours. Be sure to read instructions and follow manufacturer guidelines for safe operation.
Proper cleaning and maintenance is also key for safety. As noted by CNET, “To clean the glass and plastic diffusers, carefully wipe them out with a paper towel or soft cloth. Don’t clean them with detergent, as the fragrance can stick to any residue left behind.” Allow your diffuser to fully dry before adding new water and oils.
Maintaining Your Diffuser
Proper cleaning and care is important for maintaining your homemade diffuser. It’s recommended to wipe down the interior of the diffuser with a solution of equal parts water and vinegar after every use, especially when changing essential oils (Source). This helps remove any oil residue and prevent buildup of mold or bacteria. Use a clean cloth or cotton ball to wipe down the empty reservoir and mist vent, then allow to fully air dry before refilling.
To refresh the oils and water, empty any remaining water and add new water as needed to fill the reservoir. You may wish to add a few new drops of your favorite essential oil to revive the aroma. Change the water daily to prevent mold growth. With proper maintenance, your homemade diffuser should provide soothing scents for many uses.
Enjoying Your Diffuser
One of the best parts of having a homemade essential oil diffuser is enjoying the benefits that diffusing essential oils provides. When deciding where to place your diffuser in your home, consider putting it in rooms where you spend a lot of time relaxing or sleeping like the living room, bedroom, or office. Diffusing oils in these spaces can promote relaxation, reduce stress, improve mood, and aid sleep (Health.com).
Some of the top benefits of diffusing essential oils at home include:
- Encouraging calmness and relaxation
- Uplifting mood and energy levels
- Promoting easier breathing
- Cleansing and purifying the air of bad odors
- Providing aromatic benefits like stress relief or improved sleep
Experiment to find your favorite essential oil or oil blends to diffuse. Some popular options are lavender, bergamot, lemon, peppermint, and eucalyptus. Enjoy taking in the lovely scents as the oils permeate the air in your home.