How Do You Make A Fire Starter With Sawdust And Egg Cartons?
A fire starter is a product that helps ignite a fire by catching the initial sparks and flames to get combustion going. Fire starters make starting a campfire or fireplace fire easier and more reliable compared to traditional methods like striking matches on kindling (Firestarter).
Fire starters have several key benefits over other fire starting techniques:
- They ignite faster and more easily than matches or lighters on their own.
- They burn longer to allow the fire to fully catch and spread.
- Made from dense, flammable materials like sawdust or wax, they are engineered to light with just a spark.
- They eliminate the need to gather as much tinder and kindling to get a new fire going.
- Their controlled burn makes fire building safer and prevents rogue sparks from spreading.
Overall, fire starters are a convenient and effective way to start a fire quickly and safely. Making homemade fire starters is an easy DIY project with just a few basic ingredients.
Materials Needed
To make homemade fire starters with sawdust and egg cartons, you will need the following materials:
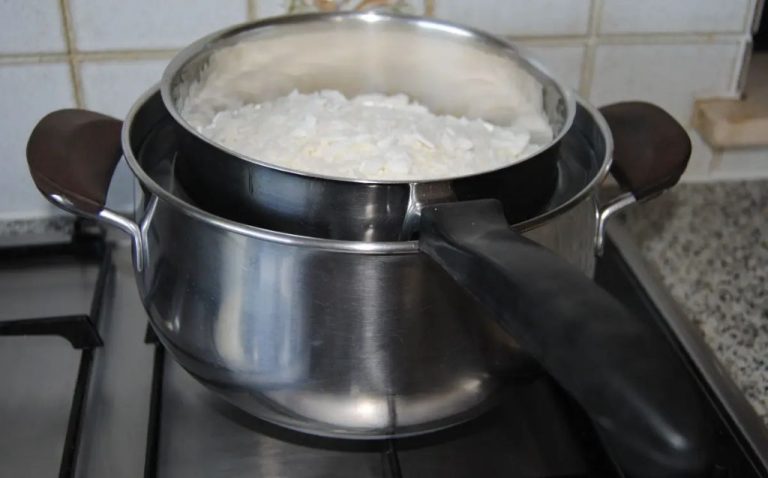
- Sawdust – The sawdust provides a flammable base material for the fire starters. You can use sawdust from any untreated wood, preferably a softwood like pine. Let the sawdust fully dry out before using it.
- Egg cartons – Recycled paper egg cartons provide the mold for the fire starter shape. Make sure to thoroughly clean and dry the egg cartons before using them.
- Paraffin wax – The wax helps the sawdust burn longer. Look for food-grade paraffin wax online or at craft stores.
- Double boiler or crockpot – You’ll need a double boiler or crockpot to melt the wax. The double boiler allows indirect heating so the wax doesn’t get too hot.
- Molds or containers – If not using egg cartons, you can use silicone molds or other small containers to shape the fire starters.
Gather these materials before starting the fire starter project. You may also want to prepare your workspace by covering surfaces for easy cleanup.
Collecting the Sawdust
Sawdust for making fire starters should come from untreated and non-toxic wood sources. Good options are local wood shops, lumber mills, or your own woodworking projects as long as you haven’t used treated lumber or finishes that contain toxic chemicals. The sawdust needs to come from bare, unfinished wood. According to Wood Magazine, sawdust from hardwoods like oak, maple, walnut, or ash works best because it’s very absorbent. Softwood sawdust from pine, fir, or cedar is okay too but may be more prone to smoking. You want the sawdust to be as fine as possible, like what you’d get from sanding wood. This helps the wax absorb evenly.
Preparing the Egg Cartons
The first step in preparing the egg cartons is to wash them thoroughly with soap and water to remove any residue. Allow the cartons to air dry completely before proceeding.
To create molds for the fire starters, use scissors to cut the egg cartons into individual cups or shapes as desired. Cutting along the edges of the cups allows you to remove one cup at a time with ease. For round molds, puncture the bottom of the cup with scissors or a thumb tack and push the cut portion through to create a circular mold.
Make sure any sharp edges are smoothed down so they don’t pose a risk when handling the fire starters. The egg cartons can be cut into a variety of shapes and sizes to suit different fire starter holder designs. Just be sure they are sturdy enough to hold the wax sawdust mixture without collapsing.
Once cut, arrange the egg carton molds in a baking sheet or other container lined with wax paper. Having the molds ready before preparing the wax mixture allows for quick and easy pouring.
For guidance on sizing and shaping the molds, refer to: https://diyprojects.com/make-fire-starter-egg-carton-dryer-lint/
Making the Wax and Sawdust Mixture
The key to getting a good consistency for the fire starters is properly mixing the sawdust and wax. According to How to Make Sawdust Fire Starters, you’ll want a ratio of about 5 parts sawdust to 1 part wax by volume. This means if you have 5 cups of sawdust, you’ll want to use about 1 cup of wax.
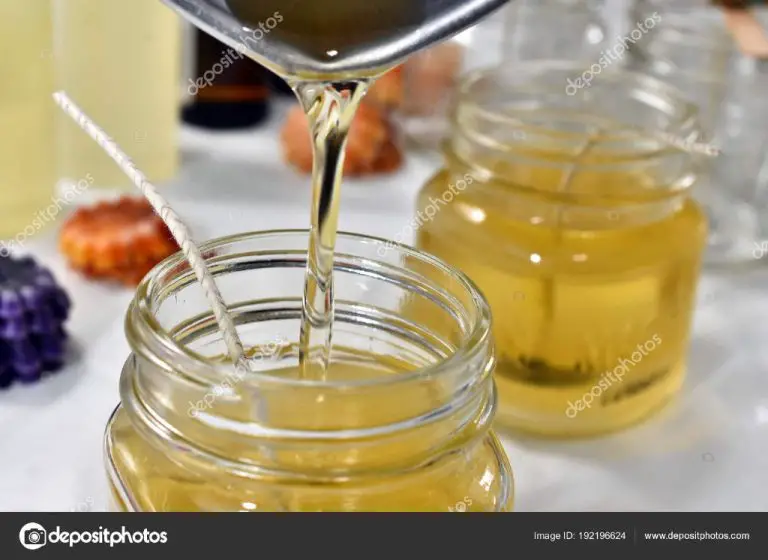
To melt the wax, it works best to use a double boiler on the stove or a makeshift double boiler with a glass jar in a saucepan of water. This allows the wax to melt evenly without scorching. Once the wax is fully melted, stir in the sawdust bit by bit, mixing thoroughly until well combined. The sawdust will help thicken the wax as it’s added. If the mixture seems too dry and crumbly, melt in a bit more wax. If it’s too wet, add more sawdust. The ideal texture is moldable but not oozing liquid.
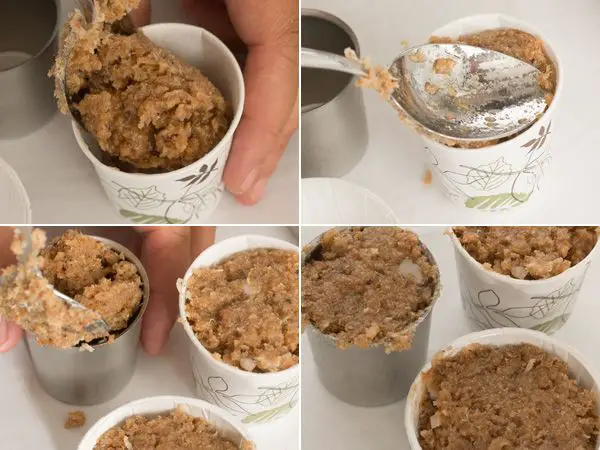
Pouring into Molds
Once the wax and sawdust mixture has fully melted and blended together, the next step is to carefully pour it into molds to create the fire starters. There are a variety of molds that can be used for this purpose:
Egg cartons – Cardboard egg cartons make perfect built-in molds for fire starters. The individual cups are the ideal size and shape. Simply cut off the top of the egg carton and pour the wax mixture directly into the cups. Let cool completely before removing the fire starters. (Source: https://www.pinterest.com/joglenny/fire-starter-mold-ideas/)
Silicone molds – Flexible and reusable silicone molds are available in a wide variety of fun shapes like stars, pine trees, snowflakes, etc. Make sure to lightly coat the molds with cooking spray before pouring in the wax sawdust mixture. Once cooled and hardened, the fire starters pop right out of the mold. (Source: https://lisassimplelife.com/diy-fire-starter/)
Ice cube trays – Standard ice cube trays work well too. The small cube size is great for kindling. Be sure to use metal or silicone trays rather than plastic, which may melt from the hot wax mixture. Spray with cooking oil before pouring.
When pouring the liquid wax-sawdust mixture into the molds, go slowly and carefully to avoid spills and overflow. Fill each mold cavity fully to the top. Allow the fire starters to cool and harden completely before attempting to remove from the molds, which usually takes 30-60 minutes.
Cooling and Removing
Once the molds have been filled, it’s important to allow adequate time for the sawdust and wax mixture to fully cool and harden before attempting to remove the fire starters. Depending on the size of the molds, this may take 2-4 hours. Rushing the cooling process could result in misshapen or cracked fire starters.
When the fire starters feel completely cool and solid to the touch, they should release easily from the egg carton molds. Gently flex the carton to loosen the fire starters, then pop them out one section at a time. If any sticks, use a small knife to gently pry it loose. Take care not to bend or warp the fire starters as you remove them from the molds.
Allowing sufficient cooling and hardening time ensures cleanly molded, durable fire starters that will hold their shape well. With proper cooling, they should release from the egg carton molds without cracking or crumbling.
Using and Storing
When using the homemade fire starters, place one in your fireplace, chimenea, or campfire pit on top of the wood you wish to light. Use a long match or lighter to ignite the end of the fire starter. As the wax melts, the sawdust will begin to burn and spread the flame to the kindling and logs. The fire starter should burn long enough for the larger fuel to catch fire and allow your fire to fully ignite.
Proper storage is important to keep your fire starters dry and ready for use. According to How to safely store fire starter sticks, the fire starters should be stored in a cool, dry place away from heat sources and open flames. A basket near your fireplace is a convenient spot, as suggested on Homemade Fire Starters. Make sure to keep them in a location where they won’t be exposed to moisture or water, which could render them ineffective.
Safety Tips
When making homemade fire starters, it’s important to keep safety in mind. Hot wax can cause serious burns if spilled or splashed, so use caution when melting the wax. Make sure kids are supervised and wear gloves when handling the wax. Allow the wax to fully cool and harden before allowing kids to handle the fire starters.
It’s also crucial to use non-toxic sawdust when making DIY fire starters. Some wood dusts and shavings may contain toxic chemicals, so make sure you are using untreated, natural sawdust. Hardwood sawdust like oak or maple works well. Pine sawdust should be avoided since it contains sap and burns very quickly. Check any sawdust you collect yourself to ensure it comes from safe, non-toxic wood.
Store homemade fire starters in a sealed container away from heat sources. Follow proper fire safety practices when using them, like having a bucket of water nearby to extinguish the fire when done. With some simple precautions, homemade fire starters can be a fun and useful campfire project.
Conclusion
Homemade fire starters made from sawdust, wax, and egg cartons are an inexpensive and easy way to get your campfire or fireplace going. By collecting free sawdust and recycling used egg cartons, you can make dozens of fire starters for just the cost of some wax. The steps are simple – melt the wax, mix it with sawdust, pour into egg carton molds, and let cool completely before use. Compared to purchasing commercial fire starters, making your own allows you to control the quality of ingredients. It also reduces waste by repurposing sawdust and egg cartons.
The key steps are collecting enough sawdust, cutting the egg cartons into sections, making the wax and sawdust mixture in the right ratio, pouring carefully into the molds, letting them fully harden before removing, and then storing in a dry spot until needed. Make sure to take proper safety precautions when handling hot wax. With some basic materials and a little time, you’ll have an abundant supply of reusable fire starters that work perfectly to start a fast flame.