How Do You Make 3 Ingredient Wax?
Wax is a versatile material that can be used for candle making, wood finishing, metal lubrication, and various other purposes. Homemade wax is popular for candle making because it allows you to fully customize the color, scent, and shape of candles. Wax can also be used to seal and protect surfaces like wood and metal.
Crafting homemade wax only requires a few simple ingredients, making it easy to whip up small batches. The most common homemade wax is made from beeswax, soy wax, or paraffin wax. These waxes melt at relatively low temperatures, allowing you to safely work with them at home. The finished wax can be poured into jars or cans to make candles, rubbed onto surfaces as a protective coat, or used for various other DIY projects around the house.
Ingredients Needed
The three main ingredients needed to make basic 3-ingredient wax are:
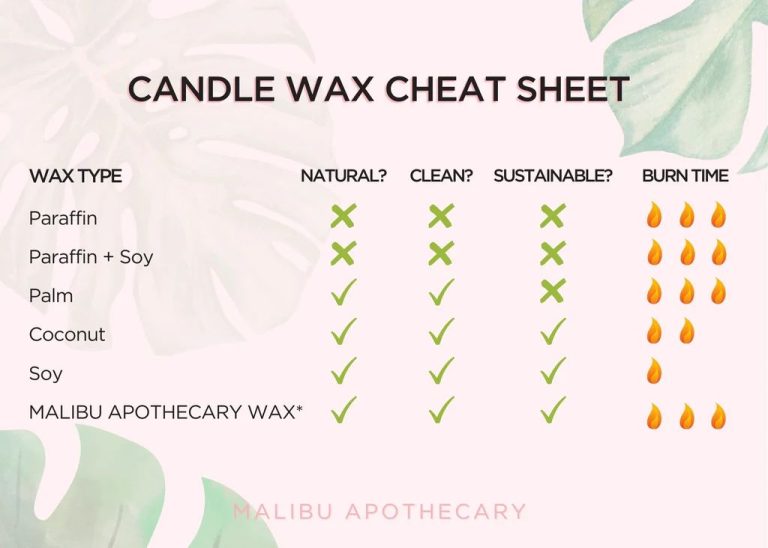
- Beeswax – This is the main ingredient that provides the wax structure and allows the wax to harden. Beeswax has a lovely natural honey scent.
- Coconut oil – Coconut oil helps modify the wax structure and makes the wax creamy and smooth to the touch. It provides moisturizing properties.
- Essential oils or fragrance oils – These oils are optional but highly recommended. They provide nice scents. Essential oils are natural while fragrance oils are synthetic but tend to have stronger scents.
The proportions of the three ingredients can be adjusted to achieve the desired wax characteristics in terms of hardness, melting point, and scent throw. A common ratio is 2 parts beeswax to 1 part coconut oil.
Required Equipment
Only a few basic supplies are needed to make 3-ingredient wax:
-
Double boiler – This allows you to gently melt the wax. You can purchase one or create your own by placing a glass or metal bowl over a pot of simmering water.
-
Spoon – Use a long handled spoon to stir the wax as it melts.
-
Glass or tin container – Pour the melted wax into jars, tins or other heat safe containers. Glass Mason jars work great.
-
Candle wicks – These soak up the wax to fuel the flame. Use wicks made specifically for container candles.
In addition to this basic equipment, you may want to have silicone molds, essential oils, candle dye, glue dots, and labels on hand for customizing your candles.
Melting the Wax
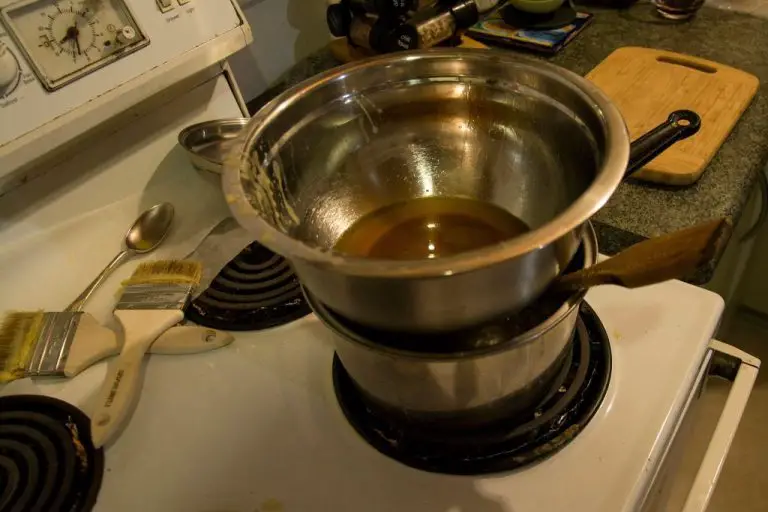
To make the wax, you’ll need to melt the beeswax and coconut oil together in a double boiler. Here are the steps:
Fill a small saucepan with 2-3 inches of water and place it over medium heat. Place a glass or metal bowl on top of the saucepan – make sure it fits tightly over the saucepan and the bottom of the bowl doesn’t touch the water.
Add the beeswax and coconut oil to the bowl on top. Heat the water in the saucepan to a gentle simmer – this will slowly melt the wax and oil in the bowl on top. Stir occasionally as it melts. [1]
Once fully melted, remove the bowl from the saucepan. Make sure all ingredients are fully incorporated. The wax is now ready for the next steps.
Adding Fragrance
Once the wax has slightly cooled, it’s time to add essential oils or fragrance oils. Fragrances give candles, wax melts, and other products their signature scents. When adding fragrance, it’s recommended to use a ratio of 1 oz of fragrance oil per 1 pound of wax (https://www.tiktok.com/discover/fragrance-to-candle-ratio). For a strong, potent scent, some makers may opt for using 1.5 oz of fragrance per pound of wax. Use less if you prefer a lighter fragrance. After adding the fragrance, stir thoroughly to fully incorporate it.
Take care not to add the fragrance when the wax is too hot, as high temperatures can cause the fragrance oils to evaporate. Conversely, don’t wait until the wax has fully set, as it will be difficult to stir in the oil evenly at that point. The wax should be cooled just slightly, to around 150-160 degrees Fahrenheit before adding the fragrance.
When working with fragrance oils, it’s also important to source high quality oils from reputable suppliers. Poor quality or old oils may not have as strong of a scent. Certain types of oils also have properties that make them ideal for products like candles versus wax melts. Be sure to use candle-safe fragrances.
Pouring into Containers
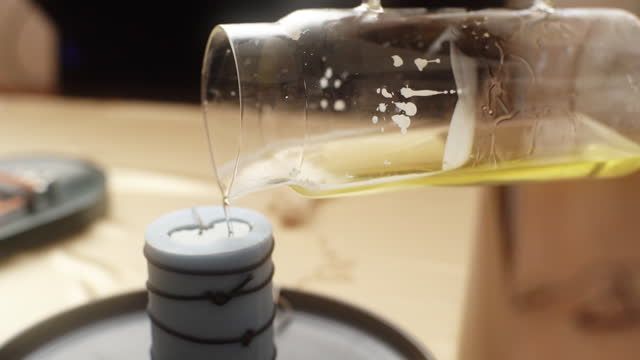
Once the wax has fully melted and you’ve added any fragrance or coloring, the next step is to carefully pour the liquid wax into containers. Small jars, tins, or silicone molds
work well for holding wax melts. Make sure the containers are heat resistant. Pour slowly to avoid spills and fill each container about halfway to account for shrinkage as the wax cools and hardens.
Aim for a pour temperature around 135-165°F to avoid issues with the wax setting up too quickly or being too thin. Allow extra pouring time if using a complex mold. Tap the containers gently on the counter to release any air bubbles after pouring. Leave room at the top for adding wicks later if making candles.
Once all the wax is poured, set the containers aside undisturbed to cool and harden completely before attempting to move them. The cooling process can take 1-2 hours. Curing the wax fully results in a smooth finished product.
Optional Coloring
To add some color to the wax, you can add candle dye blocks or liquid candle dye. Candle dye blocks come in a variety of vibrant colors and are easy to use. Simply add a small amount of the dye block to the melted wax while stirring until the desired color is achieved. It’s best to start with a smaller amount, like 1/8 block per pound of wax, and add more if needed for a darker shade. Liquid candle dyes also come in a wide range of colors and typically use 1/4 teaspoon per pound of wax for a medium shade, working up to 1/2 teaspoon per pound for a darker color (source). Adding too much dye can result in poor scent throw or affect how the candle burns, so it’s best to add conservatively especially when first experimenting with a new dye. To test colors, dip a strip of white paper into the dyed wax and let it cool to see the final color (source).
Adding Wicks
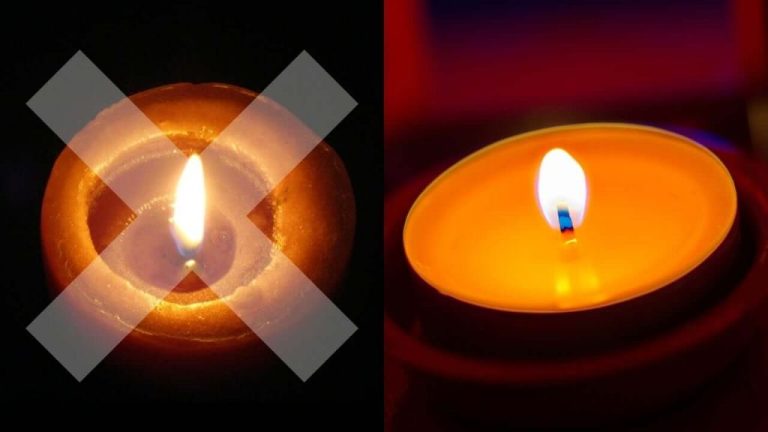
One of the most crucial steps when making candles from homemade wax is adding the proper wicking. Since homemade wax melts at a lower temperature than commercial candle wax, it’s important to use a wick that is trimmed to the correct height for the wax type. This helps ensure proper melt pool size and burn time.
For container candles, add wicks to empty containers before pouring in wax. Use a wick with a diameter sized for the container – a larger candle needs a wider wick. Secure wicks to the bottom center of containers with a drop of hot glue or wick stickums. Make sure wicks are straight and centered.
With pillar or votive candles, add wicks once wax is slightly cooled but still soft. Use wick tabs or a hot glue dot to secure wicks in place at the bottom center of the candle. Again, wick sizing is crucial. Test different wick types and trim lengths to find the best option for complete melt and clean burn.
No matter the candle type, trim wicks to 1⁄4 inch before burning to prevent excess smoking. Monitor candles the first few burns and adjust wick height as needed. Properly installed and trimmed wicks help homemade wax candles burn beautifully and safely.
Cooling and Settling
Once the candles are poured into containers, it is crucial to allow the wax to fully cool and settle before moving to the next step. Cooling the wax completely allows it to fully harden and shrink slightly as it transforms from a liquid to a solid state. Settling is the process where wax pulls away from the sides of the container, which can leave unsightly marks if not given proper time.
In general, aim to allow the poured candles to cool and settle for 24-48 hours before moving them. This gives the wax adequate time to completely harden and shrink back, resulting in smooth sides and a clean finish. Rushing this step can lead to cosmetic defects. If the candles are disturbed or moved too soon, the wax may pull away from the container sides unevenly.
Be patient and allow the cooling and settling process to fully complete. Once cooled and settled, candles are ready for the final steps like adding wicks, attaching lids, and labeling. This important resting period helps ensure your finished candles have a flawless appearance.
Uses
Homemade wax has many versatile uses around the home. Some of the most common uses for homemade wax include:
Candles – One of the classic uses for homemade wax is for making candles. The wax can be poured into candle jars or molds and allowed to cool and harden. A wick is then inserted to allow the candle to burn.
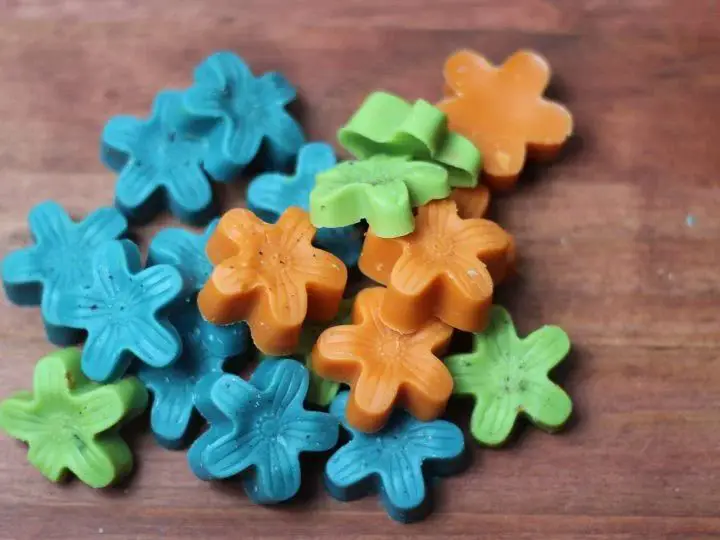
Wax melts – Wax melts are a popular candle alternative. The wax is poured into silicone molds and allowed to harden. A piece is then placed in a wax warmer to melt and scent the air.
Sealants – Homemade wax can be used to seal and protect wood surfaces. The wax is rubbed into the woodgrain to give the surface a protective coating.
Polishes – The wax can be made into a furniture or wood polish by adding essential oils. Use a soft cloth to buff the wax into wood to create a glowing sheen.
Lip balm – Beeswax is a common ingredient in natural lip balms. Essential oils and other ingredients can be added to the homemade wax to create your own custom lip balm.
Waterproofing – Canvas and other natural fabric materials can be made water resistant by rubbing wax into the fibers before use.