How Do You Cut Bottles For Candles?
Bottle candles have grown increasingly popular over the last decade. According to the National Candle Association, container candles like bottle candles are currently the most popular type of candle in the U.S. Source Consumer interest in home fragrance products and aromatherapy has helped drive demand for scented candles in decorative containers. The global candle market was valued at over $12 billion in 2021 and is expected to grow around 6% annually through 2030. Source
Bottle candles offer many benefits that appeal to consumers. They allow for creativity and customization when choosing a bottle and arranging decorations. The candlelight shining through colored glass creates ambiance. Scented bottle candles effectively fragrance a room. Recycling bottles into candles reduces waste. Making bottle candles yourself is an enjoyable DIY project. Overall, bottle candles are an attractive option for home decor and gifts.
Gather Materials
When choosing bottles for candle making, opt for heat-resistant glass bottles made from tempered or borosilicate glass. Mason jars work well since they are designed to withstand high heat levels for canning. According to Village Craft and Candle, tempered glass jars made specifically for candles are best. Avoid using plastic containers or glass that is prone to cracking. As Life n Reflection states, make sure the glass is smooth and free of defects so the melted wax will release easily.
You’ll also need candle wicks, which come in different diameters. Choose a wick size suited to your bottle’s opening. Wicks are typically made from cotton, wood, or paper. Gather candle wax flakes, granules, or blocks – common types are paraffin, soy, beeswax, or blends. Other supplies include candle dyes for color, essential oils or fragrances for scent, adhesive for attaching the wick, and any decorative embellishments.
Prepare the Bottle
The first step in preparing bottles for candle making is to clean and dry them thoroughly. It’s important to remove any dust, dirt, or moisture from the bottle’s surface before cutting to allow for a smooth cut.
Be sure to remove all labels and adhesive residue from the bottles. According to How To Make Wine Bottle Candles: Ultimate DIY Guide, you can soak the bottles in warm water to loosen the labels before peeling them off. Use a bottle brush and bottle cleaning solution to scrub off any remaining adhesive.
Once the bottles are squeaky clean and dry, they are ready for cutting and transforming into beautiful candles.
Measure and Cut
Before cutting, you’ll need to determine the height for your bottle candle. Consider the look you want and how much space the candle will need to fit. The most common bottle heights for candles are 3-5 inches, but you can customize it.
Once you decide on the height, use a marker or pencil to draw a straight line around the full circumference of the bottle where you want to make the cut. Make sure the line is dark and visible – this will be your guide when cutting.
For cutting glass bottles, you’ll need a proper glass cutter or bottle cutter tool. Don’t try to cut glass with a regular knife or scissors! Specialty cutters have a small carbide cutting wheel that scores the glass surface. Apply firm, even pressure and roll the cutter along the marked line. You can also use string, hot water, or a candle flame in combination with cold water to cut bottles, but these may produce less precise results.[1] After scoring, the glass will usually break cleanly along the cut line with just a light tap. Be very careful handling the sharp edges!
Smooth the Edges
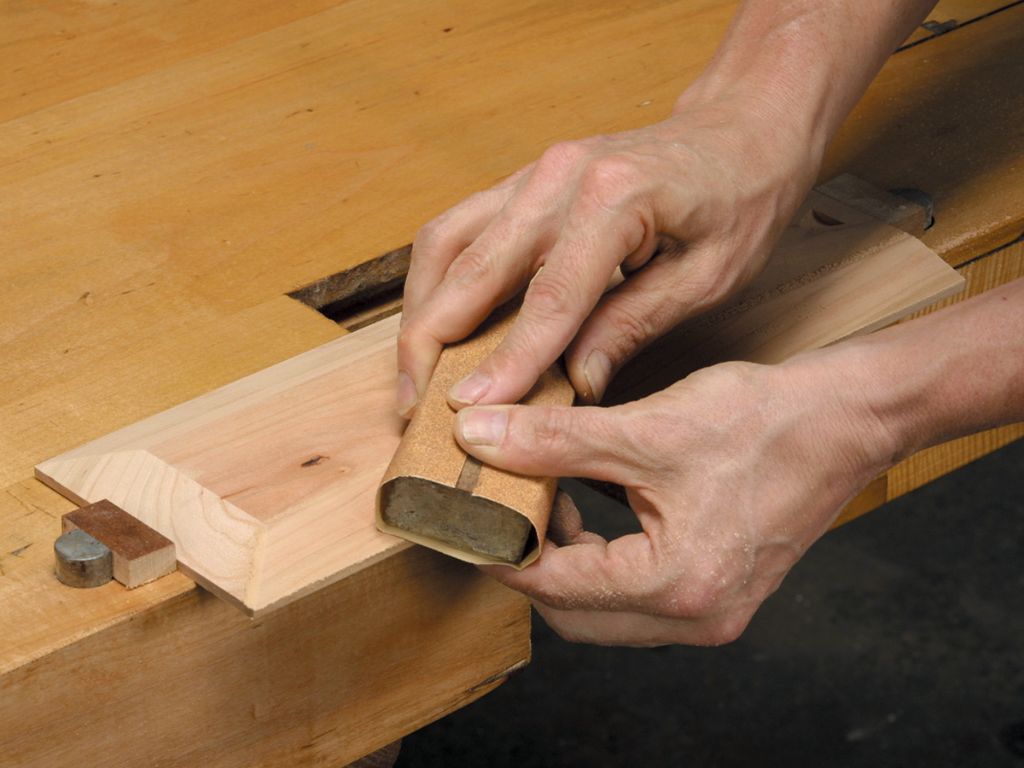
It’s important to smooth the edges after cutting a glass bottle. Sharp edges can easily cut skin and are dangerous to handle. Sanding the edges will round them out and make them smooth to the touch.
You’ll need some basic sanding tools like wet/dry sandpaper in varying grits ranging from coarse to fine. Start with a lower 80-100 grit paper to do the bulk of the smoothing. Apply water liberally and rub the sandpaper back and forth along the cut edge in a circular motion, taking care to round out any sharp points or jagged areas. You may need to re-wet the sandpaper frequently.
Work your way up through higher grits like 150, 220, and 400 grit sandpaper. This will progressively smooth the glass until it has a polished, glossy edge. Take your time and don’t rush the smoothing process. Pay close attention to any remaining rough spots and work them until smooth. The end result should be a uniform, rounded, and glossy edge safe to handle and touch.
Add Wick
Choosing the right wick is crucial for your wine bottle candle to burn properly. There are a few factors to consider when selecting a wick:
Wick Diameter – The wick must be proportional to the diameter of the bottle opening. A wick that is too small will drown and create smoke, while too large of a wick can create big flames and get too hot. For a standard wine bottle, a #4-#6 medium wick is recommended.
Wick Type – Cotton, paper-cored, and wood wicks are common options. Cotton wicks are economical and burn well. Paper-cored wicks help sustain an even burn. Wooden wicks make a crackling sound.
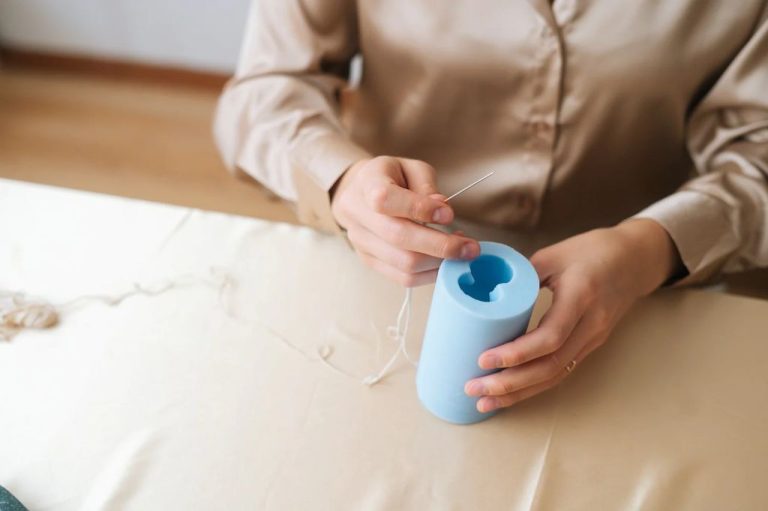
Securing the wick is an important step. You want the wick to stand straight up in the center of the bottle. There are a few methods to achieve this:
– Hot glue the wick to a chopstick or pencil and place it in the bottle opening until the wax hardens.
– Secure the wick halfway down the bottle with adhesive putty or tape.
– Tie a washer, nut, or bolt to the bottom of the wick to weigh it down.
The wick needs to reach all the way to the bottom of the bottle so that the entire candle can melt and burn.
Prepare Candle Wax
After cutting and preparing the bottle, the next step is to prepare the candle wax. Be sure to use wax specifically formulated for container candles, as regular candle wax may not adhere properly to the glass surface of the bottle. According to How To Make Wine Bottle Candles: Ultimate DIY Guide, soy wax is recommended for bottle candles.
To prepare the wax, place soy wax flakes or pellets into a heat safe pouring pot or pitcher. Melt the wax using a double boiler method, taking care not to overheat it. Once melted, the wax should be around 180-200°F. At this point, you can add candle dye and fragrance if desired. Use caution when adding fragrance, as too much can inhibit the candle’s burn. A good rule of thumb is 1 ounce of fragrance per 1 pound of wax. Stir well to fully incorporate the dye and fragrance.
The wax is now ready to be carefully poured into the cut wine bottle. Pour to a depth of at least 1 inch to promote a long, even burn. Allow the candle to fully harden before trimming the wick and lighting.
Pour the Wax
Once the wax is fully melted and ready for pouring, carefully pour it into the mouth of the bottle in a steady stream. According to Lonestarcandlesupply.com, “Slowly pour the hot wax into the jar making sure it doesn’t splash up on the sides” https://lonestarcandlesupply.com/pour-melted-wax-into-a-jar/. Pouring too quickly can cause air bubbles or an uneven surface. Fill the bottle about 1/2 to 2/3 full to allow room for the wick and to prevent overflow as the wax cools and contracts.
Allow the wax to cool completely before moving or handling the candle. This may take 6-12 hours depending on the size of the bottle. Kalamazoocandle.com recommends “Letting candle cure for at least 48 hours before burning” https://kalamazoocandle.com/blogs/learn-about-candles/how-to-make-wine-bottle-candles. As it cools, a concave dip may form at the top – this is normal. Multiple pours may be needed to fill the dip and achieve a flat level surface.
Finish the Candle
Once the wax has fully hardened and cooled, you can finish up your wine bottle candle. An important step is to trim the wick to 1⁄4-1⁄2 inch before lighting. This helps control the flame and prevent it from getting too big. You can use scissors or wire cutters to trim the wick.
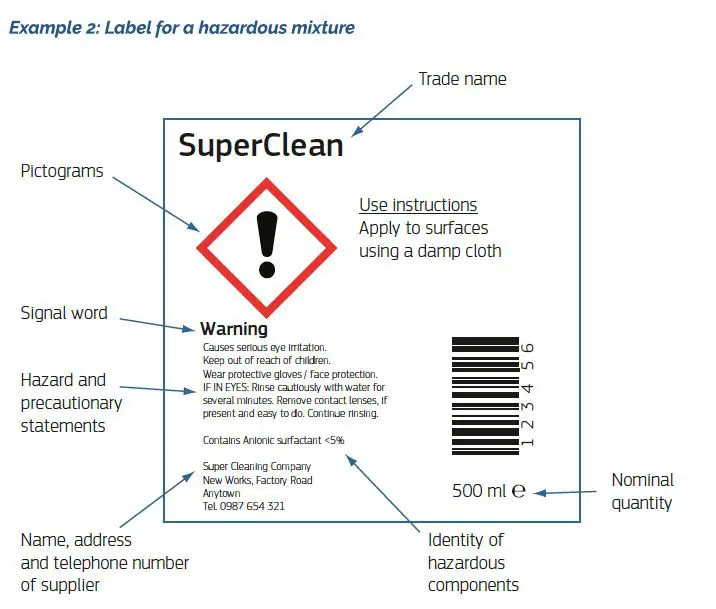
You’ll also want to add a label to your candle, either writing directly on the bottle or adding a tag. Get creative with the label! List the wine varietal, a fun name, or label it as a gift. You can find printable candle label templates online or create your own on the computer.
According to this guide, trimming the wick helps sustain an even burn and prevents tunneling. Proper wick length is important for performance and safety.
Safety Tips
When working with glass bottles for candles, it’s important to take proper safety precautions. According to Candle Making Safety Tips, all glass jars should be cleared by the manufacturer as safe for candles. You want to avoid using any container not deemed candle-safe.
When handling melted wax, there are also key safety tips to follow. As noted in 5 Candle Making Safety Tips Everyone Should Follow, always use appropriate equipment like a double boiler for melting wax. Never leave melting wax unattended. Wear protective gear like gloves and eye protection when pouring hot wax. Work in a well-ventilated area. Keep a fire extinguisher on hand in case of accidental ignition. Allow adequate time for candles to fully cool and harden before handling.
Following basic safety precautions when making candles with glass bottles will help ensure the process goes smoothly and safely.