How Do I Make A Line Sheet In Word?
What is a line sheet?
A line sheet is a document used to organize and display product information to potential buyers. It lists details about products a company offers, such as:
- Product names and descriptions
- Colors and sizes available
- Item numbers or SKUs
- Wholesale cost and retail price points
- Product images
Line sheets help sales representatives showcase their collection of products during sales meetings and pitches to retail buyers. They provide buyers with a concise overview of all the products being offered for the season. Having products organized on a line sheet makes it easier for buyers to evaluate and select items to purchase for their retail stores.
Why make a line sheet in Word?
Word is an accessible and easy-to-use program that most people already have installed. This makes it a convenient choice for creating and sharing line sheets. Here are some of the benefits of using Word:
Allows you to easily add images, text, and tables to create an attractive and organized line sheet. You can format fonts, colors, and layouts in Word to make the line sheet visually compelling.
Offers formatting options like text wrapping around images that are not available in Excel. Word provides more flexibility in terms of design.
Since Word is part of Microsoft Office, it is a software that most businesses and people already use. This makes sharing and collaborating on line sheets seamless.
The files are easy to export and share as PDFs or in Word format. You can also print sheets directly from Word.
In summary, Word is an optimal choice for DIY line sheets because it’s accessible, full of useful features, and facilitates collaboration and sharing.
Set up the document
When creating a new line sheet in Word, the first step is to set up the document with the appropriate page layout and settings. This will provide a clean foundation to build the sheet on.
To start, open a new blank Word document. Then go to the Layout tab and adjust options like page orientation (portrait or landscape), margins, and paper size based on the dimensions you need for your sheet. Landscape orientation allows you to fit more content width-wise. Margins can be narrowed to utilize more space.
Next, add a header and footer by going to Insert > Header & Footer. The header is a good place to put your company logo and name. The footer can display page numbers and the date.
Finally, go to View > Print Layout to see the page breaks as you add content. Having the proper document layout from the beginning will make organizing products and details easier as you build out the sheet.
Overall, taking the time to set up the Word document correctly will provide the ideal structure and formatting for a professional looking line sheet.
Organize products into tables
The easiest way to organize your product details in a line sheet is by using tables in Word. Here are some tips:
Insert a table with columns for product information like name, image, colors, price, etc. To insert a table, go to the Insert tab and click on Table. Select the number of columns and rows needed. You can add or remove columns and rows later if needed.
To add columns, click inside the table, go to the Layout tab under Table Tools, and click on “Insert Left” or “Insert Right”. To remove columns, select the column and go to Layout > “Delete” > “Delete Columns”.
You can adjust column widths by selecting a column, going to Layout > “AutoFit”, and choosing an option. Make the product image column wider and text columns narrower.
For product details that span multiple rows like product descriptions, merge cells by selecting the cells and going to Layout > “Merge Cells”.
Use table formatting options like borders and shading to make the tables easy to read. Go to Design > “Borders” and “Shading” to customize.
Organizing products into tables makes the sheet neater, easier to update, and enables custom formatting.[1]
Add product images
Adding photos of each product alongside the item details is key for providing buyers with a visual reference. Here are some tips for including product imagery in your line sheet:
Insert product photos into table cells or alongside text descriptions using the Insert > Pictures menu in Word. Make sure to resize images proportionally so they fit neatly within cells without distortion using the image toolbar. For nicer formatting, consider adding a solid fill color to table cells before inserting pictures.
To resize quickly, select the image then drag any of the corner handles to make larger or smaller. Images can also be set to automatically resize to fit within the cell under the Layout tab.
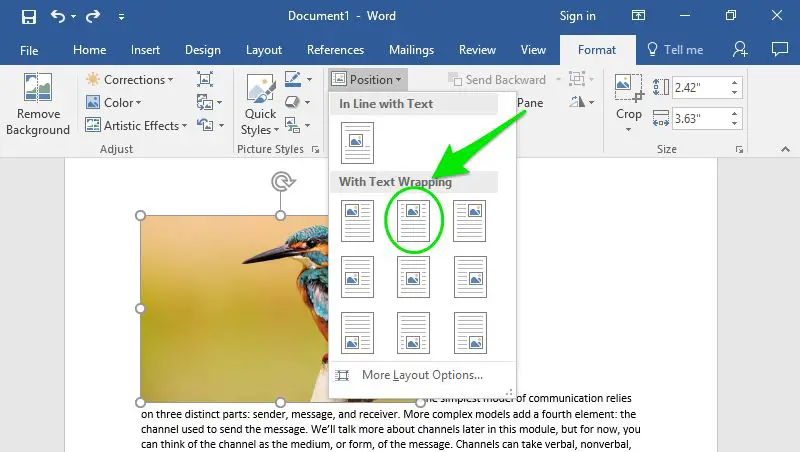
Right click on a picture and choose Wrap Text to flow text around the image for a magazine-style layout. Adjust text wrapping settings to find an optimal balance of image placement and text flow.
For digital line sheets, hyperlink images to product pages on your company website so buyers can seamlessly click through. Select the picture, click Hyperlink in the Insert tab, and paste the URL.
Strategically inserting product photos makes sheets more visually engaging. Experiment with layouts to find what works best for prominently featuring images within your document.
Include all relevant product details
Filling out all columns in the table with relevant product details is crucial for an effective line sheet. As Top 5 Tips on How to Create a Great Line Sheet notes, you’ll want to cover details like the product name, description, available colors, sizes, pricing, and any other pertinent information.
The product descriptions should give buyers and retailers a clear sense of the item, materials used, design features, etc. Having images is also key, as mentioned in the Wholesale Line Sheet 101 Guide. In addition to the product specifics, the line sheet should note any items that are unavailable or have custom options.
Making thorough notes on each product ensures potential buyers have all the details they need to make purchasing decisions. Leaving out information can lead to confusion and missed sales opportunities. Aim to be as comprehensive as possible when filling out the line sheet tables.
Use formatting to organize
Formatting can help make your line sheet more scannable and easy to read. Some tips:
- Bold or highlight product names or section headers. This helps the important information stand out.
- Use text colors, borders, or shading to improve readability. Breaking up the text makes it easier on the eyes.
- Make entire rows clickable links if it’s a digital sheet. That allows the viewer to seamlessly get more details on a product.
Overall, leveraging Word’s formatting options like fonts, colors, and borders can help organize your sheet and draw attention to key details. Just be sure not to go overboard with fancy formatting as that can make the sheet overly busy and hard to read.
Sources:
https://smallbusiness.chron.com/create-lined-document-word-53771.html
Save and export the line sheet
Once your line sheet is complete in Word, you’ll want to save it in a shareable format for sending to retailers and partners. There are a few options:
- Save as a Word .docx file for easy editing. This format allows you to make changes later on.
- Export or save as a PDF for a locked version that can’t be edited. PDFs are great for sharing a “final” sheet.
- Export the sheet as an HTML file to create a digital line sheet. The HTML format preserves formatting and allows you to post the sheet online (according to this guide).
You can also print hard copies as needed for meetings, trade shows, and conventions where you’ll be showing your product line in person.
The ability to share your line sheet digitally as a Word, PDF, or HTML file makes it easy to distribute to potential buyers and partners. Just be sure to keep the file updated as your product offerings change each season.
Update regularly
It’s important to regularly review and update your line sheet to keep buyers informed about your latest products. Each season or collection release is an opportunity to refresh the sheet with new information:
- Review and update the sheet each season/collection to showcase new products. Remove any discontinued items.
- Refresh product images to use photos of the newest product versions. Make sure imagery is high-quality and shows products clearly.
- Update pricing, product IDs, descriptions, and other details as needed. Note any changes in availability, colors/variants, sizes, etc.
- Share the latest version of the line sheet with buyers so they always have access to your current offerings. Send via email or post on a website, sales portal, etc.
Maintaining an up-to-date line sheet allows buyers to easily place orders and helps drive sales of your newest items. Put a reminder in your calendar before each market or season to review and refresh your sheet.
Get feedback
It’s important to get feedback from buyers after sending them your line sheet. This allows you to improve the sheet going forward.
After a buyer has reviewed your line sheet, follow up and ask for their input on ways to improve it. You can ask questions like:
- Was the sheet easy to read and navigate?
- Were any important product details missing?
- Were any unnecessary details included?
- How could the formatting be improved?
Listen carefully to their responses and take notes on any suggested changes. Then, update the line sheet template based on the feedback. For example, you may need to adjust the formatting to make it easier to scan, or add an important column that was missing.
Getting regular feedback will ensure your line sheet provides the necessary information to buyers in the clearest, most useful way. Over time, incorporating buyer input will improve your sheets and make life easier for your customers.