How Can I Do My Own Wax?
Introduction
Waxing is a hair removal method that many prefer over shaving for its longer-lasting results. While waxing at a salon or spa can get expensive over time, waxing at home is a cost-effective alternative that can save you significant money compared to professional services. According to https://www.vidasleek.com/blogs/blogs/the-expense-of-waxing-home-vs-salon, waxing at home will only cost you $14 to $75 per session, while salon waxing services can cost much more per visit. This guide will walk through the entire process of waxing safely and effectively at home.
Materials Needed
The main supplies you’ll need for an at-home wax are:
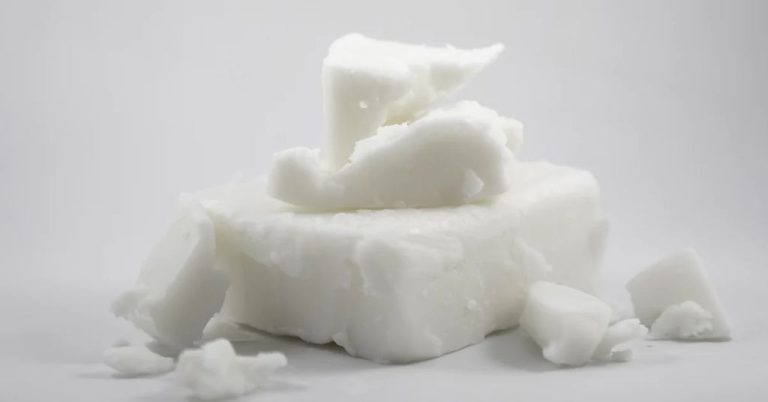
- Wax – This comes in two main types: hard wax and soft wax. Hard waxes are ideal for sensitive areas like the bikini region because they only adhere to hair and not skin. Soft waxes stick to both hair and skin so are better for larger areas like legs or arms. Hard wax is usually preferred for DIY waxing.
- Wax warmer – This melts the wax to the ideal temperature for application. Look for a warmer with adjustable heat settings.
- Wax applicators – You’ll need either wood or plastic applicators to apply the wax. Cut up popsicle sticks work well.
- Muslin strips – These cotton strips are used to pull off soft wax. Hard wax can be peeled off without strips.
- Exfoliant – Use a scrub before waxing to remove dead skin cells and allow for easier hair removal.
- Baby powder or oil – These help the wax adhere less to skin.
Make sure to get a wax made specifically for at-home use, not salon-grade wax which requires professional experience to use safely. Also have aftercare supplies on hand like aloe vera gel.
Preparing the Skin
Properly preparing the skin before waxing is crucial for getting smooth results and avoiding irritation. Exfoliating 24-48 hours before waxing helps remove dead skin cells and allows the wax to adhere closely to the hair for more effective hair removal.
Use a gentle body scrub with ingredients like sugar, salt, coffee, or oatmeal to lightly scrub the area you plan to wax. This will help lift any dry, flaky skin and prevent ingrown hairs (source). Do not scrub too harshly or exfoliate right before your appointment, as this can cause sensitive skin to become red and irritated.
Chemical exfoliants with alpha hydroxy acids (AHAs) or beta hydroxy acids (BHAs) can also help keep skin smooth before waxing by dissolving dead skin buildup. Look for serums or lotions with glycolic acid, lactic acid, or salicylic acid and apply a day or two before waxing (source).
After exfoliating, avoid using scrubs, masks, or products that contain retinol leading up to your wax to prevent extra skin sensitivity.
Heating the Wax
Before applying the wax, it’s crucial to heat it to the ideal temperature for effective hair removal. According to experts, keeping the wax heated to 105.8°F or 41°C is recommended for the best results (source). Wax that is too hot can burn or irritate the skin. On the other hand, wax that is too cold will be thick and sticky, making it difficult to apply and remove.
When it comes to hard waxes specifically, some technicians recommend keeping the wax warmer around 65 degrees Fahrenheit to maintain the proper hardened but spreadable consistency (source). Hard waxes need to be warm enough to spread easily but cool enough to harden quickly once applied.
To find the right temperature, it’s best to follow the recommendations on your wax product’s packaging. Then, use a thermometer to monitor the temperature and adjust your wax warmer as needed. Heating the wax little by little until the ideal temperature is reached will prevent overheating. With some trial and error, you’ll find the optimal temperature for the wax you are using.
Applying the Wax
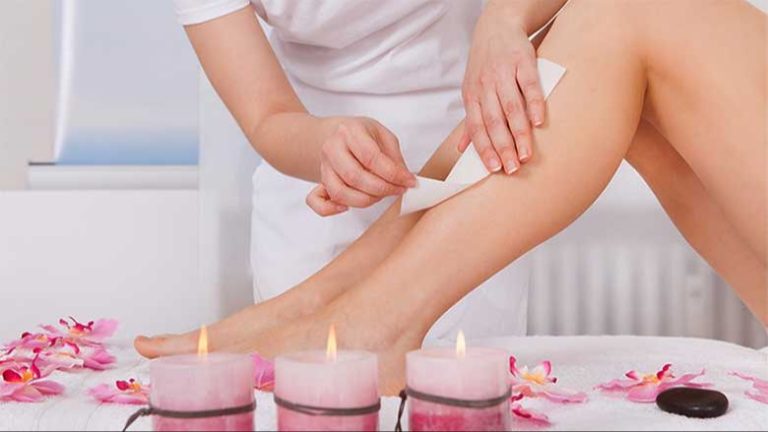
There are two main methods for applying wax – using waxing strips or applying wax directly to the skin without strips. The method you choose depends on whether you are using a soft wax or a hard wax.

Soft waxes are typically applied using waxing strips. To use this method:
- Cut strips of fabric, like muslin or cotton, into sizes appropriate for the area being waxed.
- Apply a thin, even layer of soft wax in the direction of hair growth.
- Press the strip firmly onto the wax, smoothing it to make sure it adheres.
- Holding the skin taut, quickly rip the strip off in the opposite direction of hair growth.
Hard waxes are designed to harden on the skin and be removed strip-free. To use this method:
- Test the temperature of the wax on the inside of your wrist first – it should be just warm enough to spread thinly but will harden quickly.
- Spread a very thin, uniform layer of hard wax over the area with a spatula or popsicle stick.
- As the wax hardens, it will shrink and lift off the skin, trapping the hair beneath it.
- Grasp a corner of the hardened wax and swiftly flick it off against the direction of hair growth.
Going strip-less with hard wax allows for less painful hair removal and is gentler on sensitive areas of skin. Be sure to follow aftercare directions to avoid irritation.
Removing the Wax
When removing the wax, it’s important to work quickly and efficiently. First, press the cloth or paper strip firmly against the skin to ensure it adheres properly. Holding the skin taut with one hand, swiftly pull the strip off in the opposite direction of the hair growth. Use a quick, darting motion instead of pulling slowly. Rip the strip off as close to the skin as possible, going against the direction of hair growth. The speed and technique you use is key for minimizing discomfort during this step, according to experts from the American Academy of Dermatology (source). Pulling off the strip quickly elicits less pain compared to a gradual removal. After removing one strip, apply another across the waxed area, pressing firmly before pulling. Repeat until you have removed all the wax.
Aftercare
After waxing, it’s important to take proper care of your skin to avoid irritation, inflammation, and ingrown hairs. The skin may be sensitive after waxing, so be gentle and avoid harsh products. According to The Remedy Room, you should apply an antiseptic cream to the waxed area regularly for 3 days after your treatment to soothe and protect the skin. Always wash your hands before touching the treated area.
Waxcenter recommends avoiding sun exposure for 24-48 hours after waxing. The sun can cause inflammation and irritation on sensitive post-wax skin. It’s also important not to shave between waxes, as this can increase ingrown hairs. Allow the hair to grow out to the proper length before your next wax.
Exfoliating is key to prevent ingrown hairs, but avoid exfoliating immediately after waxing as the skin needs time to heal. Starpilwax recommends exfoliating 24 hours before and after your wax to remove dead skin cells and allow new hairs to grow through cleanly. Use a gentle scrub or loofah when exfoliating.
Pain Management
One way to help manage pain during waxing is by using a numbing cream or spray. Popular options include products like GiGi Anesthetic Numbing Spray or Tina Davies Zensa Numbing Cream. These creams contain lidocaine or similar anesthetics that can temporarily numb the skin when applied 30-60 minutes before waxing.
Numbing creams are especially useful for sensitive areas like the bikini line. Always follow package directions carefully. While numbing products can help make waxing more comfortable, they don’t eliminate pain completely. Avoid applying them to damaged or broken skin.
Troubleshooting
Redness and irritation are common side effects after waxing. Here are some tips to help soothe the skin and reduce discomfort:
Apply a cold compress or take a cool shower to help soothe inflammation. The cold temperature helps constrict blood vessels and reduce swelling (https://www.healthline.com/health/beauty-skin-care/bumps-after-waxing).
Use a gentle, fragrance-free moisturizer to hydrate the skin. Look for calming ingredients like aloe vera, chamomile or green tea (https://www.byrdie.com/how-can-i-calm-sensitive-red-skin-after-waxing-1717174).
Wear loose, breathable clothing to avoid friction and irritation on the treated areas.
Avoid irritants like strong fragrances, exfoliants, or retinol creams which can further aggravate the skin.
If irritation persists for more than 48 hours or you notice signs of infection, contact your dermatologist.
Conclusion
In summary, waxing has many benefits over shaving. Some of the key advantages are:
- Waxing lasts longer – hair regrowth can take 3-6 weeks compared to just a few days with shaving.
- Waxing removes hair from the root so it grows back softer and thinner over time.
- Waxing avoids the nicks, cuts and irritation that can happen from shaving.
- Waxing leaves skin smooth and stubble-free for weeks.
- Over time, waxing can help reduce the amount of hair that grows back.
While waxing does take more effort upfront, for those wanting to avoid frequent shaving and enjoy weeks of smooth hair-free skin, waxing at home can be a great option.


