Can You Pour Candles Into Mason Jars?
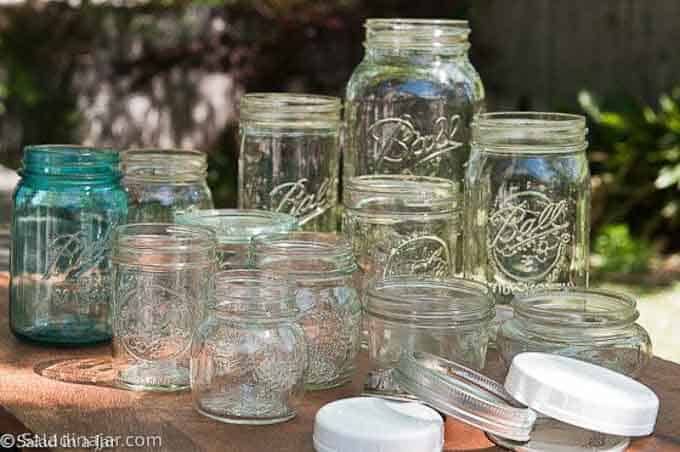
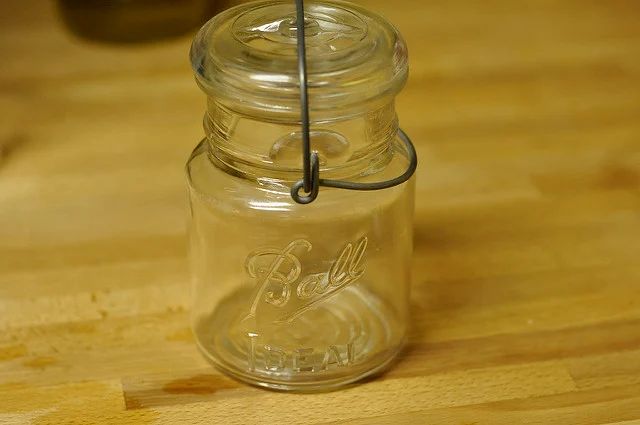
Pouring candles into mason jars has become a popular DIY craft project. Mason jars provide a cute, rustic, and customizable container for homemade candles. The glass of the jars allows the flickering candlelight to shine through attractively. Mason jars are inexpensive, readily available, and come in a range of sizes. They can usually withstand the heat of the melted wax during pouring. However, care should be taken to ensure the glass is properly tempered and heat resistant (1). The finished candle in a mason jar makes a great gift or home decor item.
When pouring candles into mason jars, there are a few considerations to keep in mind. Properly preparing the jars, using the right pouring temperature, and allowing time to cure are important steps. This ensures the wax adheres correctly and the candle burns evenly. With some simple safety precautions, this easy DIY results in stunning decorative candles with wonderful scents. The unique designs possible make it a fun craft and satisfying way to create beautiful ambiance and decor for your home.
Types of Candles
There are a few main types of candle wax to consider when pouring candles into mason jars:
Paraffin wax is made from petroleum. It is inexpensive and easy to work with, making it a popular choice for candle making. Paraffin wax melts at a low temperature and produces a bright, long-lasting flame. However, some find the scent of paraffin unpleasant and prefer natural wax options (source).
Soy wax is made from soybean oil. It is a cleaner burning, renewable resource. Soy wax melts at a low temperature so it is easy to work with. It holds scent well. The drawback is that soy wax does not retain its shape as well as paraffin, so it works better in containers versus pillars (source).
Beeswax is a natural wax made by honey bees. It has a lovely honey scent when burning. Beeswax candles burn slowly and cleanly. The drawback is beeswax is expensive and can be challenging to work with as it has a high melting point.
For container candles, soft waxes like soy, coconut, or a soy-paraffin blend are recommended as they adhere well to the sides of the glass as they cool. For freestanding pillar candles, a harder wax like paraffin is recommended to hold its shape (source).
Choosing a Jar
When choosing a jar for pouring candles, you’ll need to decide between glass or metal options. Glass jars are the most popular choice as they allow you to see the candle wax and fragrance. Look for heat-resistant borosilicate glass to withstand the hot wax. Mason jars are a commonly used glass jar type. You can find them in a variety of sizes like 4 oz, 8 oz, 12 oz, etc. They have a classic, vintage look. Other decorative glass jar styles let you get creative. Just ensure any patterns or textures inside won’t interfere with releasing the candle.
Metal tins or containers are another option, often seen in travel tins or votive holders. Tin allows for a more rugged, industrial design. However, you won’t be able to see the candle wax itself. Tins also tend to be smaller in size, like 3-4 oz capacity. They work well for tealight or votive candles. Just ensure any metal container is specifically designed to hold hot wax and has a lip for the wick (Source: https://www.ryanhart.org/wholesale-candle-jars/).
Consider what size and shape jar makes sense for your candle type. Votives and tealights fit well into small, skinny metal tins. Pillar candles and jars candles work best in wider mouth cylindrical containers. Take into account the candle burn time you want to achieve too. Larger jars allow for bigger wax pools and longer burn times. A 6 oz jar can burn for 60-80 hours, while a 10 oz may last 90-100 hours (Source: https://www.ryanhart.org/wholesale-candle-jars/).
Finally, think about the aesthetics. Decorative jars with patterns, textures, or colors can enhance the candle’s look. Plain mason jars provide a clean, simple appearance. Just ensure any decorative touches inside the jar won’t interfere with properly releasing the candle. The jar style you choose impacts the overall product appearance.
Preparing the Jar
Before pouring candles into mason jars, it’s important to properly prepare the jars. Here are some tips:
Cleaning and drying – Mason jars should be thoroughly cleaned with soap and warm water to remove any dust, oils or residue. Make sure to rinse and dry the jars completely since any moisture can impact how the wax adheres to the glass. Try using a lint-free cloth for a spotless finish.
Using jar accessories – You can customize your candles by adding items inside the jar before pouring wax. Popular options are seashells, coffee beans, dried flowers or tea leaves. Just make sure any items are fully dry first. You can also use candle accessories like wicks and wick stickers specifically designed for mason jars.
Pre-warming – Some candle makers recommend gently warming mason jars before pouring wax to prevent cracking from temperature shock. You can do this by placing clean, dry jars in a low oven or rinsing with hot water. Just be cautious as glass can be slippery when wet or hot.
Taking the time to properly clean, dry and accessorize the mason jars will help ensure your homemade candles come out perfectly.
Melting the Wax
There are a few different methods for melting candle wax. Two popular options are using a double boiler or microwave.
A double boiler gently heats the wax to the proper pouring temperature without scorching or burning it. Fill the bottom pot with an inch or two of water and place the wax in the top pot. Heat the water to simmering, between 180-200°F, stirring the wax occasionally until fully melted. This slower heating gives you more control over the temperature.
The microwave can melt wax very quickly, but requires caution to avoid overheating. Melt the wax in short intervals, around 30 seconds at a time, then stir and check the temperature. Going too long can scorch the wax. Microwave in a glass or microwave-safe container. The ideal wax temperature for pouring is between 150-165°F.
Getting the wax to the right temperature is crucial. If it’s too hot, above 180°F, the fragrance oils can burn off. Too cold, below 130°F, and the wax can start to solidify too soon while pouring (Source). Use a thermometer to carefully monitor the melted wax temperature.
Adding Fragrance
Choosing the right fragrance is key to creating appealing candles. You have two main options for scenting candles – fragrance oils or essential oils.
Fragrance oils are artificially created scents designed specifically for candle making. They offer excellent scent throw and come in a huge variety of options. According to Candleers, the recommended usage rate for fragrance oils is 6-12% of your wax weight (1). This ensures sufficient scent while avoiding issues like fragrance burn-off.
Essential oils are natural plant extracts, making them a popular choice for those looking to avoid synthetic ingredients. However, essential oils are not as strong as fragrance oils. Recommended usage rates are typically around 3-5% (1). At this level, you may get a lighter scent from the finished candle.
Blending scents is an art but can result in unique, sophisticated candles. As a general rule, use equal amounts of each fragrance and adjust to taste. Start with lower percentages around 4-6% total when blending (1).
(1) https://www.candleers.com/how-much-fragrance-oil/
Pouring the Candles
When pouring candles into jars, proper technique is important for getting a clean burn and minimizing issues like sinkholes. According to Candle Making University, the wax should be around 135-165°F when pouring into the container1. Pour the wax slowly and steadily in a circular pattern around the wick to prevent splashing. Leave at least 1⁄4 inch of headspace at the top of the jar.
After the main pour, it’s a good idea to top off the candle. Let the wax cool and solidify for a few hours, then remelt and add a small final layer of wax. This helps prevent sinkholes by accounting for initial shrinkage as the wax cools2. After topping off, allow the candles to fully cure for 24-48 hours before burning to ensure the wax has completely solidified.
Proper pouring and curing helps maximize the burn time and minimize issues with mason jar candles. Taking the time to follow best practices leads to beautiful finished candles to enjoy.
Curing the Candles
After pouring candles into jars, it’s crucial to allow adequate curing time before lighting them. Curing refers to allowing the wax to fully harden and stabilize over a period of days or weeks. This helps ensure proper burn quality and performance.
The necessary curing time can vary depending on the wax type:
- Paraffin candles: 3-5 days
- Soy candles: 7-14 days
- Beeswax candles: 7-10 days
Curing too quickly can cause issues like tunneling, where the flame burns unevenly through the center. Storing candles in a cool, dry area helps slow the curing for best results. Candles made from natural waxes like soy or beeswax need extra time to fully harden.
To test if a candle is fully cured, you can gently press a fingertip into the wax surface. If your fingerprint remains, it needs more time. If the wax quickly bounces back and smooths over, the candle should be ready for use. Taking the time to properly cure poured candles helps maximize their burn quality and fragrance.
Troubleshooting
Some common issues arise when pouring candles into mason jars:
Wet Spots – A wet spot is when wax pools unevenly, leaving part of the candle surface dotted with liquid wax droplets. This happens when the fragrance oil concentration is too high or the wax is overheated. To avoid wet spots, use the recommended amount of fragrance and heat the wax to the proper temperature (source).
Frosting – Frosting occurs when white wax crystals form on the candle surface as it cools. This is usually caused by pouring the wax at too low of a temperature or cooling the candle too quickly after pouring. To prevent frosting, pour wax at the recommended temperature and allow candles to cool gradually (source).
Sinkholes – Sinkholes form when wax adhering to the sides of the glass contracts as it cools, pulling wax away from the center. To fix, remelt the candle and repour just the center to fill the hole. Avoid sinkholes by heating the glass before pouring and pouring at the proper temperature (source).
Tunneling – When a candle burns unevenly, creating a tunnel down the center, it is called tunneling. This happens if the wick is too small or if there is impurity buildup on the wick. Trim the wick or try a larger wick size to fix tunneling problems (source).
Safety Tips
Candle making involves working with hot wax, so safety should always be a top priority. Here are some key tips to keep in mind:
Working with hot wax – Wear protective gear like gloves, long sleeves, closed toe shoes and safety goggles when pouring wax that is above 135°F. Always pour wax slowly and deliberately to avoid splashes and spills. Allow poured candles to fully cool and harden before handling to prevent burns. Work on a surfaces that can withstand heat and are easy to clean wax from.
Ventilation – Work in a well-ventilated area to allow wax vapors to dissipate. Open windows and use fans to keep air circulating. Avoid breathing in wax vapors directly. Take breaks outdoors if needed. Consider wearing a respirator mask if working extensively with fragrance oils, which can irritate airways.
Fire safety – Keep candles away from flammable materials, children, and pets while pouring and cooling. Have a fire extinguisher on hand. Avoid distractions and remain attentive while melting and pouring wax. Extinguish all flames before leaving your work area. Let wax fully harden before trimming wicks to prevent accidental igniting.
Following basic safety guidelines will allow you to make candles safely. Pay close attention when working with hot wax, maintain adequate ventilation, and control potential fire hazards.

