What To Do If Your Candle Wick Is Not Centered?
Why Wick Centering Matters
A properly centered wick is crucial for a candle to burn safely and evenly. When the wick is off-center, it can lead to issues like tunneling, where wax melts unevenly, and an uneven burn rate. As Candlewic explains, “It is very important for the safety of the burning candle and performance that the wick is centered in the entire candle.”
An off-center wick burns the wax around it faster than wax further away. This makes the candle tunnel down on one side, leaving excess melted wax on the other side. The flame gets lower in the tunnel, which leads to incomplete burning and more soot. An off-center wick also causes the candle to burn unevenly, making one side hotter. This poses safety risks if the glass or wax overheats on one side. For optimal safety and to prevent tunneling, the wick must be centered properly.
Diagnosing the Problem
The first step is to look at the wick to see if it is off-center in the wax pool. Carefully observe where the wick is situated in the candle. If the wick is leaning to one side or not aligned in the middle, then it is considered off-center. You may be able to discern this just by looking at the top of the unburned candle. However, it becomes more apparent once the candle has been lit and a wax pool forms around the wick.
According to Suffolk Candles, “A misaligned wick can cause your candle to burn unevenly, drip, or smoke. If your wick is not centered, one side of the wick will likely burn faster than the other” (https://suffolkcandles.co.uk/blogs/candles/candle-wick-not-centered-how-to-fix-it).
One way to check is by lighting the candle and allowing the wax pool to form. Pay attention to whether the wick remains centered as the candle burns. If the wick starts off centered but becomes off-center as the wax pool develops, that indicates the wick itself is not properly aligned within the wax.
Trimming the Wick
One of the easiest ways to fix an off-center wick is to simply trim it. Using a wick trimmer or small scissors, carefully snip the wick so it is centered within the wax pool. You’ll want to trim the wick to about 1/4″ length before lighting it for the first time (source: https://www.harlemcandlecompany.com/blogs/journal/candle-care-101-how-to-trim-candle-wicks-the-right-way).
Trimming the wick helps the candle burn slower and more evenly. It also reduces excess smoke and filament mushrooms that form on the tip of the wick as it burns. For the best results, trim the wick every few hours as you burn the candle to maintain the ideal 1/4″ length (source: https://paddywax.com/blogs/weekender/the-little-secret-to-a-perfect-candle-burn-the-importance-of-trimming-your-candle-wicks). Carefully trim just the blackened portion of the wick each time to recenter it.
With a few careful snips as you burn, you can guide the wick back to the center of the wax pool. This helps the candle burn more efficiently and evenly.
Melting and Resetting
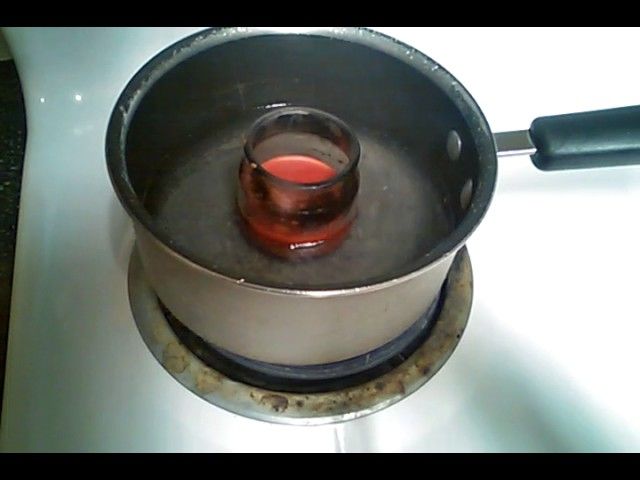
One of the easiest ways to recenter a wick is to simply melt the wax and let it cool again. To do this:
- Preheat your oven to 175°F to melt the wax without overheating it (Harlem Candle Company, 2022). You want the oven just warm enough to soften the wax.
- Place the candle in the oven for around 15 minutes, checking often. The wax should become liquid but not too hot.
- Remove the candle from the oven and gently move the wick back to the center by hand before the wax starts setting again (Glow As You Go, 2020). You may need to hold it in place for a minute as the wax begins cooling and solidifying.
- Allow the candle to finish cooling fully to room temperature. The wax will reset around the wick in the new centered position.
This melting and resetting technique allows you to quickly reposition the wick without any extra tools or materials. Just be careful not to overheat the wax, and work gently while the wax is still fluid but not too hot. With this simple process, you can restore your candle’s wick to the optimal centered position.
Using a Wick Stick or Tab
Using a wick stick is often the easiest and most effective way to center your wick. Wick sticks are small wooden sticks with holes drilled in them to hold the wick centered in the proper position (see Wick Centering). Simply:
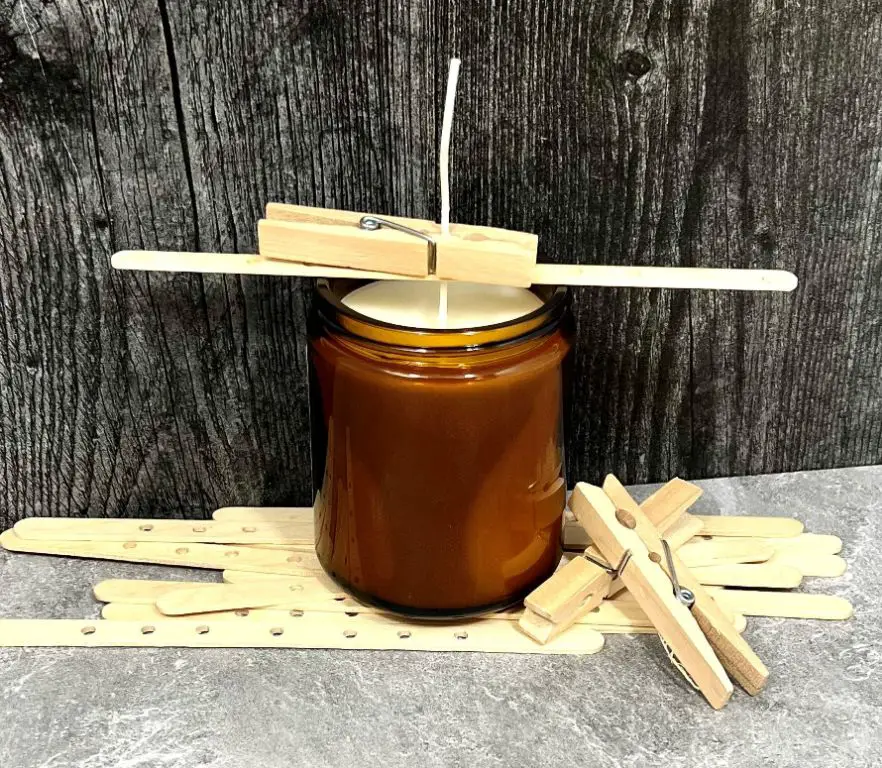
- Insert a wick stick into the container before melting the wax. Position it so the hole lines up with the center.
- Thread the wick through the hole so that it is held in place.
- Melt the wax and pour as usual. The wick stick will keep the wick positioned in the center as the wax hardens.
This prevents the wick from migrating to one side during pouring and cooling. The stick is left in place to help maintain wick centering as the candle burns.
Wick tabs serve the same function by providing a central holding point. Slide the wick into the tab cutout and embed it in the wax to hold the wick in the middle (see wick centering tabs).
Adding More Wax
If the wick is off-center because there is a gap or dip in the wax, you can melt and pour more wax to fill it in. Make sure the candle has been burning for at least an hour before adding more wax so that there is a melted wax pool. Blow out the candle and let it cool slightly so the wax is still liquid but not dangerously hot. Prepare some melted wax of the same type as your candle – melt old candle remnants, wax flakes, or a new candle. Carefully pour just enough melted wax into the gap to raise the level and re-center the wick. Let the candle cool completely before trimming the wick and lighting again. Be cautious not to overfill when adding more wax, as spillover can be dangerous. Adding just a tablespoon or two is usually sufficient. This method effectively fills in wax gaps and re-centers wicks.
Using Shims
One way to fix an off-center wick is to use shims. Shims are thin pieces of material that can be placed under the edge of the wax pool to raise it up. This helps level out the wax so the wick is centered again.
Good shim materials include cardstock paper, popsicle sticks, toothpicks, wooden coffee stirrers, or anything else thin that can withstand heat. Cut or break the shims into small pieces roughly 1-2 inches wide.
To use the shims:[1]
- Trim the wick to 1⁄4 inch before lighting if it is too long.
- Light the candle and let it burn for 5-10 minutes until a wax pool forms.
- Blow out the flame and let wax cool and harden again.
- Gently press shims into the wax around the lower edge of the pool, keeping them upright.
- Relight the candle. The shims will help lift the wax pool edge as the candle burns again.
Add enough shims to raise the wax pool edge up to the same level as the wick. Monitor the candle as it burns and continue adjusting the shims as needed. Once the wax pool burns evenly centered around the wick, the issue should be resolved.
Preventing Recurrence
To help prevent wick centering issues from occurring again, focus on proper wick placement when pouring your candles.
Start by making sure your candle vessel is level. Use a bubble level on the pouring surface if needed. This will help the wax pool evenly as it cools.
Next, ensure your wick is properly secured. Wick stickers, glue dots, or wick tabs can all keep your wick in place in the center of the vessel before pouring hot wax.
As you pour, aim to pour the wax directly over the wick, so that it helps anchor the wick in the middle as the wax pools. Pour carefully and slowly for best results.
Let the candle fully cool and harden before moving the vessel at all. This prevents the wick from drifting off-center during the cooling process.
Check wick centering and adjust as needed after each pour of wax layers. This gives you a chance to correct any slight drifting before adding more wax.
Taking preventative steps goes a long way towards producing perfectly centered candle wicks every time. Paying close attention when preparing the vessel, securing the wick, pouring the wax, and allowing proper cool time will help avoid lopsided wicks.
When to Get Help
If you’ve tried the methods above to re-center your candle wick, but are still experiencing issues with uneven burning, smoke, or dripping, it may be time to contact the candle manufacturer for additional troubleshooting or support.
Most reputable candle makers want to ensure their customers have a positive experience with their products. Don’t hesitate to reach out to customer service via email or phone. Have your order information ready, along with photos of the unevenly burned candle if possible.
The manufacturer may ask clarifying questions about when the issue started, how you’ve attempted to fix it, etc. They should be able to provide specific guidance based on the materials and wick used in that particular candle. This could include recommending a specialty wick centering device, additional trimming techniques, or even sending a replacement.
While an off-center wick is frustrating, manufacturers are ready to help. With some troubleshooting guidance, you should be able to get your candle burning evenly again.
As a last resort, if the manufacturer is unable to resolve the issue, request a refund or replacement candle. Most companies stand behind their products and will make it right if the wick centering is a defect in that particular candle.
Enjoying Your Candle
With the wick centered, you can now enjoy proper burn and scent throw from your candle. A centered wick promotes an even melt pool across the top of the candle, allowing the fragrance to be released consistently as the wax liquefies. The flame will burn straight up through the center of the wick, rather than erratically off to one side which can tunnel the wax and make the candle unusable before all the wax is burned.
Centering the wick also helps prevent soot build up around the sides of the glass and allows the candle to burn down evenly. With an evenly burning candle, you don’t have to worry about the wick drowning in liquid wax before reaching the bottom. This allows you to enjoy every last bit of your candle before needing to replace it.
A perfectly centered wick creates the ideal candle experience from start to finish. From visual appeal to performance and scent throw, a centered wick is the key to candle enjoyment and maximum burn time. Now that your wick is straightened out, you can light your candle with confidence knowing it will burn cleanly down to the bottom of the glass.

