Can I Make Candle Wicks At Home?
Candle wicks are an essential component of candle making. They serve the important purpose of bringing the melted wax to the flame. The wick absorbs liquid wax via capillary action and brings it to the top of the candle, where the wax then vaporizes and combusts with the flame. This allows for controlled, consistent burning of the candle wax. Without a wick, it would be impossible to maintain a candle’s flame.
When making candles at home, it is important to use a properly constructed wick. The thickness and type of wick determines how well the candle will burn. Wicks that are too thin or too thick can cause issues like tunneling, soot, or an uneven flame. With the right materials and techniques, crafters can create high-quality wicks at home to make great candles.
Materials Needed
There are just a few basic materials needed to make candle wicks at home (source). The most important ingredient is cotton cord, which serves as the wick material. Cotton cord can be purchased at craft stores and comes in different thicknesses. Look for a thicker cotton cord for larger candles. You’ll also need regular sewing thread or special wick threading to attach wick tabs.
In addition to cotton cord and thread, you may want stiffening wire to help the wick stand upright, especially in containers like jars. The wire helps provide rigidity. Finally, you’ll need wax, which comes in different varieties like soy, beeswax, paraffin, or palm. The type of wax impacts the melting point and burn properties.
Preparing the Wick
Properly preparing the wick is an important step before making candles. This helps ensure proper wick performance and burning once the candle is made. There are a few key steps:
Twisting – Take 2-3 wick strands and twist them together tightly by hand. This helps strengthen the wick and prevent fraying.[1]
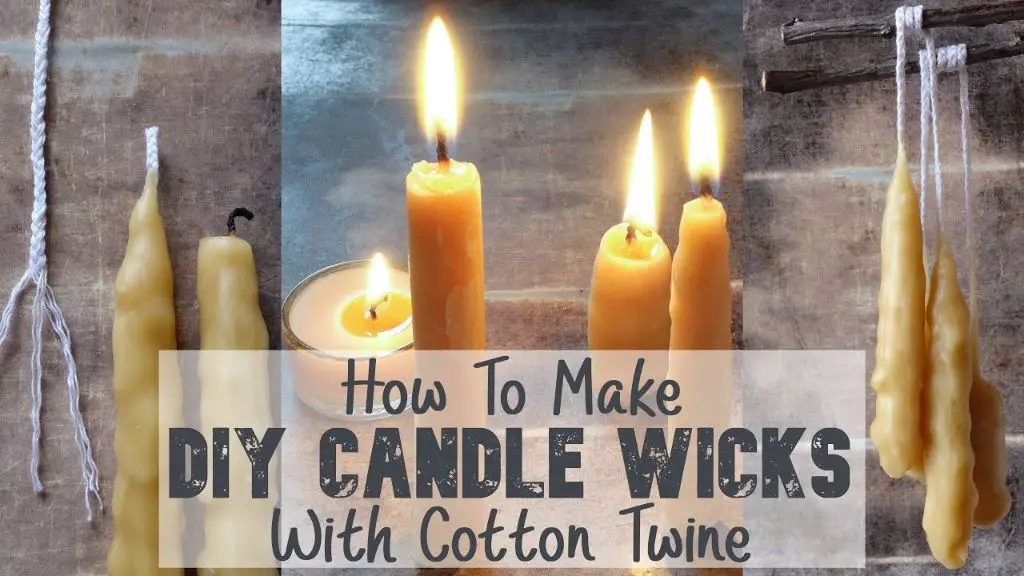
Braiding – For larger wicks, braid 3 strands together for added stability. Keep the braid tight.[1]
Priming with wax – Before using, it helps to dip and soak the wick in melted wax. This primes it to burn properly when the candle is lit. Remove excess wax before inserting into the candle container.[1]
Wick Thickness
The thickness of the wick is one of the most important factors when making candle wicks at home. As a general rule, larger candle diameters need thicker wicks. This is because thicker wicks are sturdier and can support the larger melted wax pool of bigger candles (1). For example, candles with a diameter of 3-4 inches typically use a #6-#8 thick wick. In contrast, thinner container candles with a diameter of 1-2 inches only require a #4-#5 wick thickness (2). Thinner wicks are suitable for smaller candles, as they prevent tunneling and allow for full meltpool coverage without generating excessive soot or smoke (3). The wick thickness must correlate properly to the candle diameter, otherwise it can lead to poor flame performance and an unsafe burning candle.
(1) https://www.candlescience.com/learning/choosing-the-right-wick-size/
(2) https://villagecraftandcandle.com/blogs/news/what-are-the-different-types-of-candle-wicks
(3) https://lonestarcandlesupply.com/guide-to-wicking/
Wick Length
Proper wick length is crucial for a clean-burning candle. According to The Spruce Crafts, the wick should be trimmed to be 1/4 to 1/2 inch longer than the diameter of the candle before lighting (Source 1). For example, if your candle is 2 inches in diameter, trim the wick to 2.25-2.5 inches long.
Hotel Lobby Candle recommends trimming wicks to 1/4 inch above the wax before lighting, as this will allow for the cleanest burn (Source 2). Longer wicks can produce excess soot and smoke.
Test different wick lengths to find the optimal trim for your specific candle’s wax, diameter and home environment. Trimmed wicks encourage complete wax melting and minimize excess carbon buildup.
Tabbed vs Non-Tabbed
Tabbed wicks and non-tabbed wicks each have their advantages depending on the type of candle you are making. Tabbed wicks have a small metal tab at the base that helps anchor the wick to the bottom of the candle container. The metal tab gets embedded in wax at the bottom of the container. This makes tabbed wicks ideal for candles in jars, tins, and other rigid containers where the wick needs to stand upright.
Non-tabbed wicks do not have a metal anchor tab. Instead, they may rely on being glued directly to the bottom of the candle container. Non-tabbed wicks are often preferred for pillar candles and votive candles where the wick gets embedded directly into a pool of wax at the base. The flexible wick can lay horizontally in the melted wax pool. Without the rigid metal tab, non-tabbed wicks allow more flexibility in wick positioning in candles with non-rigid containers. However, tabbed wicks may still be used for pillar candles if desired.
Wick Styles
There are various wick styles to choose from depending on the type of candle you want to make. The material and shape of the wick affects how the candle burns.
For container candles, braided cotton is a common wick material. It provides a bright flame and absorbs wax well. Popular shapes are square and cored wicks, which curl as the candle burns to promote full wax pool coverage [1].
For taper candles, stiff wicks work best so the wick stays upright as the candle burns down. Common materials are cotton covered wire and wood. Popular shapes are flat or square [2].
Votive and tealight candles often use a thin paper or cotton wick to produce a small flame. Popular wick types are CD wicks with a ‘C’ or ‘D’ shape to produce an even burn pool [3].
Testing different wick types and sizes is recommended to find the best match for your wax type, candle shape and desired burn characteristics.
Testing the Wick
Once you have created the wick, it is important to test it to ensure it will burn properly. The main test is the burn test, which checks the melt pool of the candle. To perform a burn test:
- Trim the wick to 1⁄4 inch and place it in a container with wax.
- Light the wick and allow it to burn for 1 hour.
- Blow out the flame and check the melt pool. It should be around 1 inch across for a container candle. A deeper melt pool risks tunneling, while a smaller pool means the wick is too small (https://www.youtube.com/watch?v=5qie9l9pr9o).
Adjust the wick thickness and repeat the burn test until the proper melt pool size is achieved. Testing the wick before making candles allows you to identify and correct any issues with the homemade wick.
Troubleshooting
Some common issues that can arise with homemade candle wicks include tunneling, drowning, and smoking. Tunneling occurs when wax melts and forms a tunnel around the wick, rather than pooling properly. This is often caused by using too small of a wick for the candle diameter. To fix, use a larger wick size (see Making Candle Wicks Borax). Drowning happens when the wick is swallowed by melted wax and snuffed out. Using a longer wick can help prevent drowning. Finally, smoking results from a wick that is too large for the wax pool. Trim your wick or use a smaller wick size to stop smoking.
Safety Tips
When making candles at home, following proper safety precautions is crucial. Here are some tips for safely working with candle wicks:
Trim the wick to 1⁄4 inch before lighting to prevent excessive smokiness and dripping. Only use sharp scissors designated for wick trimming. According to Amazon, trimming the wick helps provide an even, steady flame.
Inspect the wick before each use and trim if needed. Wicks can become irregular after burning, so maintaining them is important.
Use wicks made of non-toxic materials like cotton, paper, or wood. Avoid wicks with zinc or lead, which can release toxic fumes.
Never leave a burning candle unattended. Always keep candles away from flammable materials and out of reach of children and pets.
Consider using self-extinguishing wicks, which are designed to stop burning if tipped over. According to a patent filed with Google, these innovative wicks improve safety.
Candle making can be a fun and fulfilling hobby when proper care is taken. Maintaining wicks is one key way to enhance the experience while minimizing risks.

