Can You Make A Tea Light Holder With Air Dry Clay?
What is Air Dry Clay?
Air dry clay is a type of modeling clay that cures (dries and hardens) at room temperature rather than requiring heat from an oven or kiln. It is made from natural clays and minerals combined with binders and other additives that allow it to dry in the open air. Air dry clay typically has a light and soft composition that makes it easy to shape and mold.
The main properties of air dry clay are that it is soft and pliable when moist, becomes hard when dried, and does not require baking. It can be molded into various shapes which hold their form as the clay dries. Air dry clays are non-toxic, making them safe to handle and use.
There are several types of air dry clays:
- Polymer-based air dry clays contain additives like glue or binders that facilitate drying. Popular brands like Crayola Model Magic are polymer clays. (https://www.thesprucecrafts.com/air-dry-clay-2905844)
- Self-hardening clays are made from natural earth clays that harden with exposure to air. Pottery clay that is air dried is an example.
- Homemade air dry clay can be created by mixing glue, cornstarch, and water to make a clay that dries in air.
Benefits of Using Air Dry Clay
Air dry clay has many advantages that make it a great option for beginner and experienced crafters alike:
Safe and non-toxic – Unlike some other clay types, air dry clay is non-toxic and safe for kids. As it dries, it doesn’t release any harmful fumes or chemicals.
Air dries at room temperature – Air dry clays cure through evaporation, so they don’t require baking or firing. They will harden at room temperature within 1-3 days.
Reusable if kept moist – Leftover clay can be stored in an airtight container to keep it workable for future projects.
Easy to mold and shape for beginners – Air dry clay is very malleable and easy to shape by hand without specialized tools, making it ideal for beginner crafters and kids.
Affordable and accessible – Compared to other clays that require firing, air dry clay is relatively inexpensive and can be found at most craft stores.
Making a Tea Light Holder With Air Dry Clay
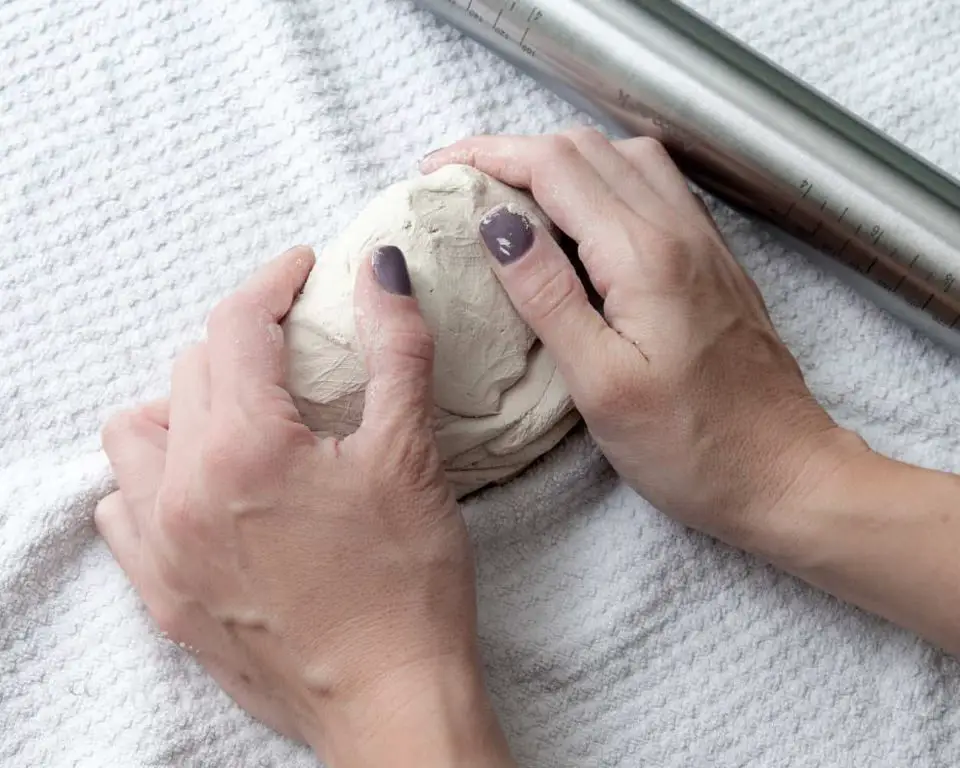
Making your own tea light holder with air dry clay is a fun and easy craft project. Here are some tips for successfully molding, sculpting, decorating and finishing an air dry clay tea light holder:
Start by kneading the clay to make it soft and pliable. Roll pieces into balls or coils to build up the basic shape. Air dry clay is very moldable, so you can easily press it into basic molds or sculpt freehand to create different shapes like circles, squares, hearts etc. Just be sure the holder is large enough to fit a standard tea light candle.
When sculpting the clay, add indentations, textures and designs to decorate the outside of the holder. You can press designs in with stamps, make patterns with toothpicks, or attach clay cutouts like beads or shapes. Let your creativity run wild – the options are endless!
Once the holder is molded, allow it to air dry completely, which usually takes 24-48 hours. Avoid extreme temperatures or humidity while drying. Optionally, you can bake air dry clay to harden it further according to package directions.
After the holder is dry, brush on a sealant like polyurethane, Mod Podge or varnish. This will protect the clay and add shine. Allow sealer to dry fully before using the tea light holder.
Now you have a one-of-a-kind clay tea light holder to decorate your home. The best part is that air dry clay allows endless creativity and you can remake pieces as many times as you like. Have fun crafting!
Source: https://www.gatheringbeauty.com/blog/diy-clay-tea-light-holder-ideas
Tips and Tricks
When working with air dry clay, there are some tips and tricks to keep in mind for the best results:
To keep the clay moist while working, have a spray bottle of water on hand. Mist the clay lightly to add moisture back as needed. Allowing the clay to dry out too much can lead to cracking. However, take care not to over-saturate the clay or it may become too sticky and soft.
If cracks or mistakes do occur, you can smooth them by rubbing a bit of water over the area and gently working the clay back together with your fingers. Small cracks can often disappear once the piece is painted.
For thin or narrow areas like a handle that may be prone to breaking, you can add reinforcement by embedding a wire, straw, or piece of foil into the clay while shaping.
To avoid trapping air bubbles, avoid overworking or kneading the clay too much. Fold the clay over itself rather than pushing straight down. Pop any bubbles that appear at the surface with a pin.
If the clay is drying out quickly or cracking excessively, try a slower drying clay formula next time. Store unused clay in plastic wrap or a resealable bag to prevent drying out between uses.
For more tips, see these helpful guides from Gathering Beauty and Mont Marte.
Creative Tea Light Holder Ideas
Making tea light holders out of air dry clay opens up an endless world of creative possibilities. Here are some fun ideas to spark your imagination:
Animal Shapes
From birds to turtles, creating animal-shaped tea light holders is a classic option. Sculpt 3D figures of your favorite animals, or make 2D silhouettes by cutting animal shapes out of clay slabs. Add details like feathers, scales, ears, or tails to bring your creatures to life.
Geometric and Abstract Shapes
For a modern, minimalist look, play with geometric shapes like spheres, cubes, cones, and cylinders. Stack or combine them in interesting arrangements. Or, craft abstract organic shapes and freeform patterns.
Holiday and Seasonal Themes
Make tea light holders perfect for gifting and displaying during the holidays. For Christmas, sculpt miniature trees, wreaths, snowmen, stars, and stockings. Carve pumpkins for Halloween, hearts for Valentine’s Day, and flowers for spring.
Etched and Engraved Designs
Use rubber stamps, stencils, or freehand etching tools to imprint patterns onto the surface of your clay. Try geometric designs, letters, inspirational words, or silhouette drawings. Engraving gives a lovely embellished finish.
Using Multiple Colors
Consider combining clays of different colors to create visual interest. Roll snakes and twist together, hand shape color blocks, or layer colored slabs. Experiment with marbleizing by mixing clays to achieve swirling color variations. The options are endless!
Different Ways to Use Air Dry Clay
Air dry clay is an extremely versatile material that can be used for a wide variety of crafts and projects. Here are some of the most popular ways to use air dry clay:
Jewelry Making
Air dry clay is perfect for making jewelry like beads, pendants, charms and more. The lightweight nature of the clay makes it comfortable to wear. Jewelry pieces made with air dry clay have an artisan, handmade look. See examples at https://www.pinterest.com/candiecooper/air-dry-clay-crafts/
Figurines and Sculptures
Air dry clay allows you to sculpt miniature figurines, animals, dolls and more. The clay holds fine detail well, so you can create intricate designs. Pieces will dry hard while still retaining some flexibility. Air dry clay is easy to sand and paint once dry. Get inspiration from https://www.gathered.how/arts-crafts/art/pottery/air-dry-clay-ideas
Bowls, Cups and Vases
With some basic hand-building techniques like coiling, you can form functional pieces like bowls, mugs and vases with air dry clay. Allow items to dry fully, then seal with an acrylic sealant if you want to use them with food. Air dry clay creates handmade dishware with rustic charm.
Ornaments and Decor
Air dry clay is perfect for making Christmas ornaments, wall hangings, wind chimes, decorative boxes and more. Let your imagination run wild creating custom decorative accessories. The lightweight nature makes these types of decorations easy to hang around the home.
DIY Crafts
Air dry clay can be used for all kinds of whimsical DIY craft projects. Make things like refrigerator magnets, bookmarks, coasters, frames, candle holders and anything else you can dream up. Air dry clay is beloved by crafters for its versatility.
Pros and Cons of Air Dry Clay
Air dry clay has several advantages that make it a popular choice for crafters and artists. Some of the main pros of working with air dry clay include:
Easy to Use: Air dry clay is very easy to work with and requires no special tools or equipment. It can be shaped by hand or with basic sculpting tools. The clay remains malleable until it dries, allowing time to create detailed designs.Source
Affordable: Compared to other clays that require firing, air dry clay is relatively inexpensive. A block or package of air dry clay costs just a few dollars, making it accessible even for beginners.Source
Air Dries: As the name implies, air dry clay dries and hardens at room temperature. There is no need for a kiln or other special equipment to set the clay.
However, there are also some downsides to be aware of when using air dry clay:
Fragile When Dry: While air dry clay is strong in its flexible state, finished pieces can be brittle and fragile once dry. Dropping or bumping unfired pieces may cause them to chip or break.Source
Prone to Cracks: If air dry pieces are not allowed to dry slowly and evenly, they are prone to cracking. Using too much water while sculpting can also lead to cracks as the clay dries.
Heavy Pieces May Sag: Gravity can take its toll on large or heavy air dry clay pieces, causing them to slump or sag as they dry if not properly supported.
Storing Leftover Air Dry Clay
Properly storing leftover air dry clay is important for keeping it moist and reusable for future projects. Here are some tips:
Keep air dry clay in a sealed airtight container or bag. Remove as much air as possible and seal the container to prevent the clay from drying out. Some options are Tupperware containers, ziplock bags, or plastic wrap formed tightly around the clay (Source).
Store clay in a cool, dry place away from direct sunlight or heat. A cabinet or closet works well. Heat causes clay to dry out faster (Source).
Save all clay scraps and leftovers from projects. Re-wrap them tightly and store with the rest of the unused clay. This allows you to reuse scraps for other projects later.
If clay does start to dry out, rehydrate it by kneading in a small amount of water. This revives the clay and makes it workable again.
With proper storage methods, air dry clay can be kept moist and reusable for months after opening.
Safety Tips When Working With Clay
When working with air dry clay, it’s important to take some safety precautions. Here are some tips:
Avoid prolonged skin contact. The dust from air dry clay can be drying to the skin, so try to limit contact. Wearing gloves while sculpting can help.
Wear gloves and wash hands after use. Always wash hands thoroughly with soap and water after working with clay. This will remove any residual dust or clay.
Work in a well-ventilated area. When sanding or cutting air dry clay, it can create dust. Working in an area with good airflow, like near an open window, can help ventilate properly.
Supervise children when using. Air dry clay is non-toxic, but appropriate supervision is still recommended when kids are using it.
Take breaks when working extensively with clay. Give your skin a rest periodically after prolonged sculpting or sanding sessions.
Store clay properly when not in use. Keep it sealed in an airtight container or bag to prevent drying out.
Avoid contact with eyes. As with any fine particles, air dry clay dust can irritate eyes. Be careful not to rub eyes after working with clay.
Clean surfaces after use. Wipe down countertops and work areas after finishing clay projects to avoid buildup of dust.
FAQs
Here are some frequently asked questions about working with air dry clay:
Drying and Curing
How long does air dry clay take to dry? Air dry clay typically takes 24-48 hours to dry completely. Thinner pieces may dry faster while thicker pieces can take longer – up to 5 days or more. Make sure there is good airflow around your clay as it dries. You can speed up drying time by placing your clay sculptures in front of a fan. Do not microwave or bake air dry clay in the oven as it can melt or burn [1].
How do I prevent cracking while air dry clay dries? Cracking happens because the clay dries too quickly. To prevent cracks, allow your clay adequate drying time and keep it away from direct heat sources that cause uneven drying. You can also apply a very thin layer of water to the surface while it dries.
Working with Air Dry Clay
Can air dry clay be reused? Yes, as long as the clay has not fully dried out, you can reuse it. Knead some water into the clay to restore flexibility. For dried clay, you may be able to salvage it by breaking it up and soaking it in water.
How durable is air dry clay? Fully dried air dry clay is quite fragile and delicate. To make it stronger, you can apply a sealer, varnish or glaze. Avoid situations where your dried clay may get wet or moist, as that can cause softening, damage and mold.
Classroom Use
Is air dry clay safe for kids? Air dry clay is non-toxic and safe for kids. Supervise young children so they don’t eat the clay. Have kids wash hands after use, and clean surfaces when done. Store clay in an airtight container away from moisture.
How do you store unused air dry clay? To keep air dry clay workable, store it in an airtight plastic container or bag. Make sure all pieces are sealed so no air gets in. Keep in a cool, dry place away from direct sunlight [2].

