How Do You Put Pictures On Glass Candles?
Glass candles have become an increasingly popular decorative item for both the home and special events. Their transparent or translucent glass holders allow light to pass through, creating a warm and romantic ambiance. The smooth glass surface also provides the perfect canvas for adding personalized photos, artwork, or text. Glass candles come in every shape and size, from classic cylinders and globes to more unique sculptural silhouettes. They can be used on their own as an accent piece or grouped together to make a bolder decorative statement. Their versatility and customizable nature makes them a crafting enthusiast’s dream. With some creativity and the right materials and techniques, stunning photo candles can be designed by hand.
Preparing the Glass
The first step in decorating a glass candle is properly cleaning and preparing the glass surface. According to Plaid Online, it’s important to thoroughly clean the glass with rubbing alcohol or vinegar to remove any dirt, oils or residue. Use a cotton pad or soft cloth dampened with the cleaning solution to wipe down the entire surface. This will help the image or paint adhere properly.
You may also want to lightly scrub the glass with mild soap and water after the alcohol wipe down. Make sure to rinse and dry completely. The glass needs to be as grease-free as possible. Mod Podge Rocks recommends spraying a clear acrylic sealer on the glass before painting or transferring an image. This provides a tacky base layer for the decorations to stick to.
Properly preparing the glass by cleaning and sealing ensures your decorations or artwork will adhere smoothly and permanently. It’s a quick but important first step before moving on to the fun part – decorating!
Choosing a Photo or Image
When selecting a photo or image to put on a glass candle, there are a few key considerations. First, think about the overall look and feel you want for the candle. Black and white or sepia toned photos can create an elegant vintage aesthetic, while bright and colorful images give a more playful and fun vibe. The image complexity and level of detail is also important to consider based on the size of your glass candle surface. Highly detailed photos with many small elements don’t always translate well onto small candle surfaces. It’s best to choose images with clean lines, strong focal points, and simple compositions. This source recommends choosing photos with good contrast for glass printing to help the main subjects stand out.
When sizing your image, make sure to choose a high resolution photo with at least 300 dpi to allow for sharp image printing and scaling. Standard candle sizes range from 3-12 inches in diameter. Select an image that will fit the surface area appropriately based on your candle dimensions. Having strong focal points centered on the candle can create a dramatic look. Also consider whether you want a tight crop for maximum impact or include some negative space around the edges for a more relaxed composition.
Printing and Transferring the Image
The most common materials used for transferring images to glass candles are waterslide decal paper and printable vinyl.
Waterslide decal paper allows you to print your image with an inkjet printer. After printing, you cut out the image and soak the decal paper in water to release the printed decal. You then slide the decal off the paper backing and apply it to the glass surface of the candle.
Some key tips when using waterslide decal paper include:1
- Use decal paper designed specifically for curved surfaces
- Allow the printed decal to dry fully before soaking and transferring
- Follow the decal paper manufacturer’s instructions carefully
Printable vinyl is another option. This allows you to print your image on special vinyl sheets using a printer. You then cut out the image with a cutting machine like Cricut or Silhouette. The vinyl contains an adhesive backing that sticks to the glass when applied.
Some tips when using printable vinyl include:2
- Use vinyl designed for smooth, curved glass
- Cut out the image precisely just inside the printed lines
- Carefully transfer the vinyl to the candle using a transfer tape
Applying the Decal
Once the decal and glass surface are properly prepared, you are ready to apply the waterslide decal or vinyl to the glass. Here are the steps for a smooth application:
- Fill a sink, tub or bowl with room temperature water. Submerge the decal paper into the water for 30-60 seconds until you can gently slide the decal off the backing paper.
- Position the decal where you want it on the glass surface. Use a squeegee, credit card or soft cloth to gently push out any water or air bubbles from under the decal.
- Allow the decal to sit undisturbed for at least 24 hours until fully dry before sealing or handling further. The longer you allow the decal to cure before sealing, the more securely it will adhere.
Take care not to tear or wrinkle the decal during application. Work slowly and gently. If any folds, tears or lifts occur during positioning, gently lift the decal and reapply. With patience, even complex decal designs can be smoothly applied to glass surfaces.
For more detailed instructions, see this tutorial: https://jennifermaker.com/waterslide-decal-tutorial/
Sealing and Protecting
Once the decal image is transferred, it is important to properly seal and protect it with a top coat. The thinned Mod Podge or water is temporary and will allow the decal to become damaged or peel over time. Sealing it will help the image and colors last much longer.
Apply 2-3 thin coats of a clear acrylic sealer, letting each coat fully dry in between. This seals the decal and provides a protective barrier against scratching or fading. The sealer also gives the image a smooth, glossy finish for an attractive candle design. Make sure to avoid pooling or puddling of the sealer.
Another option is using a spray sealer like Krylon Crystal Clear Acrylic Coating. This gives an even application in thin layers. Let the spray sealer cure for 24 hours before handling to ensure maximum durability.
Properly sealing the glass candle is the most important step for preserving your design. It protects against moisture, heat from the candle flame, oils from skin contact, and potential scratches or damage during use. Taking the time to apply multiple thin coats of sealer will provide lasting protection and keep your custom image vibrant.
Troubleshooting Issues
Applying decals to glass candles can sometimes lead to bubbles, wrinkles, or other issues with the decal not properly adhering. Here are some tips for troubleshooting common problems:
- Bubbles – Slowly peel back the decal and reapply it, gently smoothing out any air bubbles with your finger or a soft cloth. Go slowly and be patient. You can also try poking a pin to let air escape.
- Wrinkles – Heat can often smooth out wrinkles. Carefully pass a hairdryer or heat gun over the decal on a low setting. Be cautious not to overheat the glass or decal. The heat allows the decal to conform to the glass surface.
- Decal not sticking – Make sure the glass is completely clean and dry before application. Apply firm pressure for 30-60 seconds when putting the decal on the glass. If it still won’t adhere, try lightly scoring the glass with sandpaper where the decal will go to help it grip.
Be gentle when working with the decals, and take your time applying them. With some patience, you can get a smooth application without bubbles or wrinkles. If part of a decal tears, carefully peel it up and reapply just that section.
This guide from Dippy Cow Nails has more useful tips for troubleshooting decal application: https://www.dippycownails.com/en-us/pages/decal-application
Decorating the Candle
Once the image decal has been applied and sealed, there are many ways to further decorate the glass candle to make it truly unique. Popular options include adding paint, glitter, sequins, beads, shells, ribbons, lace, buttons, and more.
Paint can be used to add accents, patterns, or background colors around the image. Acrylic paint pens work well on glass. Let the paint fully dry before applying a protective sealant spray. Metallic paints like gold, silver, or copper can add a lovely shimmery touch.
Fine glitter sprinkled on wet paint or glue will adhere to the glass. For best results, use a glue specifically made for glass like Aleene’s Clear Gel Tacky Glue. Apply glue to the glass, sprinkle glitter, let dry, then seal it in with a spray sealant. Washi tape can be used to create stripes, patterns or borders for the glitter.
Other embellishments like sequins, beads, shells, ribbons, buttons and more can be glued on using strong craft glues suitable for glass like Beacon 527. Have fun decorating your glass candle and make it a true decorative art piece!
Displaying the Finished Candle
Once your photo candle is complete, it’s time to think about how you want to display it. Finding the right holder and location to showcase your candle is an important final step.
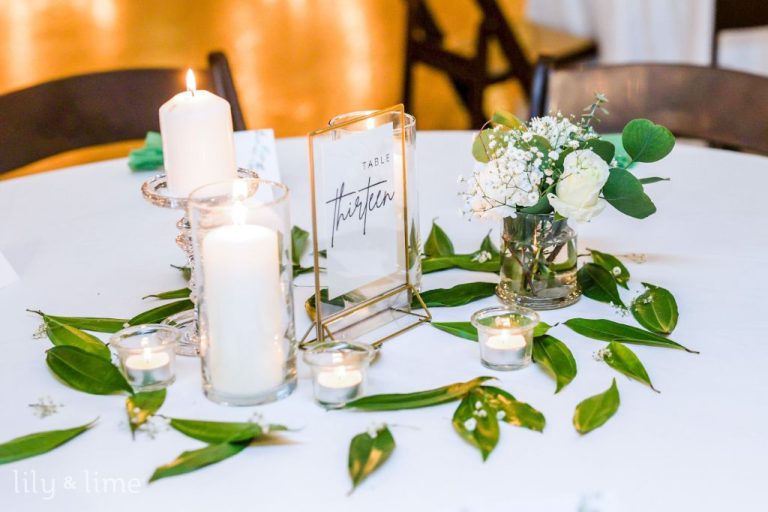
For tabletop or mantle displays, look for candle holders, lanterns, or hurricane vases made of clear glass or acrylic. This allows the image to shine through and be the focal point. Opt for holders that are slightly taller than the candle to protect the surface from melting wax. Vintage-style lanterns or more contemporary geometric shapes both work well.
For maximum visibility, place the candle in a high-traffic area like a dining table, kitchen countertop, or entryway table. Position it in a spot where the light will be most visible at night. Near a window or mirrored surface creates interesting reflected effects from the candlelight.
Get creative with your display location. Consider placing the candle on a bookshelf next to framed family photos, or on a bathroom counter next to decorative soaps. Choose locations where the image has significance or will create a meaningful vignette.
Glass photo candles make great gifts. Display them proudly alongside other meaningful decor items. The customized image will spark conversation and delight anyone who receives one.
Other Glass Decorating Techniques
In addition to transferring photos and images onto glass candles, there are many other glass decorating techniques that can be used to customize and personalize glassware. Some other popular options include:
Etching
Etching involves using acids or abrasives to cut into the glass surface. This removes material and leaves behind a frosted look. Common etching techniques include sandblasting and chemical etching. Sandblasting directs a focused stream of sand at the glass to erode the surface. Chemical etching uses hydrofluoric acid to eat away at the glass. Etching allows for intricate designs and patterns to be carved into glass (source).
Staining
Glass staining uses colored chemicals to tint the glass surface. The glass piece is submerged into a staining chemical, which soaks into the porous etched areas. Typical staining colors include black, brown, blue, green, red and yellow. The longer the glass sits in the stain, the darker the shades become. Staining allows for bold pops of color to be added to etched glassware designs.
Painting
Glass paint can be used to hand paint designs directly onto glass surfaces. Glass paints are formulated to bond permanently to the glass through firing. There are specific glass paints made to be fired in a kiln or oven. Glass paint opens up many options for freehand artwork on glass candles and other objects.

