How Do You Make Soap Supplies?
Soap making supplies refer to the ingredients and equipment needed to handcraft soap from scratch. The basic soap making process involves combining oils or fats with an alkali, usually lye, to trigger a chemical reaction called saponification. This reaction transforms the oils and lye into soap and glycerin. To make soap, you’ll need supplies like oils, lye, additives for color and scent, and equipment for measuring, mixing, molding, and curing the soap.
While commercial soap is manufactured on a large scale, homemade soaps allow you to control the ingredients. Handcrafting soap from scratch with oils, lye, and other additives provides an opportunity to create customized bars with desired qualities, scents, and designs.
The main soap making supplies are oils, butters, or fats for the fatty acids; lye as the alkali; fragrances and botanicals for scent; colorants for visual appeal; and equipment like scales, thermometers, molds, and stick blenders to mix, pour, and shape the soap batter.
Oils
The types of oils used is one of the most important considerations when making soap supplies. Each oil contributes unique properties to the soap. Some of the most common oils used in soap making include:
- Olive oil – A versatile oil that produces a mild, stable soap with creamy lather. Olive oil soaps are very moisturizing. (Qualities of Soap Making Oils 2022)
- Coconut oil – Produces a cleansing soap with abundant lather. Coconut oil adds hardness and cleansing properties. (The Roles of Different Fats and Oils in Soap Making 2022)
- Palm oil – Contributes hardness and creaminess to soap. Palm oil makes a bar with a long shelf life.
- Sweet almond oil – Very mild and great for sensitive skin types. Almond oil contributes to a creamy lather.
- Avocado oil – High in vitamins and fatty acids, avocado oil makes a moisturizing and luxurious bar of soap.
Oils used in soap making are sourced from plants and vegetables. Common vegetable oils used include olive, coconut, palm, and avocado. Nut oils like almond and jojoba are also popular. The fatty acid composition of each oil determines the qualities it will impart to the finished soap product.
Lye
Lye, also known as sodium hydroxide (NaOH), is a key ingredient in making soap from scratch. Lye is a caustic base that initiates the saponification process, which is the chemical reaction between the oils and lye that produces soap. When mixed with oils, the lye triggers a chemical reaction that transforms the oils into soap and glycerin.
Lye can be hazardous to handle and requires safety precautions. Always wear protective gear like goggles, gloves, and long sleeves when handling lye. Work in a well-ventilated area. Never add water to lye, as it can cause a volcanic reaction. Instead, add lye to water slowly and stir continuously. Store lye securely away from children and pets.
Food-grade lye can be purchased from chemical supply retailers like Bulk Apothecary (https://www.bulkapothecary.com/raw-ingredients/other-ingredients-and-chemicals/sodium-hydroxide-lye/) and online marketplaces like Amazon (https://www.amazon.com/Making-Hydroxide-Caustic-Cleaner-Remover/dp/B08FK7J42B). When purchasing lye, look for “sodium hydroxide” and 99-100% purity levels.
Natural Colorants
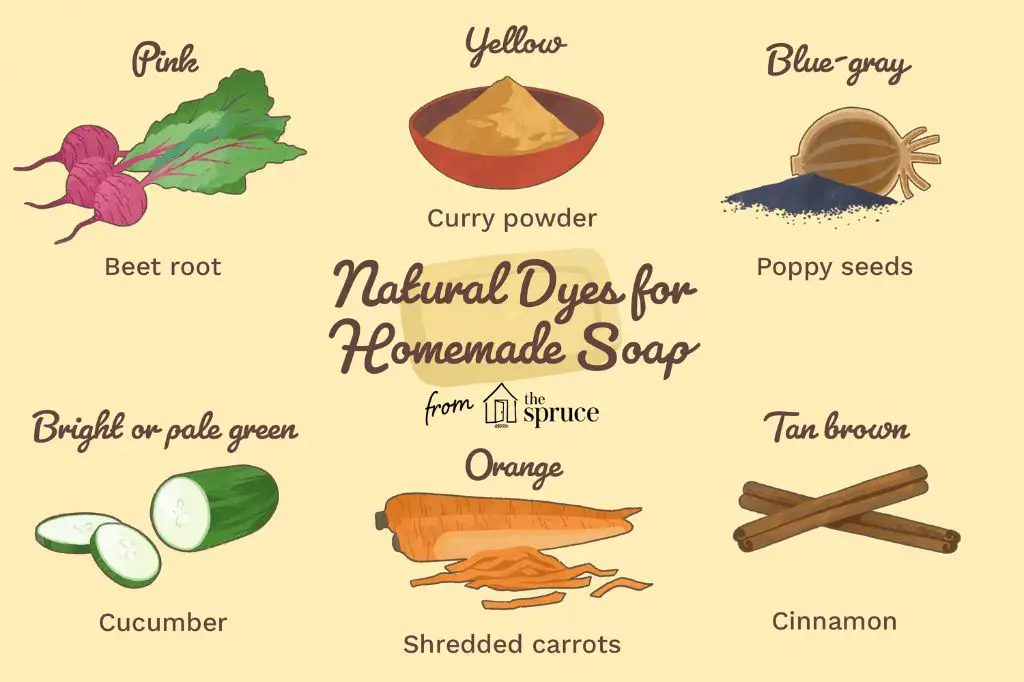
One of the most fun parts of making homemade soap is experimenting with different colors. While synthetic colorants like micas and liquid dyes are convenient, many soapmakers prefer using natural materials to color their soap. Common natural colorants for soap include:
- Clays – Red Moroccan clay, green French clay, and yellow kaolin clay can add rich earthy colors to soap.
- Spices – Turmeric, paprika, cinnamon, and nutmeg add warm yellow, orange, and brown hues.
- Herbs – Chamomile, calendula, rosemary, lavender, and mint impart soft colors.
- Teas – Black, green, rooibos, and hibiscus tea can color soap pink, brown, green, or orange.
- Botanicals – Rose petals, calendula petals, comfrey leaves, spinach, and spirulina powder make vivid colors.
Some tips when using natural colorants:
– Use more colorant for lighter oils like olive or coconut oil.
– Infuse dried botanicals in oil before using for brighter colors.
– Stick blend powdered colorants into a bit of oil before adding to traced soap.
– Anchor flecks of herbs, petals, or clays in clear melt and pour soap base.
While natural colors don’t last as long as synthetic options, they provide a more organic look. According to Soapy Friends, most natural soap colors will fade within 1 month to 1 year depending on the colorant. To maximize color longevity in natural soap, use infused herbal oils and pH stable pigments like clays and oxides.
Scent
Choosing the right scents is an important part of making soap. Many soap makers use a combination of fragrance oils and essential oils to scent their soaps. Fragrance oils are synthetic scents created to mimic natural oils and aromas. They come in a wide variety of scents from fruity to floral. Popular fragrance oil scents for soap include lavender, lemon, rose, and clean cotton. Fragrance oils should be added at around 5-8% of your oil weight. Overuse can cause the scent to be too strong and irritate skin.
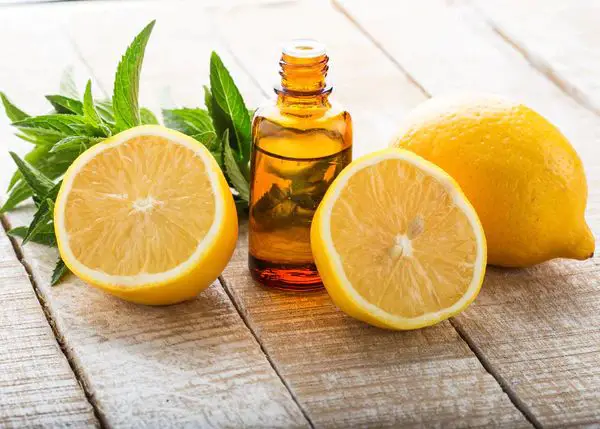
Essential oils impart natural scents and may have skin benefits. Common essential oils for soap are lavender, tea tree, peppermint, eucalyptus, and lemongrass. Essential oils are much more potent than fragrance oils so they should be used sparingly at around 3% or less of your oil weight. Going over 5% can make the scent overpowering. When combining fragrance and essential oils, adjust amounts so the total does not exceed 8%.[Most Popular Scents for Soap – Wholesale Bath bombs](https://www.bathbombbootcamp.com/most-popular-soap-scents.html)
Testing different scent combinations and percentages is key to finding the right balance for your ideal soap. Keeping good notes will help recreate successful blends. Some makers find pairing complementary scents works best like lavender with peppermint. scent
Equipment
Some basic equipment is required to make soap safely and accurately. Here are the essential tools:
Scale – An accurate digital scale is vital for measuring the amounts of oils and lye. Most soap recipes specify amounts by weight, not volume. A kitchen scale that measures down to decimals is ideal.
Thermometer – Monitoring the temperature during the soapmaking process enables you to achieve the right chemical reactions. A digital thermometer with a probe is best for measuring the temperature of oils and lye solution.
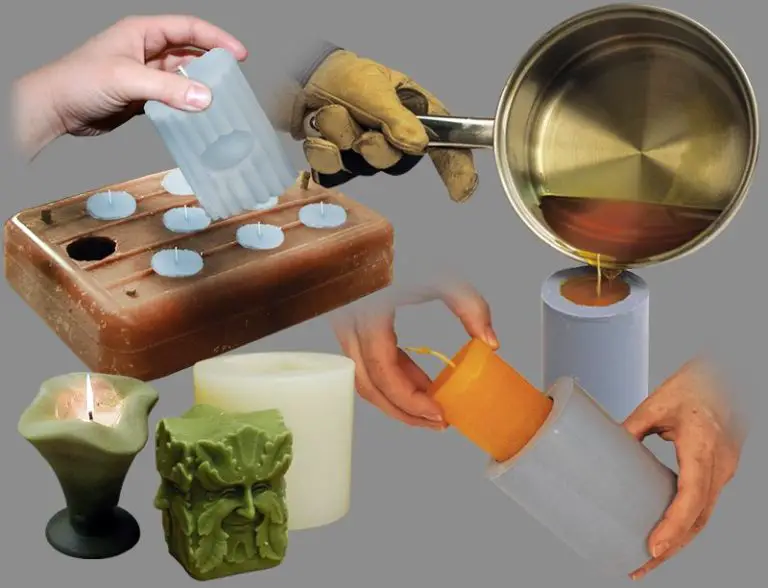
Molds – You can pour soap into all kinds of molds, from basic loaf pans to intricate silicone molds. Make sure molds are made of a material that soap won’t stick to, like silicone, plastic, resin, or stainless steel.
Stick blender – A standard or immersion blender is used to mix and emulsify the soap ingredients into trace. Look for one with stainless steel blades.
Other helpful tools are mixing bowls, a spatula, measuring cups, protective gear like gloves and goggles, and soap cutters for cutting molded bars. Start with the basics and build up your soapmaking toolkit over time.
Recipe Development
Developing soap recipes can be a lot of fun and exciting. There are many factors to consider in order to create a balanced bar of soap that produces a nice lather and leaves skin feeling moisturized.
One of the most important aspects of soapmaking is properly balancing the oils and lye. The oils provide moisturizing and cleansing properties, while the lye triggers the chemical reaction that turns the oils into soap. Using a lye calculator is crucial for developing recipes to ensure you are using the right ratio of oils to lye.
The oils typically make up about 70-85% of the recipe. Common soapmaking oils include olive oil, coconut oil, palm oil, shea butter, avocado oil, and castor oil. Each contributes different properties in terms of cleansing, bubbly lather, and skin feel.
Experimenting with different oil combinations allows you to create soaps with unique qualities. For example, increasing the coconut oil will create a soap with more bubbles. Adding shea butter will make the bar more moisturizing. Balancing these ingredients is key for a good soap recipe.
The lye concentration, which is the ratio of water to lye, also affects the soap characteristics. A lower lye concentration will make a harder bar, while a higher concentration creates a softer bar. Many artisan soapmakers prefer a lye concentration around 25-30% for a balanced bar.
Finally, the superfat percentage, meaning the amount of oils not converted to soap, is an important factor. A 5-10% superfat is common. This extra oil remains unsaponified to provide extra moisturizing properties. But too high of a superfat can lead to rancidity.
With some knowledge of how the ingredients interact, you can have fun developing unique soap recipes tailored to your liking!
Basic Soap Making Process
Making soap from scratch involves a basic process of combining oils and a lye-water solution through saponification. Here are the key steps:
- Prepare the lye solution. Measure out distilled water in a heat-safe container. In a well-ventilated area, slowly add lye flakes while stirring continuously until fully dissolved. Allow to cool.
- Melt oils. In a stainless steel pot on low heat, melt any hard oils like coconut oil, shea butter, or palm oil. Remove from heat once melted.
- Combine oils and lye. When both mixtures are around 100-110 F, slowly pour the lye solution into the oils, stirring constantly. Use a stick blender to fully incorporate.
- Add fragrance and color. Once the mixture starts to thicken to trace, stir in essential oils, colorants, botanicals, or clay. Work quickly to retain fluidity.
- Pour into molds. Pour the soap batter into silicone molds, taking care to avoid air bubbles. Tap the molds to release any trapped air.
- Insulate to gel. Wrap molds in towels to encourage gel phase, where the soap heats up and becomes more translucent.
- Cure the soap. Once cooled and hardened, unmold the soap and let cure in a dry area for 4-6 weeks before using.
Follow basic safety precautions when handling lye and see this tutorial for more details on the cold process method.
Advanced Techniques
One of the best parts about making your own soap is being able to customize and decorate it however you like. Here are some fun advanced techniques for adding visual interest and making your soap truly unique:
Swirls – swirling two or more differently colored batters together is a popular technique. You can create simple in-the-pot swirls by pouring one color on top of another and giving a few stirs with a spatula. More complex techniques like hanger swirls involve layering colors in a loaf mold and using tools to create patterns.
Embeds – you can press objects like dried flowers, coffee beans, toys, or other items into the top of your soap batter before it hardens to create an embedded look. Make sure embeds are non-water-soluble.
Layers – pouring alternating colors of soap batter into loaf molds in thin layers results in a striped effect when sliced. You can create stripes, stacks, or more intricate patterns.
Texturing – adding ingredients like oats, seeds, dried milk, or citrus peels to the soap batter creates visual and physical texture. Try pressing the add-ins into just the top of the loaf for an artisanal look.
Natural colorants like clays, spices, and herbs can create beautiful, earthy hues. See these tips for using botanicals as soap colorants.
Molds – for maximum creativity, seek out unique shaped molds like flowers, animals, sports balls, etc. Or make your own custom molds.
By mastering techniques like these, you can create soap that looks like a work of art!
Safety and Storage
When making soap from scratch, safety should always be the number one priority. Lye, also known as sodium hydroxide, is a crucial ingredient in cold process soapmaking, but can cause severe burns if it comes into contact with skin and eyes. Protective gear like gloves, long sleeves, closed toe shoes, safety goggles etc. is absolutely necessary when working with lye and raw soap batter.
According to the Soap Guild, lye should always be handled with care and respect. Never add water to lye, as this can cause a violent reaction. Instead, add lye to water in a well-ventilated area. Avoid breathing in lye dust by adding lye to water carefully. Store lye sealed and away from children and pets. In case of exposure, flush skin with water for 15-20 minutes and seek medical help if necessary.
In addition to lye safety, it’s crucial to allow soap to fully cure before use. Curing allows the soap to harden and become milder by allowing the chemical reaction between lye and oils to complete. Cold process soap should cure for 4-6 weeks. During this time, soap should be stored in a dry, well-ventilated area out of direct sunlight. Wrapping soap in butcher or wax paper can help absorb excess moisture.
Proper storage of soapmaking oils and equipment can also help maximize freshness and longevity. Essential oils and fragrance oils should be stored in dark bottles, away from heat and light. Store unused soapmaking oils in a cool, dark place to prevent rancidity. Clean and dry all equipment thoroughly after each use.
Following basic safety precautions and storage guidelines can ensure an enjoyable and hazard-free soapmaking process from start to finish.

