Why Do My Candles Tunnel When Pouring?
What is Tunneling?
Tunneling is when a candle burns down the center, leaving the outer edges of the wax pool untouched and unmelted. It creates a “tunnel” down the candle as it burns (Source: https://tlccandleco.com/blogs/tlc-talks/what-is-candle-tunneling-and-how-do-you-prevent-it). As the candle burns down, it leaves thick walls of unmelted wax around the edges. This can create an uneven melt pool and wick issues. Tunneling shortens the life of the candle because it prevents the full wax pool from being used. It also reduces fragrance throw and can create hazardous conditions with the wick being too close to the wax walls.
Common Causes of Tunneling
Candles often tunnel because the wax cools too quickly before reaching the sides of the container. This can happen if the pouring temperature is too low or if the environment is very cold. Proper pouring temperatures for soy wax are 175-185°F (About 95% of tunneling issues are not about pouring too hot, but pouring too cold) (AllSeasonsWaxCompany.com.au
Another common cause of tunneling is wick issues. If the wick is too small for the candle, it won’t melt wax quickly enough to reach the edges as the candle burns. The wick must be wide enough to provide an adequate melt pool based on the candle diameter (HarlemCandleCompany.com).
An improper fragrance load can also lead to tunneling. Usually 1-1.5oz of fragrance per pound of wax is a good target. Too much fragrance can accelerate cooling and disrupt the wax structure. Too little fragrance won’t anchor well and can pool at the bottom.
Wick Issues
One of the most common causes of candle tunneling is using a wick that is too small for the candle. As this source explains, if the wick is too small for the size of the candle, it may not be able to melt enough wax to keep up with the melt pool. This can result in the melted wax pooling around the wick and creating a tunnel down through the center of the candle.
Tunneling can also occur if the wick is off-center in the candle. As the candle burns down, the off-center wick will melt more wax on one side versus the other, causing an uneven melt pool and tunnel. It’s important to center the wick properly before pouring the candle to prevent this issue.
To avoid tunneling caused by wick problems, it’s critical to use the proper wick size for the diameter of the candle container and type of wax being used. As this source recommends, following manufacturer guidelines on wick sizing or testing different wick sizes can help identify the optimal wick to prevent tunneling.
Pouring Temperature
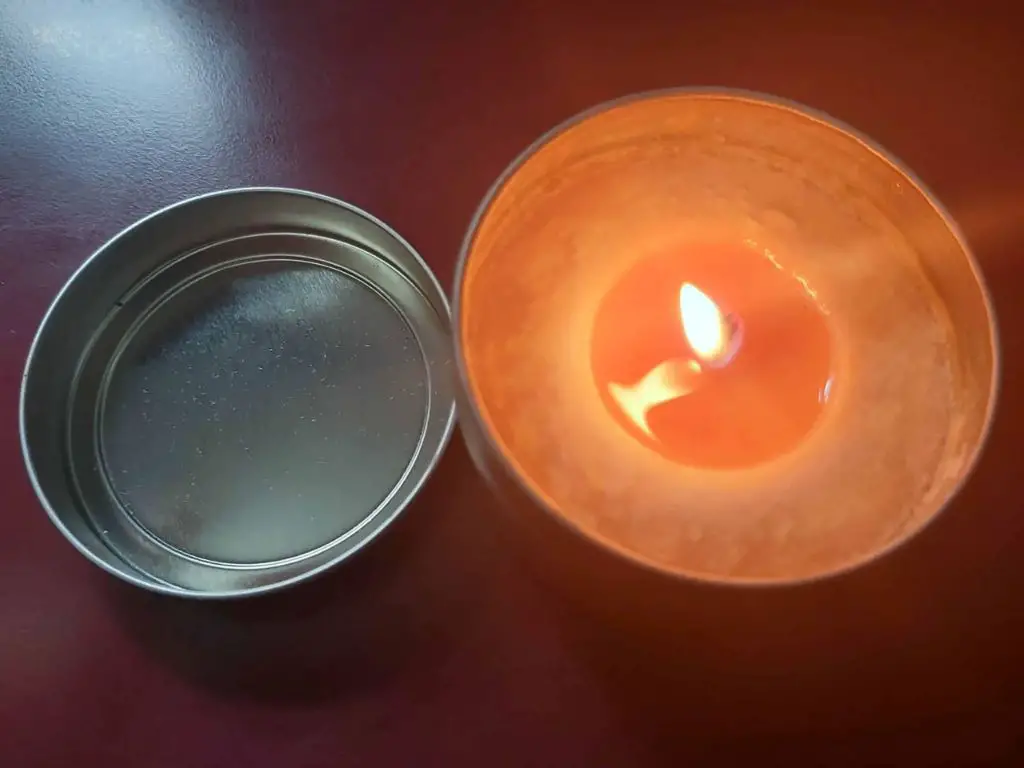
The ideal pouring temperature for candle wax is between 135-165°F, according to experts at Scandinavian Candle Company (Source). This allows the wax to spread evenly to the edges of the container and setup properly as it cools. Pouring wax that is too hot (over 180°F) can cause more shrinkage and tunneling as it cools down. The wax near the edges solidifies faster than the center, creating a void. Pouring wax below 135°F often results in an uneven surface or visible seam lines. The wax begins to setup before reaching the edges, preventing a smooth finish.
Cooling Issues
One common cause of tunneling is when the candle cools too quickly. As the wax burns, it liquefies into a molten pool. If this molten wax cools before the full melt pool has a chance to level out, it will create a tunnel down the center. Cooler temperatures or breezes can speed up the cooling process before the wax has fully leveled out. Even the type of container can impact cooling – materials like glass, ceramic, and metals draw heat away from the candle at different rates. Thicker candles also retain more heat in the center and take longer to cool.
There are a few ways to slow the cooling process to prevent tunneling:
- Avoid drafts and open windows/doors when burning the candle to prevent cooling breezes.
- Trim the wick to 1⁄4” before lighting to avoid a hot and high flame that will liquefy the wax too quickly. This gives the melt pool more time to level out.
- Allow the candle to burn all the way through the melt pool before extinguishing it. Don’t blow it out too early.
- Burn the candle in a warmer room around 70°F so the wax stays molten longer before cooling and setting.
- Place the candle container on a candle warmer, hot tray, or other gentle heat source as it burns. This keeps the sides warm to slow down cooling.
Slowing down the cooling process helps give the wax more time to pool out and level before hardening again. This results in an even burn without a tunnel down the center.[https://homesick.com/blogs/news/how-to-fix-candle-tunneling]
Fragrance Load
If a candle has too high of a fragrance load, it can cause tunneling. The fragrance oils in a candle interact with the wax, and too much fragrance can disrupt the normal melting process of the wax. As the Lafco Candle Company explains, many fragrance oils are solvents, meaning they can dissolve parts of the wax. This concentrated dissolving in the center of the candle can lead to tunneling.
To prevent tunneling from high fragrance loads, it’s recommended to keep the fragrance load under 10-12% of the total wax weight. Going above this percentage significantly increases the chances of experiencing tunneling issues. A fragrance load between 6-8% is ideal for most candle recipes to minimize tunneling while still allowing sufficient fragrance. Testing different fragrance load percentages with a specific wax and fragrance blend can help determine the optimal balance.
Preventing Tunneling
There are a few key things you can do when making candles to help prevent tunneling from happening:
Use the proper wick size – Matching the right wick to the diameter of your candle is crucial. According to the National Candle Association, the wick should be approximately 1/3 the diameter of the candle for an ideal burn. Too small of a wick can create tunneling. Test different wick types and sizes to find the best fit for your candle.
Pour at the right temperature – You’ll get the best results pouring between 125-135°F. Pouring at temperatures that are too hot or too cold can lead to issues as the wax cools at different rates, creating tunnels. Allow your wax to come down to the ideal temperature before pouring into containers.
Slow the cooling process – After pouring candles, let them cool gradually. Avoid quick cooling in the refrigerator or freezer. The outer wax will set up rapidly, trapping inner wax before it has fully cooled and adhered to the sides. Allow candles to rest at room temperature as they harden.
Use the optimal fragrance load – Adding too much fragrance oil, over 12-15%, can sometimes contribute to tunneling as it alters how the wax cools. Try decreasing your fragrance load and see if it helps.
By paying close attention to wick sizing, pour temperature, cooling conditions, and fragrance percentage, you can minimize tunneling issues.
Fixing a Tunneled Candle
There are a few methods you can try to fix a tunneled candle and burn it evenly again:
Repouring to fill the hole – Carefully pour additional wax into the tunneled section to fill it in. Make sure the wax matches the original wax in color and scent. Let it fully set before relighting. This YouTube video shows the repouring method: https://www.youtube.com/watch?v=4eHz8wWuFKw
Using heat to melt and level wax – Turn off the candle and let it fully cool if lit. Then use a hair dryer to gently heat and melt the wax, smoothing it out as you go. This evens out the tunneled section so it matches the rest of the candle surface. Allow the candle to fully harden before relighting. Here’s a tutorial on this heat method: https://www.prosperitycandle.com/blogs/news/how-to-fix-candle-tunneling
With either method, be very careful handling the hot wax to avoid burns. Fixing a tunneled candle takes some patience, but with the right technique you can revive candles to burn evenly again.
When to Toss a Tunneled Candle
There comes a point when a tunneled candle is too far gone and needs to be thrown out. According to Prosperity Candle [1], if the tunnel is very deep – over 1 inch down into the candle – it likely cannot be fixed. The wick will be too short to reach the melted wax pool. If you can’t replace the original wick or add a new one, it’s best to discard the candle at this stage.
You should also toss out a tunneled candle if you’ve attempted to fix wick issues to no avail [2]. If the wick is too small and curling or mushrooming excessively, and you’ve already trimmed and centered it, the candle likely cannot be salvaged. Wicks that are too large and sooty cannot be remedied either. It’s not worth the continued smoke and risk of fire.
In most cases, mild to moderate tunneling can be repaired with some patience and candle care. But if the tunnel is extreme or the wick problems can’t be fixed, it’s best to stop using the candle and start fresh with a new one.
Takeaways
To recap, the main causes of tunneling in candles are wick issues like the wick being too small or improperly centered, pouring at too high or low of a temperature, cooling issues like pouring into cold containers or inadequate insulation during cooling, high fragrance loads, and not pouring evenly across the diameter of the container.
You can prevent tunneling by using the right wick size for your wax and container, pouring at the ideal temperature, allowing candles to cool evenly, avoiding excessive fragrance, and pouring carefully across the entire top. Proper pouring technique is critical.
If you follow these tips, you can minimize or avoid tunneling in your candles. With attention to wicks, temps, fragrances, and pour technique, you can achieve full, even burn pools.


