How Do You Make Your Own Bar Soap?
There are many great reasons to make your own soap instead of buying it from the store. By making your own, you have control over the ingredients and can avoid harsh chemicals. In fact, most commercially made soaps contain detergents, synthetic fragrance oils, colors and preservatives – things you may want to avoid putting on your skin. Handmade soaps allow you to choose gentler, plant-based ingredients tailored specifically for your skin type.
Homemade soap can also be much more economical in the long run. Once you have the basic equipment and supplies, the ingredients for each batch cost just a few dollars. Buying quality handmade soap from artisans can get quite pricey. You’ll save money by making it yourself.
Going the DIY route is also better for the environment. Commercial soap production uses more resources and energy, and creates more waste and pollution. When you make it yourself using natural plant oils, you’ll have a low-impact, sustainable product.
Finally, creating your own soaps allows you to customize them any way you like. You can experiment with luxurious oils, beautiful colors and your favorite scents. It’s a fun hobby that results in lovely handmade gifts for family and friends.
Sources:
https://houseoftomorrow.net/9-great-reasons-you-should-make-your-own-soap/
Ingredients Needed
The main ingredients needed to make homemade soap include:[1]
Oils/Fats
Common oils and fats used in soapmaking include olive oil, coconut oil, palm oil, shea butter, and other plant-based oils. Each oil contributes different properties to the finished soap – for example, coconut oil produces fluffy lather while olive oil makes a gentle, moisturizing bar.[2] A combination of oils is typically used.
Lye
Lye, usually in the form of sodium hydroxide, is a crucial soapmaking ingredient. When lye is mixed with the oils in a chemical process called saponification, the end result is soap. Only food-grade lye should be used.
Water
Distilled water is preferred for mixing with the lye to create the lye solution. Tap water can introduce minerals and metals that may accelerate trace.
Essential Oils
A few drops of essential oils can be added to provide fragrance. Lavender, lemon, and peppermint are popular choices.
Colorants
Natural colorants like clays or herbs can color the soap if desired.
Molds
Wooden molds, silicone molds, or even cardboard boxes can be used to mold the soap into bars.
[1] https://www.healthline.com/health/how-to-make-soap
[2] https://www.thesprucecrafts.com/basic-soap-making-recipes-517179
Safety Precautions
When making homemade soap, it is crucial to take proper safety precautions. Lye, which is commonly used in soap making, can cause severe burns if it comes into contact with skin and eyes. Here are some key safety tips:
Work in a well-ventilated area. Make soap in an area with good airflow and ventilation to prevent buildup of lye fumes. Work outside or near an open window.[1]
Wear gloves, goggles, and protective clothing. Wear gloves made of heavy rubber, neoprene, or nitrile when handling lye and raw soap batter. Also wear safety goggles to protect your eyes from splashes. Wear long sleeves, pants, and closed toe shoes.[2]
Keep children and pets away. Do not let children or pets in the soap making area, as lye and raw soap can be dangerous if ingested. Make sure to store lye up high and out of reach.
Equipment/Tools
To make homemade soap, you’ll need some basic equipment and tools. Some of the key items include:
- Digital scale – Accurately weighing out the oils and lye is crucial for soapmaking. You’ll need a digital kitchen scale that measures in grams. Look for one that can handle at least 500 grams. Thenerdyfarmwife.com
- Thermometer – A digital thermometer with a probe is needed to monitor the temperature of the oils and lye water. The temperatures need to be within certain ranges to combine properly. Get a thermometer that can read up to at least 200°F/100°C.
- Stick blender – A stick blender, also called an immersion blender, blends the lye water and oils together. A regular countertop blender won’t work as well. Opt for a stick blender with a detachable stainless steel shaft.
- Silicone molds – Silicone soap molds allow you to pour the soap batter into custom shaped bars. They make it easy to unmold the finished soaps. Choose molds with silicone liners.
- Mixing bowls – You’ll need at least two heat-resistant, non-reactive bowls for mixing the lye water and melting the oils. Stainless steel, glass, and plastic all work.
A digital scale, thermometer, and stick blender are essential. You can find affordable options for all the basic equipment online or at local kitchen supply stores.
Calculating Lye & Oil Amounts
The key calculation in soap making is determining the proper ratio of lye to oils. This is done through a process called saponification, which is the chemical reaction between the alkali lye and the fatty acids in the oils. During saponification, the oils are broken down into soap and glycerin.
To calculate the amount of lye and oils, you’ll need to use a lye calculator. Some good soap making calculators are available from Soap.Club, Bramble Berry, and Certified Lye. You’ll input the desired oil weights and oil types, and the calculator will determine how much lye is needed.
Different oils have different saponification values, referred to as SAP values. Oils with higher SAP values require more lye to saponify compared to oils with lower SAP values. Most soap recipes use a blend of hard oils like coconut, palm, or shea butter along with soft oils like olive, canola, or castor. Finding the right oil blend is key for creating a bar with the desired qualities.
Melting & Mixing Oils
Properly melting and mixing the oils is an important step in cold process soap making. Here are some key tips for this step:
Heat the oils to the proper temperatures. Each oil has a different melting point. For example, palm oil melts at 92-104°F, while olive oil melts at 55-57°F (SOURCE: https://www.brambleberry.com/ingredient-information/oils-and-butters/art0006-beginners-guide-to-common-soapmaking-oils.html). Heat the oils about 5-10°F above their melting point to ensure they are fully liquefied.
Mix the oils in the proper order. First melt the harder oils like palm oil and coconut oil. Then add in the liquid oils like olive and canola oil. The liquid oils will help bring down the temperature of the harder oils (SOURCE: https://www.soapmakingforum.com/threads/how-to-melt-my-oils.30562/).
Stir frequently to incorporate the oils together. Use a spatula or whisk to fully blend the oils.
Maintain the temperature above the melting point as you work. The oils may start to solidify if the temperature drops too low. Reheat gently if needed.
Measure out the amounts of oils called for in your recipe once fully melted and mixed. Then you’ll be ready for the next step.
Mixing Lye & Water
When making cold process soap, it’s crucial to add the lye to the water rather than the other way around. Adding water to lye can cause violent splattering and be extremely dangerous (The Boyer Corporation Red Crown Lye ).
Start by measuring out the amount of distilled water called for in your recipe and pouring it into a heat-safe container like stainless steel or Pyrex. Then slowly and carefully add the lye, stirring continuously with a stainless steel spoon. The chemical reaction between the lye and water will cause the mixture to heat up rapidly. Continue stirring until all of the lye has fully dissolved and the solution has cooled down to around 100-110°F (The Boyer Corporation Red Crown Lye ). This may take 10-15 minutes.
It’s critical to let the lye solution cool before adding it to the melted oils. Adding it while too hot can cause seizing and soap batter separation. Patience here pays off in the long run with a smooth soap making process.
Combining & Mixing
It’s important to combine the lye water and oils at the proper temperatures for cold process soap making. The lye water and oils should both be between 95-100°F before combining. This will allow you to reach trace faster. If one mixture is too hot or too cold, it can lead to issues.
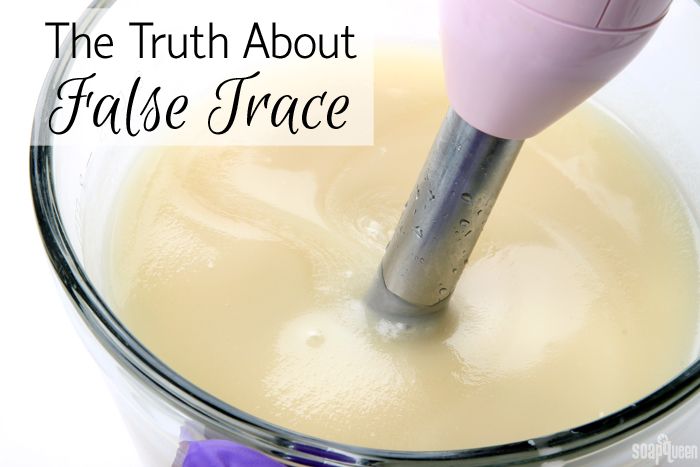
To combine, slowly pour the lye water into the oils, gently stirring as you pour. Use a silicone spatula or wooden spoon to stir. Do not use metal utensils as the lye can react. Once fully combined, use an immersion blender to blend until emulsified and a light trace is achieved. This usually takes 1-2 minutes of blending. Tracing refers to the thickening of the soap batter as saponification begins. Light trace has a yogurt-like consistency.
Stick blending helps to fully incorporate the lye water and oils for saponification. Blending to trace will produce a harder, longer-lasting bar soap. Be careful not to blend too long or you may end up with a thick batter that’s hard to pour. Stop blending once light trace is reached.
According to Back to Basics: How Temperature Affects Cold Process Soap, combining at proper temperatures between 120-130°F can help speed up trace time.
Adding Scent & Color
One of the fun parts of making bar soap is choosing which scents and colors to add. For scent, essential oils are commonly used. Some popular essential oil options are lavender, lemon, peppermint, eucalyptus, rosemary, tea tree, and orange. Add essential oils after combining the lye-water and oils, using about 0.5-1 ounce of essential oil per pound of oils in your recipe. Be sure to research if an essential oil you want to use is safe for skin contact.
For color, there are many natural options to create beautiful, vibrant soaps. Herbs, spices, clays, and botanicals can infuse color naturally. Some examples are:
- Paprika, turmeric, or carrot powder for orange tones
- Cocoa powder for browns
- Activated charcoal for black
- Green tea, matcha powder, chlorophyll for greens
- Red Moroccan clay or hibiscus flowers for reds
To use natural colorants, first prepare them in a lightweight oil like sunflower or sweet almond oil before mixing into soap batter. Use about 1 teaspoon of colorant per pound of oils. Avoid using too much color or the bars may bleed or discolor during curing. Monitor for desired color saturation as you blend in.
Have fun and get creative with natural scent and color options. Just be sure to properly research any additives for safety and usage rates.
Pouring & Curing
Once the soap batter has reached the proper trace consistency, you’ll want to pour it into your prepared soap molds right away. Make sure to pour the soap batter evenly into each mold cavity, trying to avoid creating air bubbles during this process. Tap the molds gently on your work surface to help remove any trapped air bubbles.
After pouring, allow your soap bars to cure for 4-6 weeks before using them. Curing allows the soap to harden fully and for excess moisture to evaporate out. This results in a harder bar of soap with a longer shelf life. During the curing process, store your soap in a well-ventilated area out of direct sunlight and heat. Many soapmakers create simple curing racks using wooden shelves or wire racks to allow airflow around each bar 1. You can also cure soap on a flat surface like a baking sheet. Just make sure not to tightly stack the bars.
Proper curing is important for cold process soap to reach its full quality. Never use soap before it has adequately cured. Doing so could result in a soft, sticky bar that falls apart easily. With a little patience, your homemade soap will transform into a beautifully hardened bar ready for use.

